
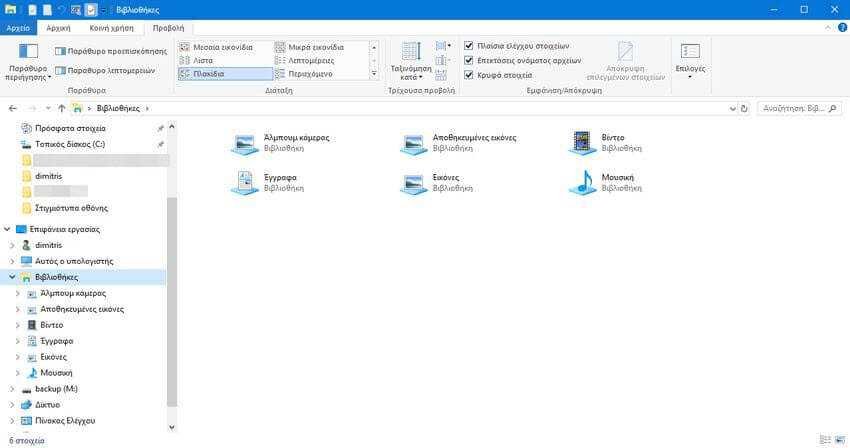
Libraries first came in Windows 7 and it's really a useful way to organize your files, since their function is to gather files from various folders and show them in a single projection.
In Windows 10, the "Libraries" item by default is missing from the window tours. If you used the libraries frequently in Windows 7, you might want to have them in Windows 10 as well. See below for the required steps to enable them.
Step 1: Open File Explorer
Step 2: On the top right, go to the "View" tab and from there press the "Options" button
Step 3: In the menu that will open, select "Change folder and search options".
Step 4: A new window titled "Folder Options" will open. There, go to the "View" tab, then scroll down the menu bar until you find the "Show Libraries" option in the "Navigation Window" chapter.
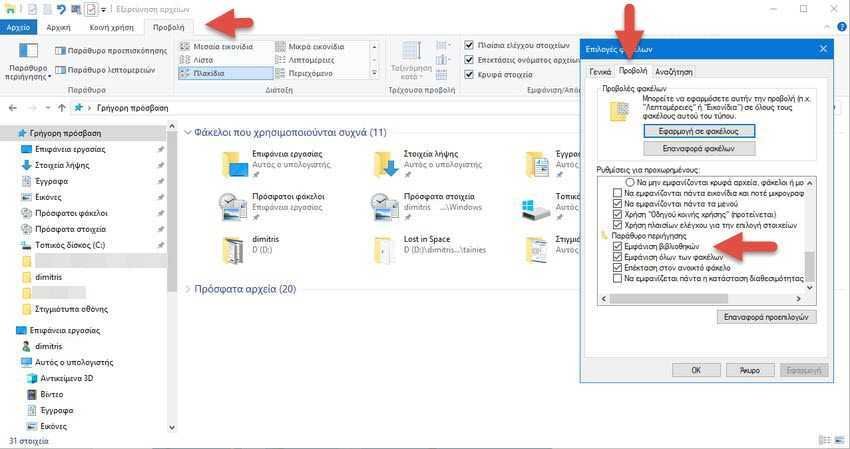
Step 5: Check "Show libraries" and then press the OK button. Close all windows.
When you open it again εξερεύνηση, Libraries will appear in the navigation pane.
Alternatively, for those who are "looking for" a little more, you can display the Libraries from Execution with a shell command. Press the Win + R shortcut keys and type the following in the Run box that will open: shell: Libraries
The above special shell command will immediately display the Libraries folder.

As much as they do not seem to be useless however libraries are a very smart and convenient idea to put some things in order