
Windows 10 from prechoice εκτελούν τακτικές εργασίες συντήρησης του συστήματος, βάση χρονοδιαletterτος. Μία από τις εργασίες αυτές είναι και η βελτιστοποίηση κάθε σκληρού δίσκου που είναι συνδεδεμένος στο σύστημα σας.
The functional system checks if the drives are fragmented and if the fragmentation levels exceed a certain threshold, then it defrags them. By default, the optimization task is run automatically by Windows, once a week. You may have noticed periods when your operating system is slow to respond and this may be due to the optimization function that may be running in the background at that time.
If you want to stop automatic optimization, and do it manually, and whenever you want, then you need to do the following steps:
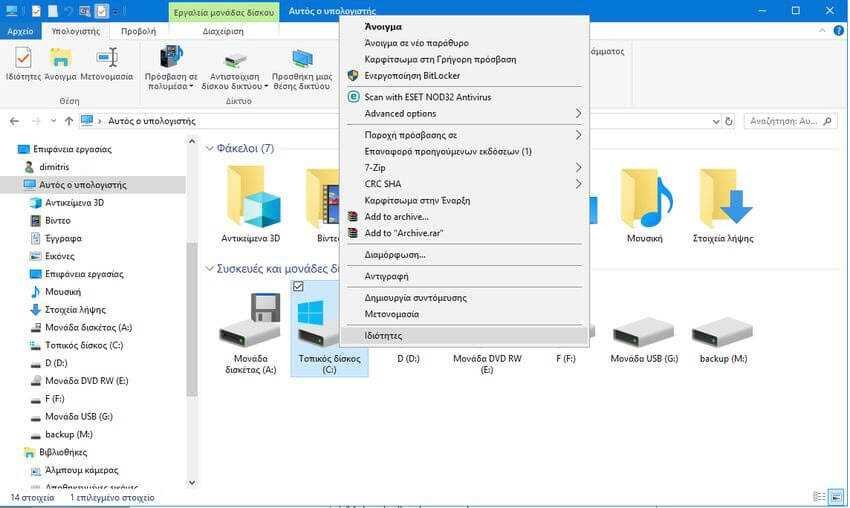
Step 1: Open File Explorer and go to "This Computer"
Step 2: Right-click on any drive that appears in Explorer and select Properties.
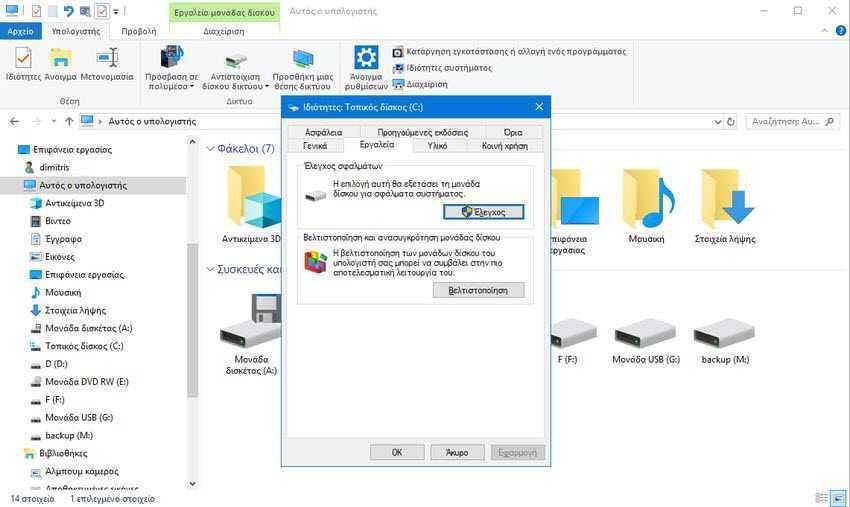
Step 3: Go to the Tools tab in the drive properties window and then click the "Optimize" button in the "Drive Optimization and Rebuild" field.
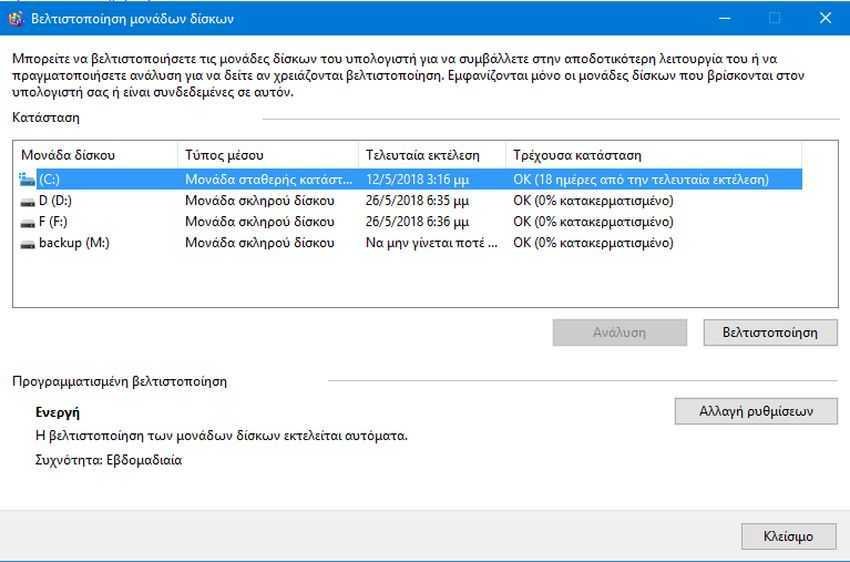
The Drive Optimize Drives window will open, which contains all the drives connected to your computer. You will notice that drives that are not defined by a letter do not appear in the window, even though they may be connected to the system.
Each drive is displayed with its name and drive letter, type, last optimization run, and current status. Note that you cannot refresh the disk list when the window is open. If you connect a drive after opening it operation “Optimize Drives”, you will have to close and reopen the window to see it.
The "media type" determines which options are available to you. Optimization is available for all types of drives, whether they are simple hard drives or SSDs. The "resolution" displays and simultaneously checks the fragmentation status of the drive, and is only available for hard drives and not for SSDs.
Scheduled optimization information is displayed at the bottom of the window. There you can see on which disks and if the optimization is planned as well as the work interval.
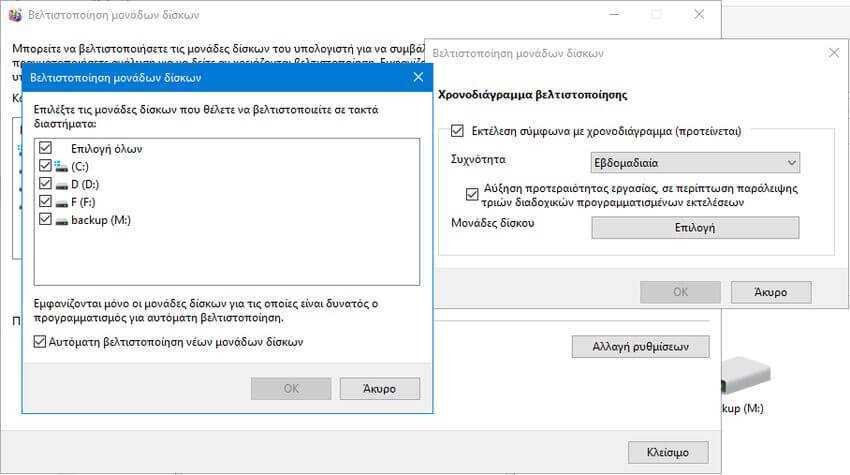
Clicking the "Change Settings" button opens a menu where you can turn off automatic optimization or change other parameters of the maintenance job. Specifically, you have the ability to change the frequency and from the default weekly to make it daily or monthly. Disable the task priority increase feature if you miss three consecutive scheduled tasks. Each change you make concerns the specific disk you have marked.
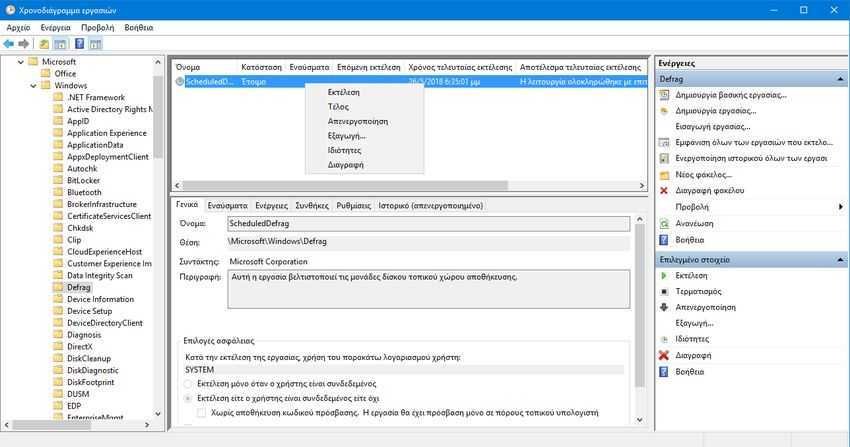
Alternatively, you can turn off optimization of all drives through the Windows Task Schedule. Let's see how:
1. Press the Windows key and the R key (Win + R) to display the Run window.
2. Type taskschd.msc to press OK to open the Task Schedule.
3. Go to "Task Schedule Library> Microsoft> Windows> Defrag".
4. Right-click on “ScheduledDefrag” tasks and select Disable from the context menu.
That's it.
