
In this article you will learn how to enable or disable a Windows 10 user account by using the command prompt or by using the LUSRMGR utility.
If you manage a multi-user system and you must disable one or more user accounts without deleting them, then this article is for you. Windows allows you to disable a user account so that it can no longer be logged in or changed.
Unlike the complete deletion of the user account, theactivation his preserves the data of the user, which are easily accessible if and when the user account is reactivated.
Method 1 - Via LUSRMGR
Note: This method only works on versions of Windows 10 Pro, Education and Enterprise. For other versions, see the 2 method below.
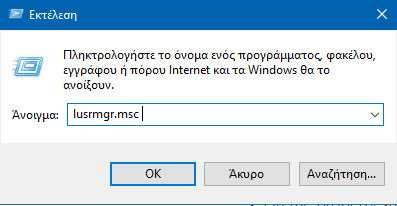
1. Press the Win + R key and in the Run window that appears type lusrmgr.msc to open the utility “Locals users and groups” (Local Users and Groups). Do click on the OK button.
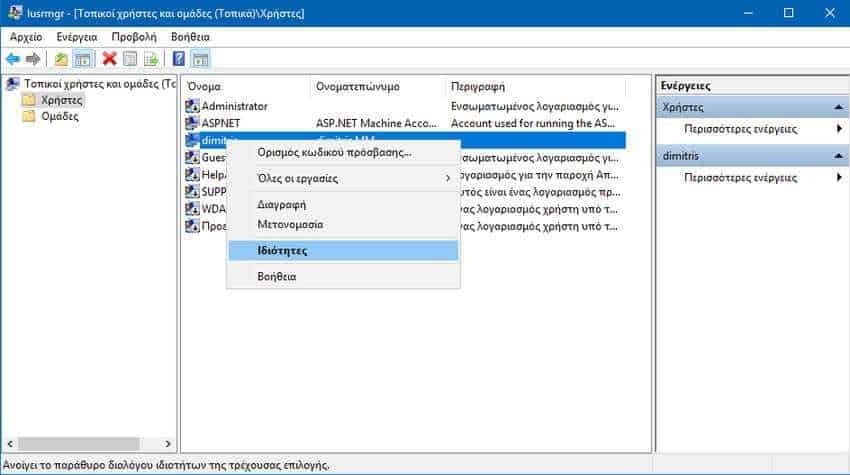
2. In the lusrmgr window, double-click users. Now right-click on the user account you want to deactivate and click "Properties".
3. In the properties window, select "Account Deactivated". Click the Apply button and then OK.
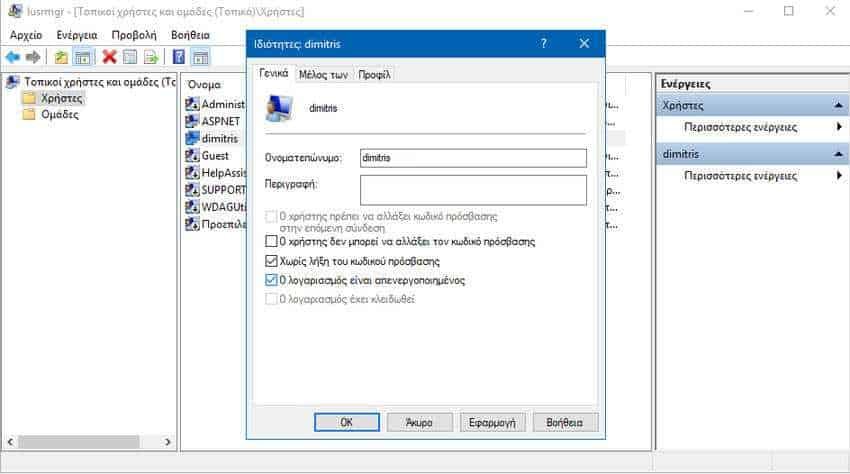
This move should disable the user account. The account will no longer be visible on the login screen, which proves that the user is disabled.
Method 2 - Via the command line
You can also use the command line to disable a user account. Follow these steps:
1. Right-click the Start button or press Win + X at the same time and select "Command Prompt (Administrator)" to open the command prompt as an administrator.
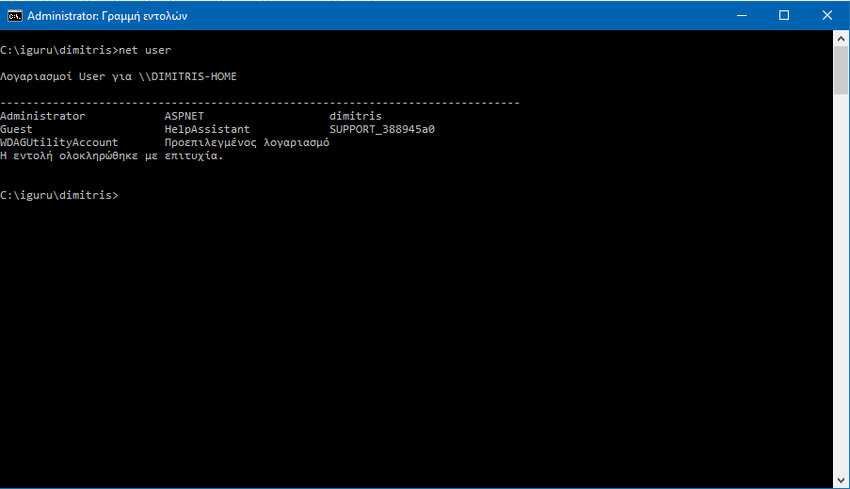
2. In the command prompt window, type net user and press Enter.
3. Then type the following command, and then press the Enter key:
When the command completes successfully, you will receive a message confirming that the selected user account is now disabled.
