
See in this article how to create your personal Windows PE rescue disk with tools and utilities that you decide on.

A Windows Preinstallation Environment (PE) rescue disk is a custom Windows-based recovery environment packed with tools that you can use to fix your computer. Tools such as backup, data recovery, password utilities, malware removal and protection, and more.
There are several great Windows PE-based rescue disks. But you do not have to rely on the work of others. You can create your own Windows PE rescue disk by selecting the recovery tools you want.
What is Windows PE?
Windows PE is a lightweight version of Windows 10. You can use Windows PE to install, test, and repair a complete installation of Windows 10. The basic version of Windows PE supports all Windows applications, drivers, networking tools, partitioning, disk management and more.
A Windows PE-based recovery disc extends the functionality of Windows PE by adding free and open source tools that you can use to recover, restore, and analyze a problematic Windows 10 installation.
We'll show you the easiest way to create a Windows PE recovery disc. This method uses a predefined set of tools that you can split and choose what you want. But you can also add a custom folder of your own programs.
How to create your own Windows PE recovery disc using Win10XPE
Win10XPE is a fully customized Windows PE environment developed by ChrisR. It has a wide range of basic Windows features, while you can also add a huge range of custom applications.
1. Tools you need to create your Windows PE recovery disc
You need two things before you start:
- The project Win10XPE
- A copy of Windows 10 version 1709 or higher
Download: Win10XPE for Windows (free)
Download: Windows 10 ISO for Windows (free)
The Win10XPE project files are courtesy of Kyhi, a Windows PE-based recovery disc maker. Kyhi stopped making recovery discs in 2017, but left a legacy of a system where users can create their own. This was last updated on 29/4/2019. Download the file Win10XPE_2019-04-26.7z and then unzip it to a folder.

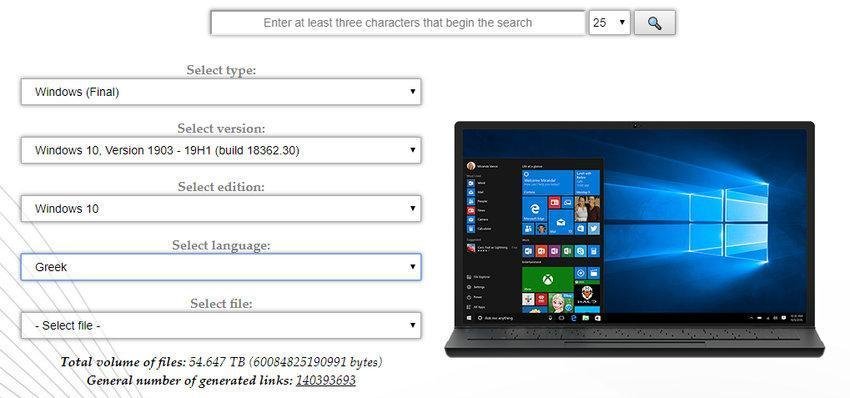
Then go to this link and open the drop-down boxes to select the version and architecture. In this article we will use Windows 10 1903 Final, as it is the latest version of Windows today and in addition 1903 is supported by Win10XPE, according to their website . After downloading the ISO, extract the contents to a folder or mount the ISO file to a Interactive tray.
2. Run WinBuilder Win10XPE
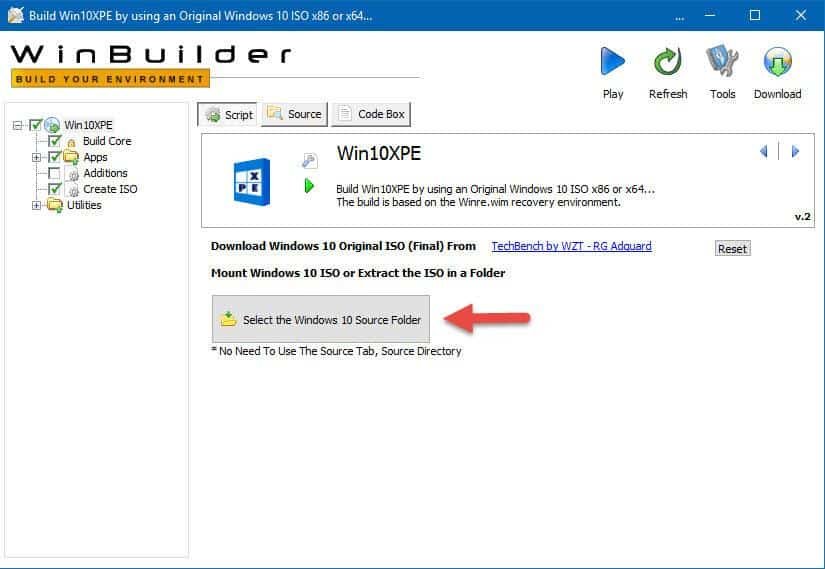
Return to the Win10XPE folder, and then run Win10XPE.exe. The WinBuilder customization interface will open.
The first thing you need to do is press the key Select the Windows 10 Source Folder (select Windows 10 source folder). Refer to the location of the Windows 10 ISO created in the previous section. Select the home folder and let WinBuilder update them data of with the source file.
Now, select the image on which you want the Windows PE recovery disc to be based. We recommend using Windows 10 Pro, as it is the full version of the operating system, instead of the restrictive Windows 10 Home.
3. Select the recovery tools for the Windows PE-based rescue disk
You can now head to the rescue tools options in the left panel. Do scroll down and select by checking what you want to include on your Windows 10 PE rescue disc.

You have options ranging from Accessibility, Components, Network, Office, Security and more. Options are all applications that Kyhi includes in the custom Windows PE rescue disk. But you can choose which ones you want to add to your own.

There is no right or wrong way to make your choices. If you click on an application, WinBuilder gives you a description of what it does. It also gives you various options for specific applications, as well as whether you want shortcuts or not.
4. Configure Build Core options
At the top of the list of applications is the option Build Core. From there you can set operating system options, such as keyboard language and format, whether to use Explorer or WinXShell (a lightweight open source alternative), desktop background (if you want to make it completely "Personal" rescue disk), as well as network, power and creation options.

An option worth changing is WinPE Cache Size. Increasing the size of WinPE cache will make Windows PE recovery disk operation faster. However, if you are considering using the recovery disc on a number of different systems, keeping it at 1GB is the best option.
Another important option is to activate it Microsoft. NET Framework 4, and then Network Addition (additional network). This way, the Windows PE-based rescue hard drive will have access to Wi-Fi.
5. Add custom files to the Windows PE recovery disc
You can also add a custom folder to the rescue tray. On the Build Core options page there is an option Add Your Custom Folder (add your custom folder). Select the box, press it button Open Custom Folder, and then open the program files (Program Files).
You can copy all the portable applications you want to add to the recovery disc. You need to select portable applications, ie applications that run immediately without the need for installation first. Otherwise, they will not run directly from the disk when you try to fix a computer.
If you do not find what you are looking for, go to Portable Apps.
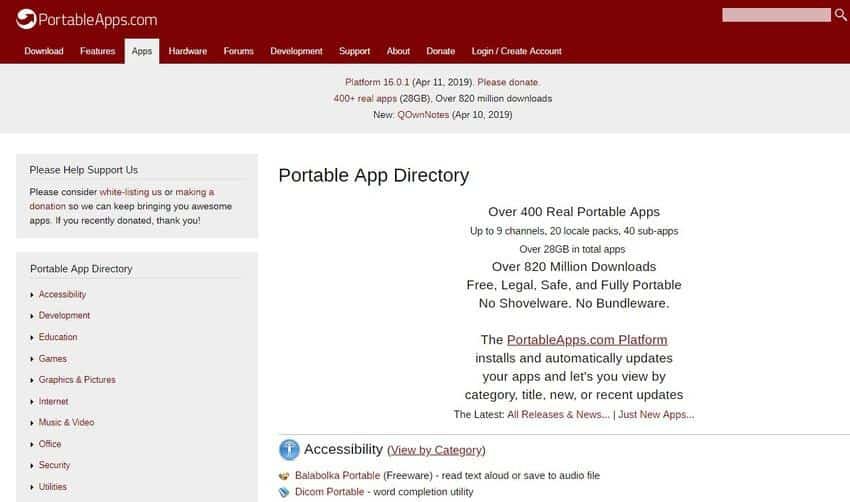
There are 400 portable applications. you will definitely find some interesting to add and enrich your rescue disk, since you never know what you will need to do with it and on which system you will use it.
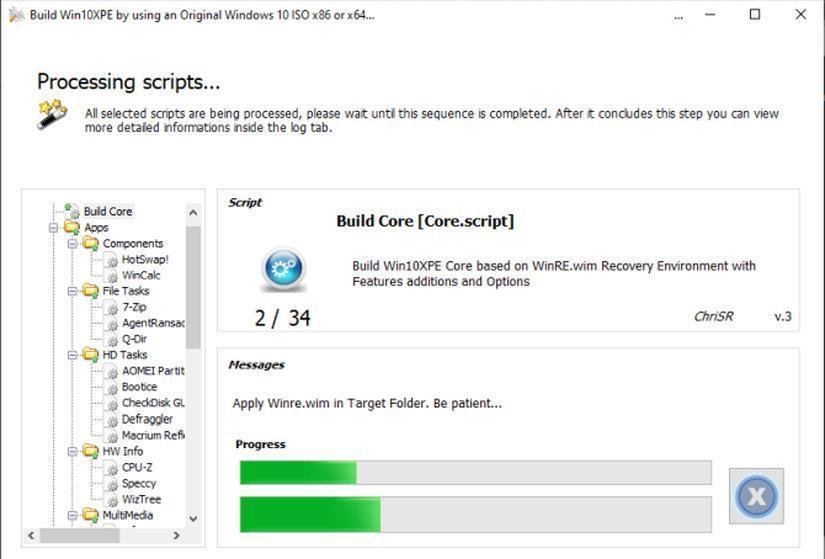
6. Download the Windows PE recovery disc
Once you have added the custom portable applications to the recovery disc, it is time to download and try it out.
Press the blue button Play in the upper right corner of WinBuilder. The recovery disc may need to download some files during the ISO creation process. Accept these files and move on. If the antivirus or antimalware suite installed on your main system complains, make an exception for WinBuilder.
Once the download of the ISO recovery disc is complete, you must burn it to a USB flash drive. Here you will find the way to Create a Bootable USB Flash Drive |
Keep multiple copies of your Windows PE recovery disc
Another useful tip is to keep copies of the recovery disc, one for each computer you manage. You never know when you will need it, and when you will need it do not look for your whole home or workplace.
Not wanting to create your own Windows PE recovery disc and want something ready-made? Check out these great alternatives Windows PE-based recovery disk.
