
Autopsy: As you know, files that are "deleted" remain on the storage medium until they are replaced. The deletion of these files it simply makes the freed space available for replacement. This means that if the criminal deleted evidence, until it is replaced by the system, it remains available to us for recovery.

In this guide, we will use the open source The Sleuth Kit (TSK) to locate and recover deleted files. The Sleuth Kit was originally developed for Linux, but now it's also available for Windows, so we'll use the program on Windows. For TSK a GUI interface named Autopsy, which we will use in this guide.
Install it Autopsy in your system.
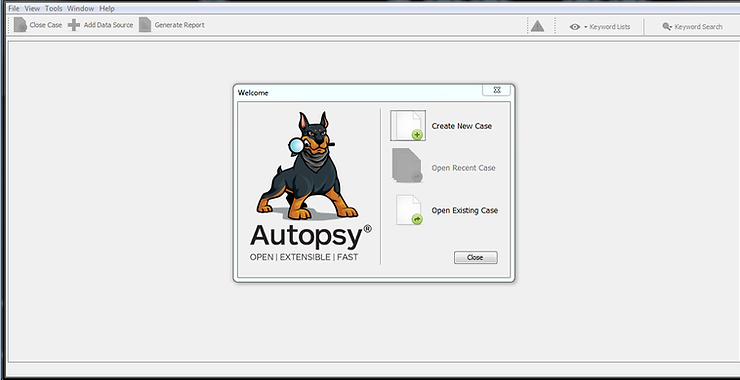
After installing Autopsy and launching it, you will be greeted with a screen similar to the one above.
Click on "Create New Case"
When you do this, you'll be greeted with a new window asking you to name your new one project and in which directory you want to place the rest of your projects. Type “New Cases 101” and place it in the root directory C:\Cases.
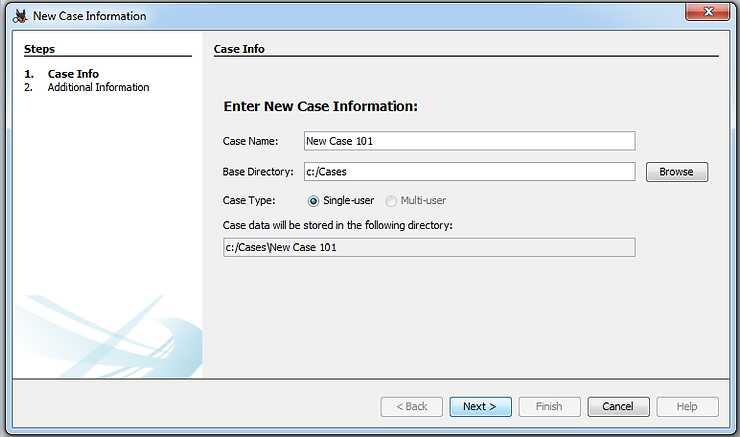
Now, tap Newer posts.
Another window will open asking you for the project number and examiner name. Provide a 101 case number and your name or the examiner's initials.
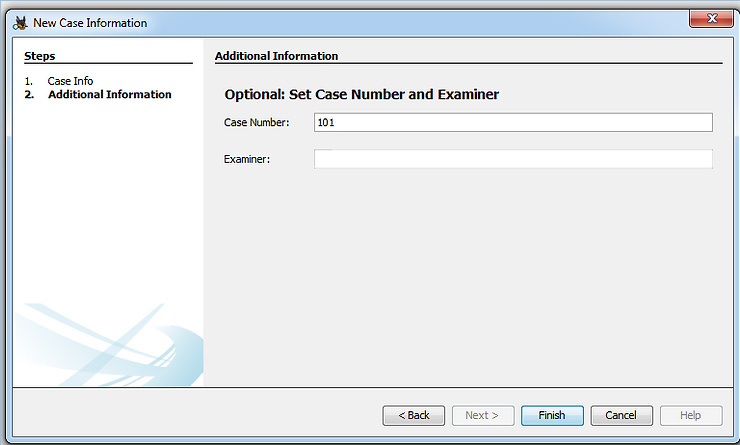
Click the “Finish"
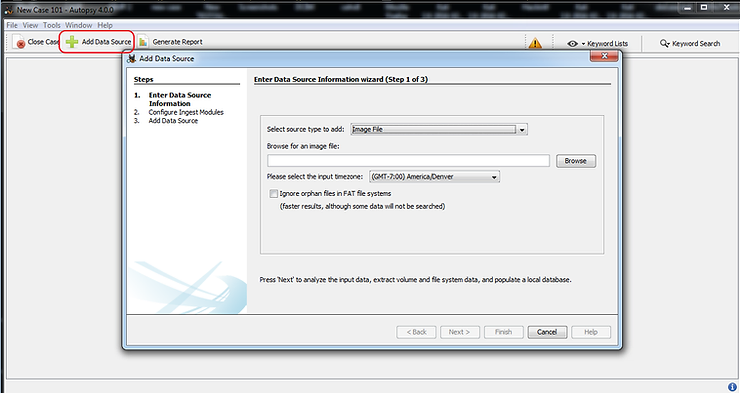
Then click on “Add New Data” (Add new data) in the upper left corner. When you do, the window will open “Add Data Source” (Add data source).
Since we will be using the image file we created in the previous section, select “Image File” and then browse to the image file you created in section 1. I saved mine in a directory C:\forensic images. Yours may be different.
Now, add the image first.image.dd.001 which we saw earlier.

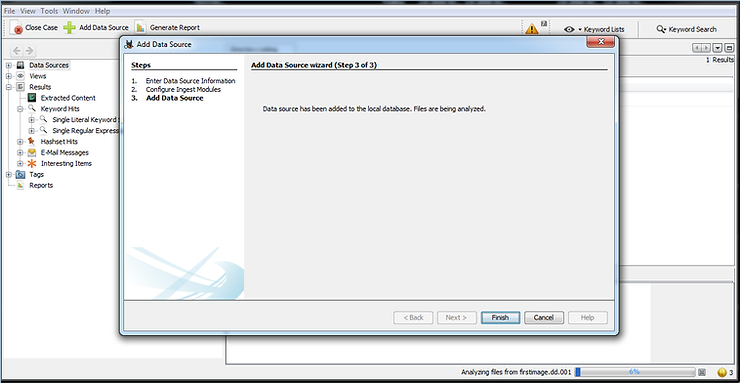
After adding the image, click the button Next and Autopsy will start analyzing the image. Finally, you will be greeted with a screen like the one below.
Click on "Finish".
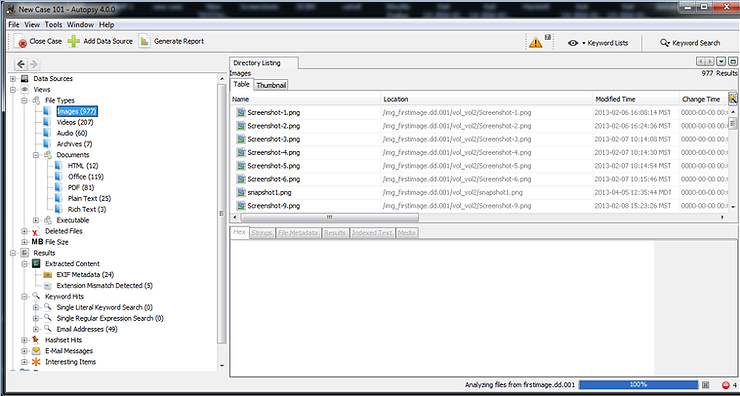
Now, you should see an interface like the one below. Note that the “firstimage.dd.001” should appear as the data source.

If we expand the section “File types” in the object explorer, Autopsy will display all file types and the number of files in each category. Below you can see that I clicked on the file type “Pictures” and Autopsy will display all image files.
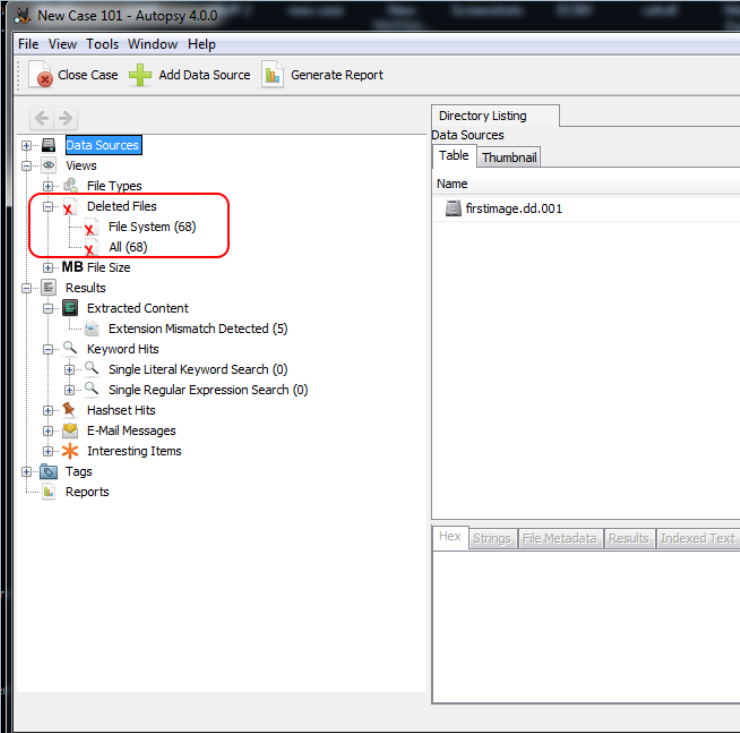
A little further down in the object explorer, we can see a file type named “Deleted files". When we click on it, all the deleted files will be displayed.
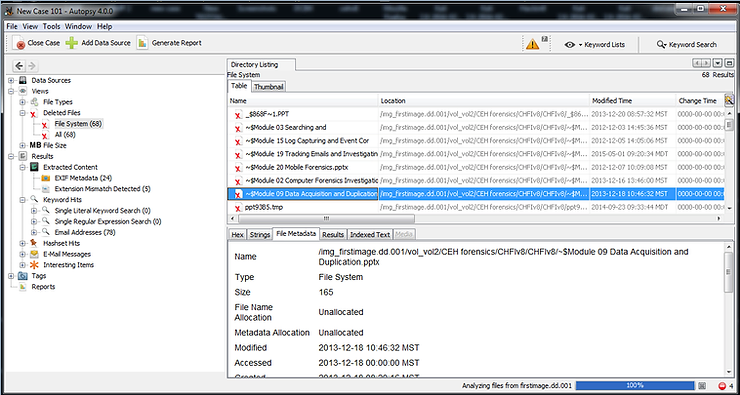
When we click on a deleted file, we can do some analysis in the lower right window. There you will see the tabs labeled: Hex, Strings, File Metadata, Results and Indexed Text. In this case, click on the “File Metadata” and the file's metadata will be displayed, including its name, type, size, modification, access, and creation (MAC).
Now, to recover the deleted file, right click on the deleted file and select “Export". This will open a window like the one below.
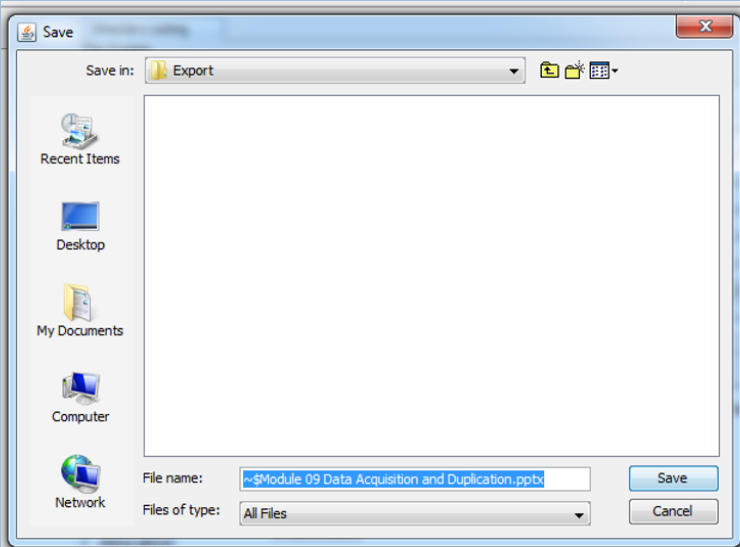
Go ahead and save the deleted file in the subdirectory “Export".
To find the extracted/deleted file, navigate to address,
C:\Cases\New Case 101\Export

You can now double-click this file to open it in the appropriate application.
Conclusion
Suspects often try to cover their tracks by deleting key evidence files. As a researcher I know that until these files are overwritten by the file system they are recoverable. With tools like Autopsy and almost every other forensic suite (Encase, ProDiscover, FTK, Oxygen etc) recovering these deleted files is easy and simple.
