Microsoft Outlook lets you apply one or more default signatures to your new messages, replies, and promotions. See how you can create such signatures.

If you use Microsoft Outlook, either professionally or for personal use, then you may be aware that you can create ready-made signatures that will be automatically placed in each of your emails. You can even make a default signature for your new message and a different one for replies - promotions. You can also create additional signatures that you can apply to any message you wish. See below how they are created and how they are regulated.
Signing your mail is a useful way to include information about who you are, what you do, and how someone can contact you (besides email). In many companies, it's a requirement from their IT companys as it emphasizes the prestige and organization of the company.
Of course, Outlook does not know the details for you, so it does not provide you with a ready-made default signature. But it gives you the ability to create yourself. If you run locally installed Outlook, one at work and one at home, then you must create both Outlook signatures, which may be the same or may or not. If you run Outlook Office 365, you can also create signatures in the same way. Let's make a signature.
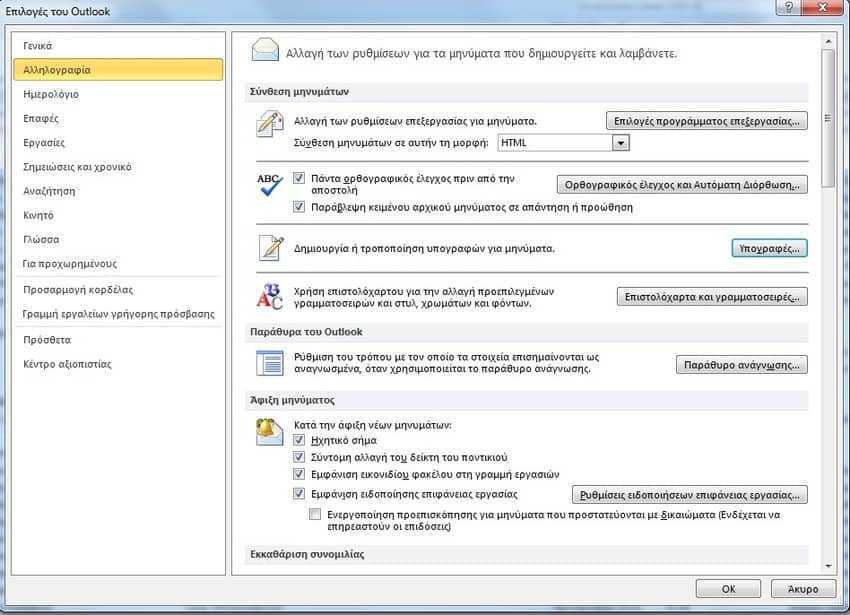
Step 1: Open Outlook and go to Options> Mail, and then click the "Signatures" button (Options are located at different points depending on your current Outlook version).

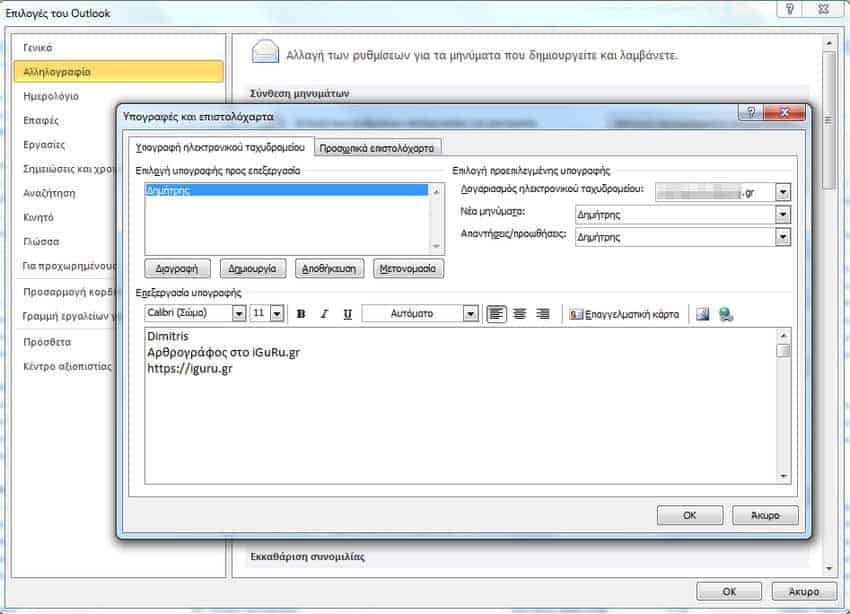
Step 2: The Signatures and Letterheads window will open, where you can add, edit and delete signatures. To add a new signature, click the "Create" button.

Step 3: Give your new signature a name, then click "OK".
Step 4: The name of your new signature will appear in the signature list (Select signature to edit) and you can add the contents of the signature to region "Edit Signature". There is a full range of formatting tools available, including the ability to import images, hyperlinks and business cards from your contacts.
You can use these formatting tools to add any kind of information, but for an official signature you should probably include at least the following:
Your company logo (a small image with the logo)
Your name and surname
Your position in the company
The address of the company
Your phone number (phone AND mobile)
your e-mail address (already your customer)
Your company's website
If you create a signature for a personal one then it depends on your character and you know what you need to sign for.
Step 5: Once you have created your signature as desired, press the OK button to save it.
Step 6: Now it's time to make it the default. First, select the correct email account (if you have set Outlook to access more than one mailbox), then select a signature for "New Messages" and a signature for "Replies / Forwards".

You also do not need to have a default signature. If you prefer to start unsigned, select "(none)" in each drop-down menu.
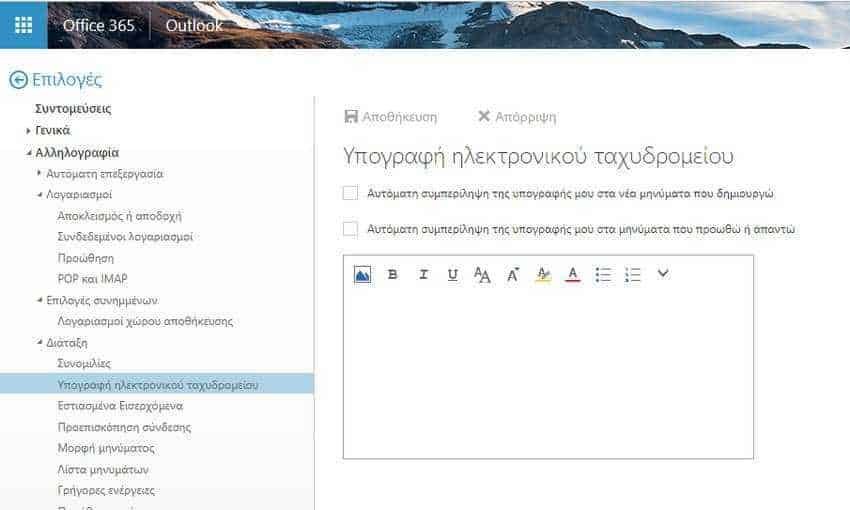
You can do about the same setup in Microsoft Outlook Office 365, that is, if you run Outllok online with an Office 365 account. To do this, go to Settings> Mail> Layout> E-mail Signature.

In general, you can create as many signatures as you want, in logical thoughts. There are some rumors that the maximum number of signatures you can use is 128, but we did not verify this as it is unlikely that there will be even one user to face a problem with this limit.
When you create a new message or reply / forward an existing message, Outlook will apply the default signature you selected. But for each email you send me you can choose a different signature by clicking the Message> Signature button and then selecting the one you want.
Selecting a new signature will overwrite the default signature.


