If usesUsing the Restore point feature in Windows 10 to restore your operating system to the last known stable point that works properly, you may be interested in being able to quickly create a restore point with one click.

This can be done with creation one shortcuts in a command that creates the restore point. In modern versions of Windows, it is especially useful because System Restore (System restore) δεν δημιουργεί πλέον συχνά σημεία επαναφοράς.
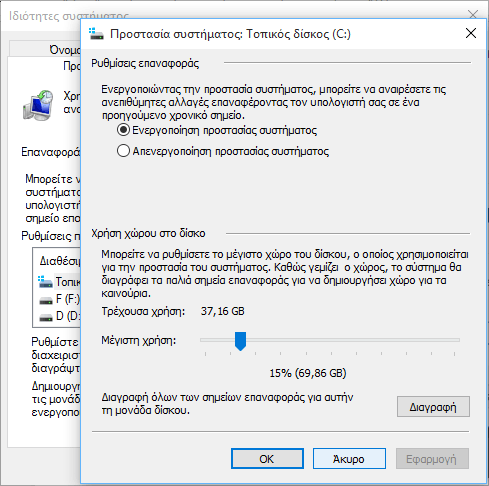
Before you start, make sure you have System Restore enabled. To make sure you do the following:
Press the Win + R keys and in the Run window type:
SystemPropertiesProtection
In the System Properties window that will open go to the "System Protection" tab and from there to "Configuration…" Check "Enable System Protection", press OK, then OK again and you are ready. Let us now make the shortcut for the restore point.
To create a restore point in Windows 10 with one click, you must do the following:
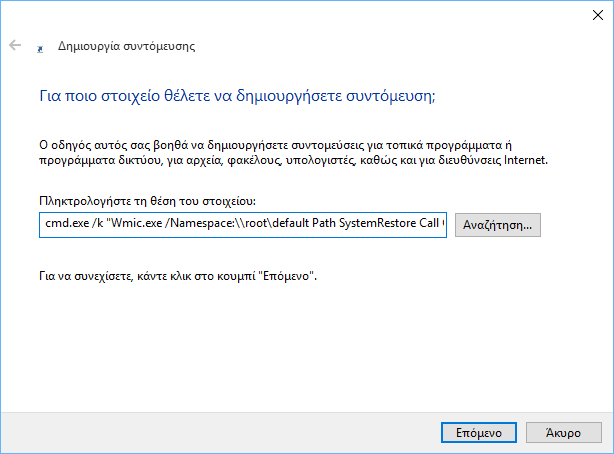
1. Right-click on the desktop and select "Create -> Shortcut" from the context menu.
2. In the "Enter item position" box, write or copy the following text:
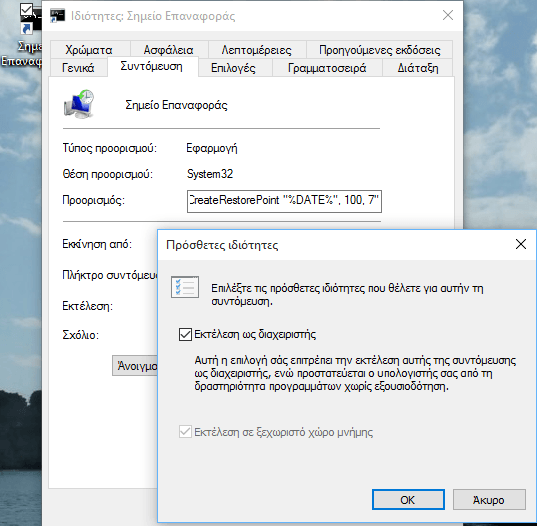
cmd.exe / k "Wmic.exe / Namespace: \\ root \ default Path SystemRestore Call CreateRestorePoint"% DATE% ", 100, 7"
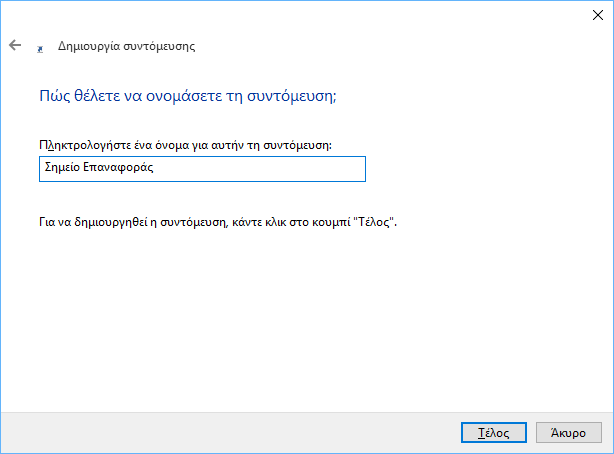
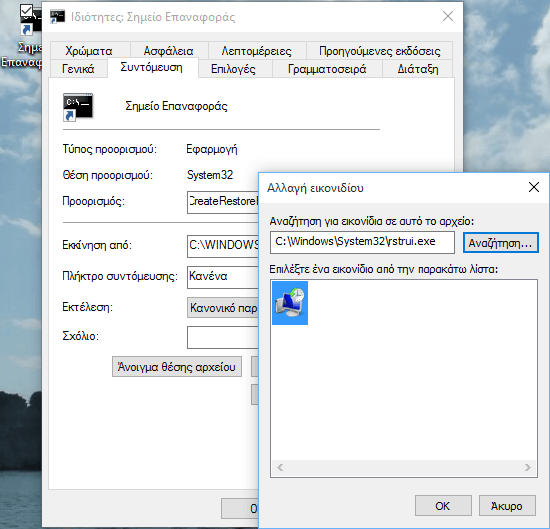
3. Give your shortcut the desired name and icon. Tip: A suitable icon can be found in the following folder:
C: \ Windows \ System32 \ rstrui.exe
4. Now, as you are in the shortcut properties press the "Advanced πλή" key. Click "Run as administrator" and then click the OK button everywhere to save the settings.
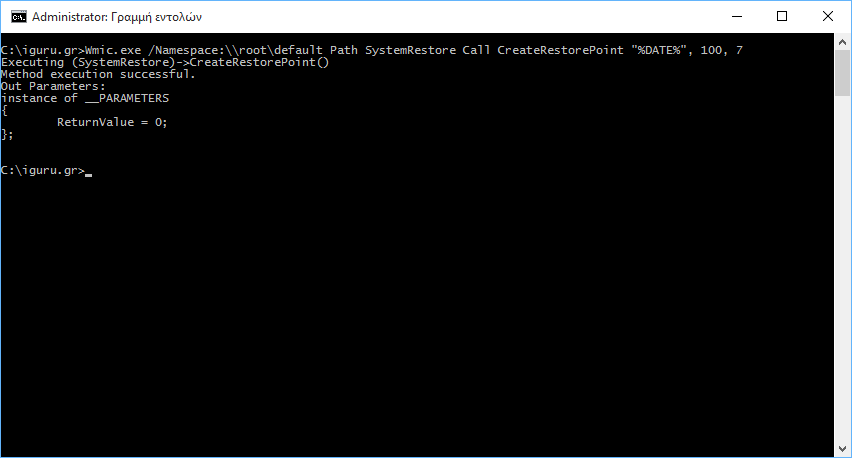
Now, all you need to do is run the shortcut you made to create a restore point. The result will be as follows:
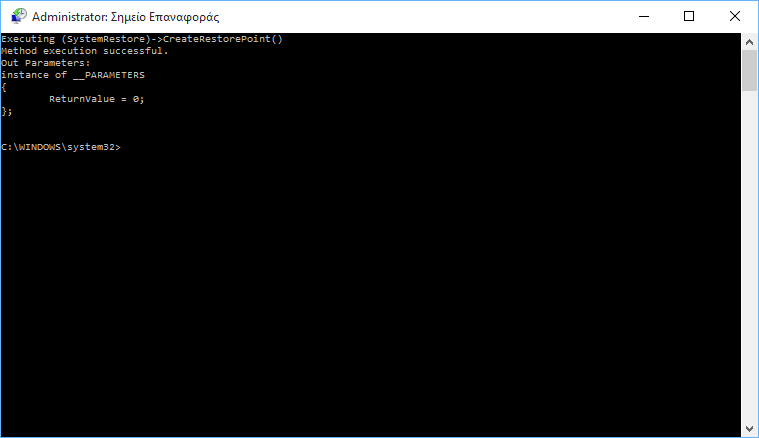
The line “Method execution successful” indicates that everything went well.
You can use the WMIC command directly from a command prompt window as follows:
Wmic.exe / Namespace: \\ root \ default Path SystemRestore Call CreateRestorePoint "% DATE%", 100, 7
Just remember to run it from a command line with administrator privileges.