
In a previous post we had provided a Windows USB creation wizard in Linux, with no third party tools.
Read it Linux: bootable USB with Windows, without tools
Below we will see how you can do one bootable USB with Windows with your Linux terminal. Of course there are tools, but often the results are doubtful. The following method will work for 100% as long as you follow the steps.
The USB should have at least 4GB, and not contain anything else you need because it will be deleted.
The first step is to configure the USB flash drive.
The program Windows installer inside the USB should be applied to a Fat32 formatted disk.
This means that we will need to do a partition for UEFI. Are not you a UEFI friend? The driver is not for you.
Let's start
Connect the USB flash and open a terminal
Run the lsblk command. The command will reveal all the devices on your computer.
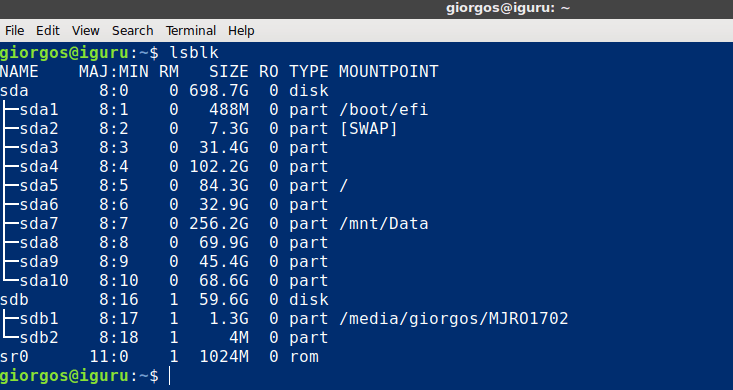
Locate the / dev / USB stick. You will get to know it by size. All the partitions in my disk are visible on the above image, but there is also a sdb disk, which is the USB I currently have.
Note: in the example, the dev / sd / label of the USB drive is / dev / sdb. Your computer may be different, and it depends on what you "wear" peripherally. Make sure you change it to what lsblk shows on your computer.
Below, with the GNU Parted tool (gparted)), we will create a new one apartment.
sudo parted / dev / sdb
However, Windows uses UEFI, so we need to configure the partition in GPT format.
mklabel gpt
Answer yes (y) to all GNU Parted questions. Next, let's create a new file system in FAT32 format.
mkpart primary fat32 1MiB 100%
Then exit GNU Parted with:
quit or just q
Finally, we will format in the new partition with a mkfs command.
sudo mkfs.vfat -F32 / dev / sdb1
Be careful to format sdb1 rather than sdb
With formatted USB, on your computer. Do not open the USB with the file manager, but create a new folder called USB with the mkdir command.
mkdir ~ / USB
and after
sudo mount / dev / sdb1 ~ / USB
In the next step we will mount Windows ISO to extract the files. Download the official ISO of Windows 10 from Microsoft.
Mounting ISO as your PC device is important. Do not attempt to open it by right-clicking as there may be data that you do not see.
Create a folder to open ISO with the mkdir command.
mkdir ~ / WindowsISO
Mount the ISO
sudo mount -o loop / home / your own path to /windows.iso ~ / WindowsISO
If the ISO file is installed well, you will see it appear if you run the lsblk command.
For after the end ofwork: If you want to decouple the Windows ISO file, use the umount command. ISO will not be disconnected unless its contents are used. Do not attempt to disconnect it while copying files.
sudo umount ~ / WindowsISO
Let's create the USB
Before we transfer the files to the upcoming Windows USB we will need root access.
sudo -s
Copy and paste all ISO contents into the USB drive. The process will take some time. For faster results, use a USB3 port if your computer is available.
cp -r / home / username / WindowsISO / * / home / username / usb
Of course you should change username / and / home / username / with your username.
After transfer is complete, disconnect the USB from the ~ / USB folder with the umount command.
sudo umount / dev / sdd1
If it does not want to disconnect and says "device is busy", try the command:
sudo umount / dev / sdd1 -l
That was, you can make your first boot from your new Windows USB.
