
When you connect Windows 11 to a Wi-Fi network, Windows automatically creates a new profile for that network. They store in this profile information such as SSID, password accessetc. But do you know how to get this information when you need it?
![]()
In this post, you will learn how to recover the password of a Wi-Fi network that you have already connected to. It is a useful detail if you want to connect to the given W-Fi network another one device and you don't remember the password. Let's see how you can see the password with two different ways.
Method 1: View the Wi-Fi Password via Settings
- Press Win + I at the same time to enter the settings. There you go to “Network & Internet”And then select“Advanced network settings"
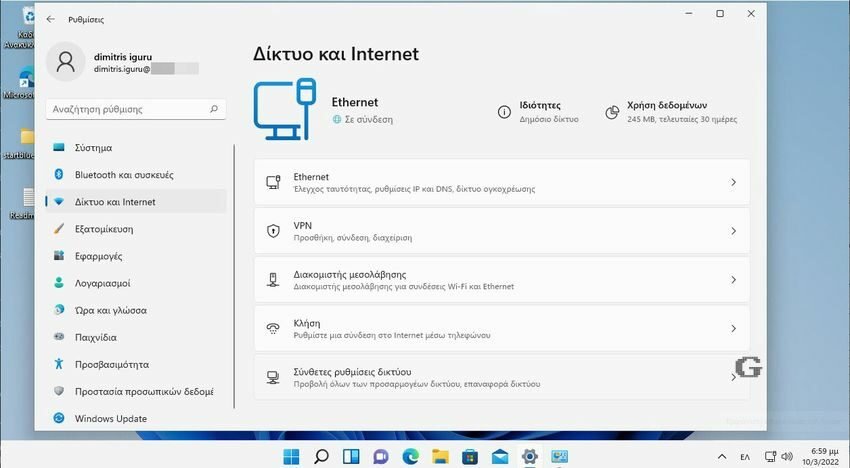
- In the Related Settings group, click “More network adapter options”To open the Network Connection Control Panel.

- Once there, right-click on Wi-Fi, then click on “Condition".
-
Then click on “Wireless network properties".
-
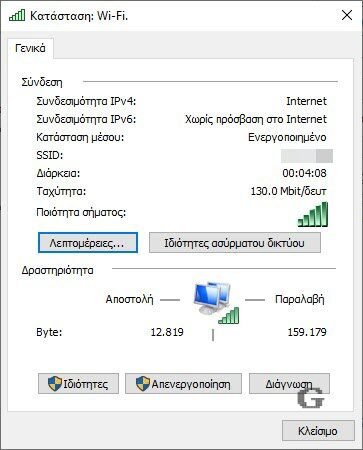
Now, go to the "Security" tab and check the "Show characters“. You will see the code in the "Network Security Key" field.
-
Now, click OK to exit the dialog box.
Method 2: View the Wi-Fi password via the command line
-
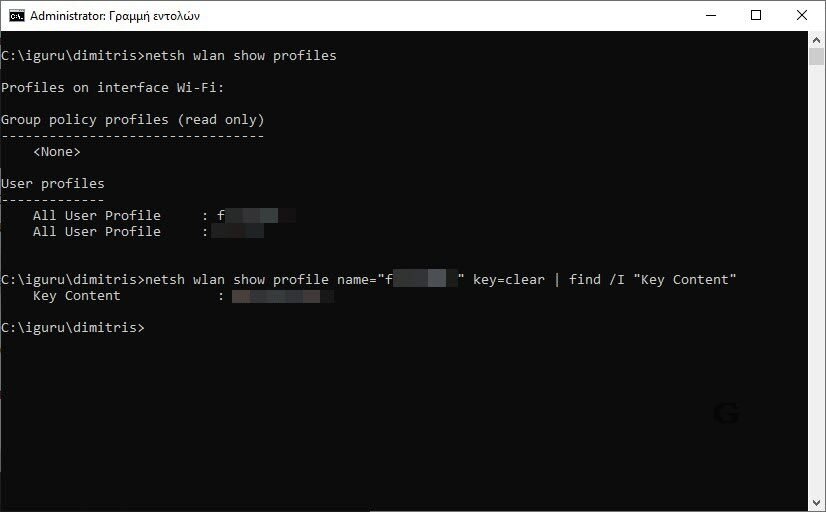
First, open Windows Terminal as Admin.
-
Then copy and paste the following command and press Enter:
netsh wlan show profiles
- You will see a list of all the saved Wi-Fi network profiles on your system.
netsh wlan show profile name=”Profile” key=clear | find /I “Key Content”
Note: Replace Profile with your Wi-Fi profile name.
- Press Enter and you will see the Wi-Fi password. This will appear in the Key Content field.
Here are two ways to view your Wi-Fi network password.
