
The Microsoft Word has established itself as the go-to word processing application. That's why it's packed with quite a few clever tricks that will increase your productivity and make its use easier.

You all work with Microsoft Word more or less. Most of you just open it, write a text, it's saved and that's it. But things are not so simple in the famous text editor. It has endless possibilities and it would be a shame not to know some pretty clever ones that are little known to the general public
Here are some advanced Microsoft Word features that can make your work and life easier.
Hide the ribbon and go full screen
Since Microsoft Word is packed with features, you may feel squeezed into one screen when you just want to read the document without distractions.
You can use a quick shortcut to hide the Ribbon and have your text spread across the screen so it's easier to read. Press Ctrl + F1 to toggle the Ribbon view.
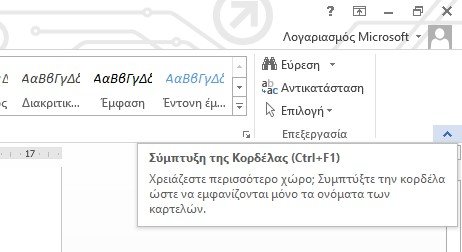
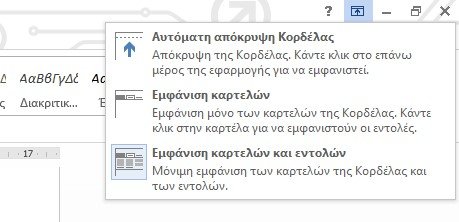
You can also change the behavior of the Ribbon so that it automatically hides when you don't need it. To do this, click on the icon Ribbon display options (next to the minimize icon) and select “Auto Hide Ribbon”.
Distraction-free reading in full screen
Additionally there is Distraction Free Reading, which is a more specialized feature available in Word 2010 and later. Although designed primarily for touch-enabled tablets, the reading mode works well on a laptop as well.
To quickly access it, use the three activations below:
- View > Reading Mode (on the Ribbon menu).
- The “Read Mode” button on the right (in the status bar).
- You can double-tap with your finger or double-click with your mouse to zoom and make graphics such as tables, charts, and images fill the screen.
Anadiorganization with the outline view
Writing down your main ideas and finishing the first draft of your document quickly is the surefire tip for productivity. Used correctly, outline view can increase your productivity on large documents by 50%.
On the Ribbon, go to the View tab and click Outline (under Views).
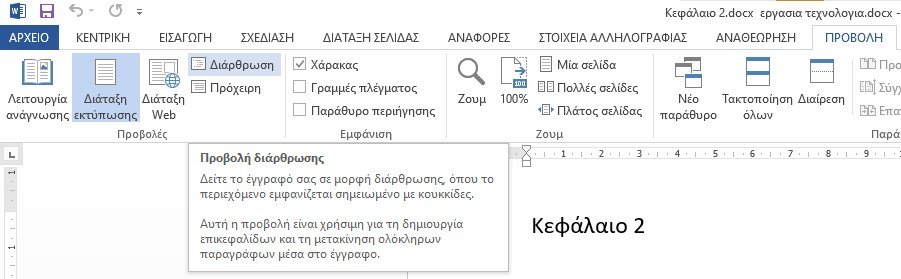
Outline view helps you fine-tune the organization of complex documents by rearranging text blocks and offering nine levels of headings.
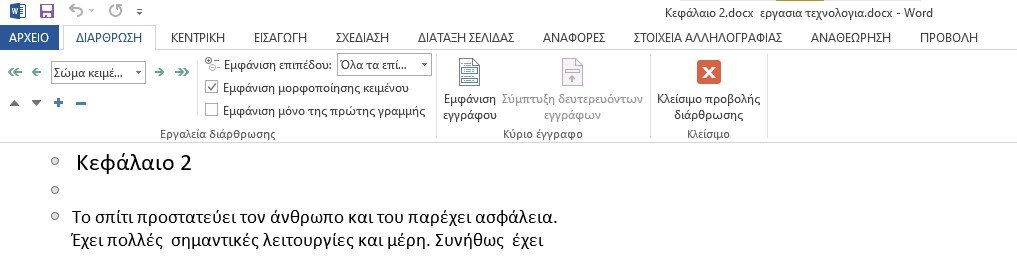
The ribbon will display a special toolbar called “Outlining”, with controls for promoting or demoting selected text. Use the controls to hide or show selected text.
- Want to get to a specific point in a long document? Go to Outline View and go to a specific heading level.
- Do you want to quickly compose a text? Draw the main sections in Outline View, then switch to the other layouts to write the body.
- Want to reorganize a report by moving huge chunks of text? Drag and drop a heading to move not only that heading, but also all sub-levels below it and the main text. Use the up and down arrows to edit them.
- Want to format headings quickly? Use headings 1, 2 and 3 instead of resizing and using capitals.
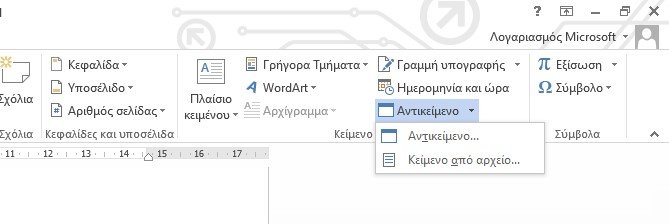
Turn tables into charts in 3 steps
What do you prefer to watch? a neat table with lots of data or a beautifully designed chart that visualizes that data for you?
Because the visual display within a chart is more pleasing, it is often difficult to choose the former. Word makes it easy to turn table information into a chart. When you don't have too much data in a table, it's better to create a chart in Word instead of putting in an Excel table. Select the table with the data and follow the following three steps:
- Click on “Insert” on the Ribbon.
- Click the Object tool in the Text group and open the Object dialog box.
- From the list of object types, select Microsoft Graph Chart. Click OK.
Word displays the table data as a clean column chart. Modify it in the datasheet that appears.
You can also format this chart with a different chart type. To do this:
- Double click on your chart.
- Right-click the white space inside the bounding box of the graphic.
- Select Chart Type.
You can also use Microsoft Word to create impressive flowcharts with the shapes feature.
Write equations in Word
It's not just the Excel formulas that are amazing. The Equation Editor has always been an important feature of MS Word. In recent versions of Word, it is simply known as Equation. To use it, choose Insert > Equation > Insert New Equation.
You will see a new line on the Ribbon, the Equation line. Use it to design your own advanced math, physics or chemistry equations. Word gives you many familiar ready-made equations to insert with a single click.
Keep 24 items in the Clipboard
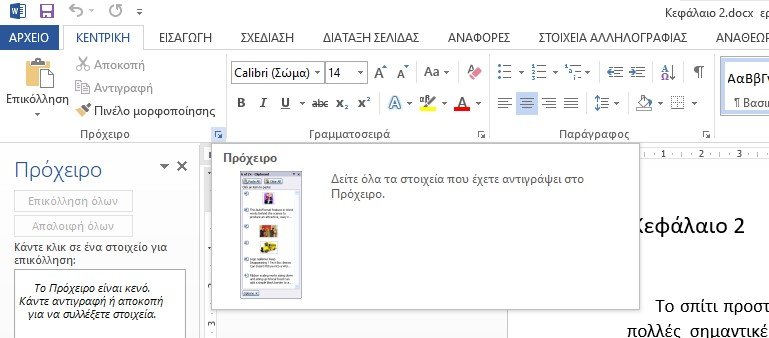
The Office clipboard can hold 24 items and is interoperable between all Office files. On the Ribbon go to “Home” and in the first “Clipboard” group click the small drop down arrow next to the group name (Clipper) to bring up the box on the left.
Highlight something and press Ctrl + C to put it on the Clipboard.
This copy capacity enables you to cut and copy multiple items and move them anywhere within the document or between open Office programs.
Use the clipboard Options to control its functions. For example, you can disable Show clipboard when you press ctrl + C twice, or show status near taskbar when copying, etc.
Translate languages online
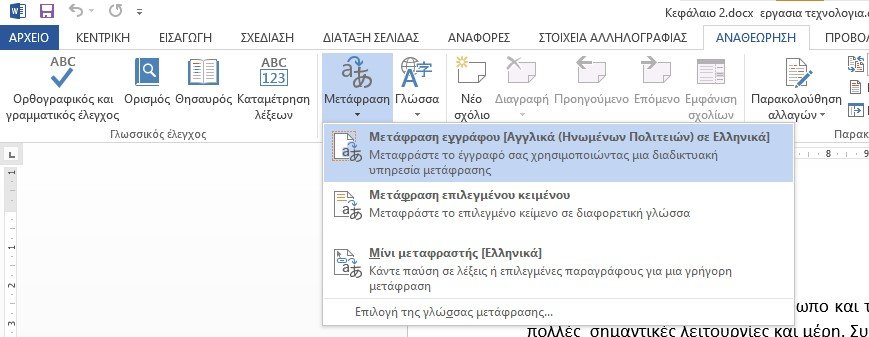
Microsoft Office uses Microsoft Translator to handle all translations. Use the Translate function from the Review tab. Translate a word or a sentence. Or, translate the entire document and display it in a separate Word document.
The Translator tab appears on the right and you can select and change languages. Use this sidebar to highlight each word and fully explore its meaning.
Beautify fonts with Kerning
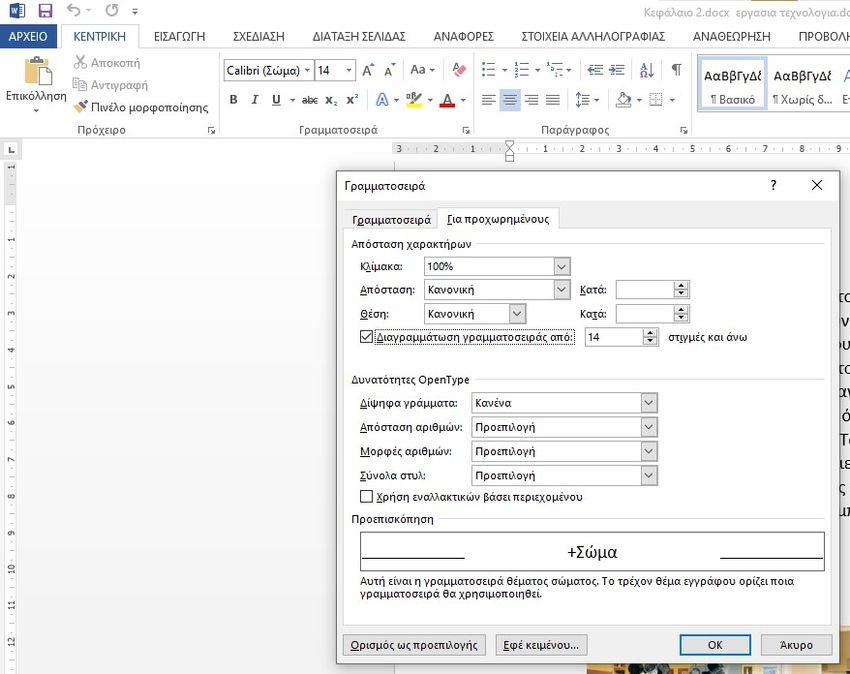
Kerning adjusts the space between two individual letters for better visual appearance. When designing a document, each font requires its own specific hyphenation. Kerning becomes important when designing with large fonts in Word, such as on an ebook cover.
Word has hyphenation turned off by default, and normally you don't need to bother with it. But suppose you have to submit a five-page paper. Save effort by increasing the width between letters instead of leaving spaces!
Click on the small emerging arrow in the Font group (on the Home tab). Alternatively, press Ctrl + D Go to the Advanced tab. Select the check box for Font Kerning. Experiment by entering a small point size in the box. Remember, some fonts and font sizes don't look good with kerning.
Inspect your document
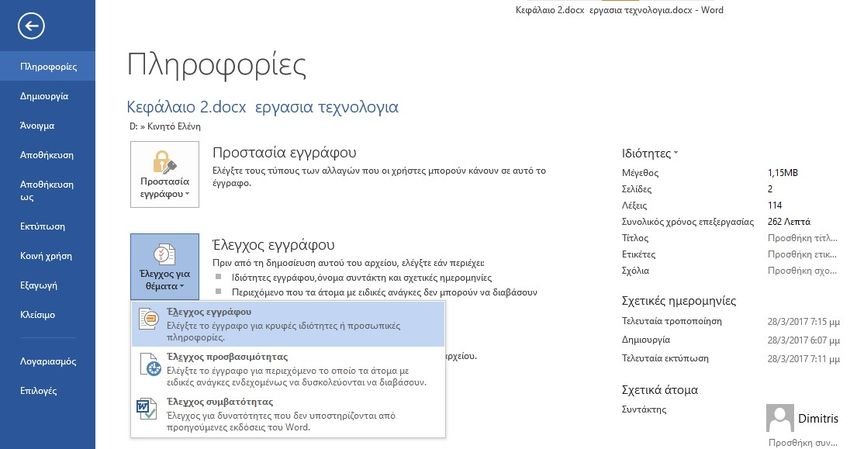
Today, an important feature of MS Word is collaboration, but you also need to pay attention to security. The Document Inspector in Word helps you check your document for any information you want to keep private.
Whenever you create or even edit a document, some user information is automatically added to the file. The Document Inspector helps you delete this kind of information before you share a document.
To access the Document Inspector, go to File > Info > Check for theme> Check document.
You can inspect for hidden content and other issues by selecting the checkboxes. After inspection, any category containing sensitive data gets an exclamation point (otherwise it gets a green tick in a circle). The Clear All button for each category removes the data and finalizes the document.
Take advantage of them benefits of the hidden text
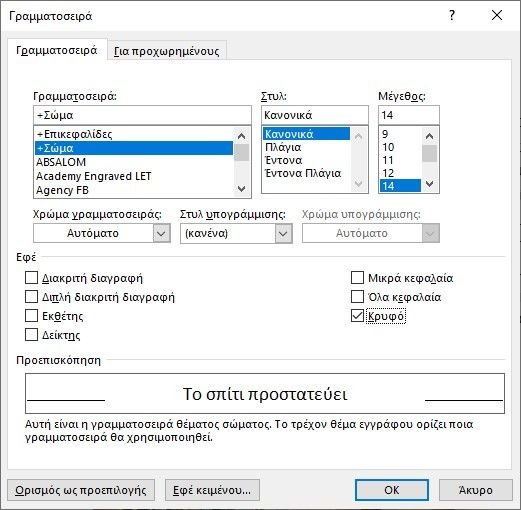
Hidden Text is a non-printable feature that has its uses. Hiding text can be useful in many situations:
- Create a simple quiz by hiding the answers.
- Control the layout for a specific print job by entering hidden text.
- Print two versions of a document. In one, hide parts of text and in the other don't. You don't need to make two copies or delete any part of the document.
- Temporarily hide confidential information that you don't want others to see.
To hide or unhide text:
- Select the text you want to hide or the hidden text.
- Click Home > the arrow after the Font group name. Alternatively go with ctrl + D
- Select or clear the “Hidden” checkbox.
To print hidden text:
- Go to File tab > Options > Display.
- Check the “Hidden text” checkbox.
- Check the “Print Hidden Text” checkbox.
- Click OK.
Non-printing characters are formatting marks, which allow you to troubleshoot and fine-tune the layout of a document.
For example, paragraph break, tab markers, spaces, line breaks, page breaks, object anchors, and hidden text are some of the non-printable elements that are useful for controlling the layout of a Word document.
Use productivity secrets in Word
Use these advanced Microsoft Word tips and you'll speed up your workflow.
Whether you're a student or a student, or you work in secretarial work, these simple tips will help you work comfortably in Word.
Of course there are a bunch of other tricks that make it easier, but let's start with the above as basics for a simple secretarial task. If you have another to recommend as a staple, we'd love to hear it.
