
Taking a little time to clean up Windows can make huge improvements in its performance. This is the ultimate list for cleaning your Windows PC and is aimed at advanced users users.
Over time, computers slow down. Of course, hardware aging plays a role, but for most users, the most common cause is poor operating system maintenance. It's time to clean your computer.
Reinstalling Windows is probably an extreme option. Yes, if you want to get rid of all the accumulated garbage, doing a new installation will immediately make your machine run faster and smoother.
However, you do not need to reach such drastic measures. Taking a little time to clean up Windows can yield almost the same results. Sure, your five-year-old laptop may never be able to play the latest game, but you'll see huge improvements.
The following is the complete checklist for cleaning a Windows computer.
| 1. Delete unused software |
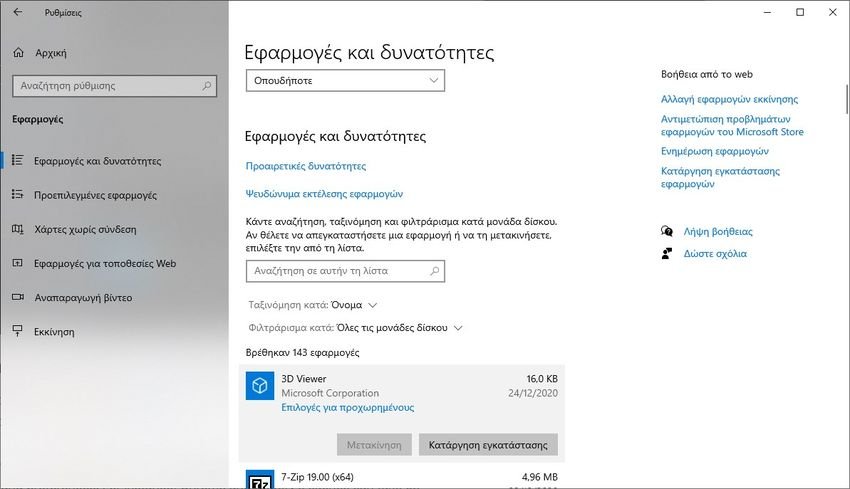
Let's start with the obvious. The first step to a clean computer is to remove all the old software that you no longer use. If you are not diligent in uninstalling old software, you will be surprised at how many unnecessary things you have installed on your machine.
To view all applications on your computer, scroll to the option Start> Settings> Applications> Applications and features . Make it scroll down the list and click the option Uninstall in anything you do not need.
Obviously you have to be a little careful. Don't just get rid of things you don't recognize !! Do a Google search first to make sure it's safe to delete software that you do not remember or have installed.
| 2. Run your Antivirus |
Next, you need to run the antivirus software. One of the most common causes of slow computers is viruses, so it is a great way to clean a Windows computer.
The exact instructions for running the scan vary from application to application, but you should try and find an option called Full scan, Deep scroll or something similar. The scan will take much longer, but you will be assured that it will not overlook anything.
It is also worth downloading Malwarebytes. Instead of focusing on viruses, its primary goal is to protect users from the latest trojans, backdoors, adware and spyware.
Take a look at the list of best antivirus applications for more information.
| 3. Disk Cleanup |
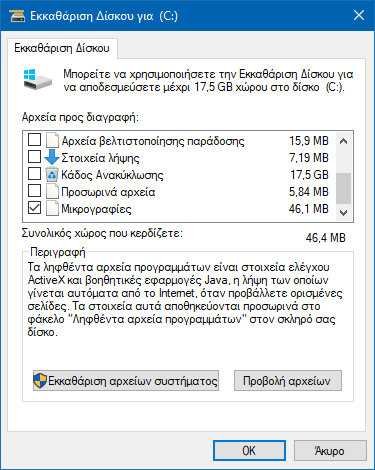
Windows 10 offers a Disk Cleanup tool. It has been part of the Windows operating system for many years and is still just as effective in cleaning up unnecessary files and improving performance.
To run Disk clean up, enter the name of the application in the Start menu or scroll to Control Panel> Management Tools> Disk Cleanup. Alternatively press the Win + R keys at the same time and in the Execution window that will appear type cleanmgr and press key OK.

Before scanning, click Clear system files. It allows the application to perform a more thorough scan, checking the old ones archives Windows Update and log files.
In general, you can delete all files that the scan detects. Select the check box next to each result type and click OK. Note, however, that when you choose to clean up previous Windows installations using the System File Cleanup option, you will no longer be able to revert to the previous version of Windows.
| 4. Rebuild your hard drive |
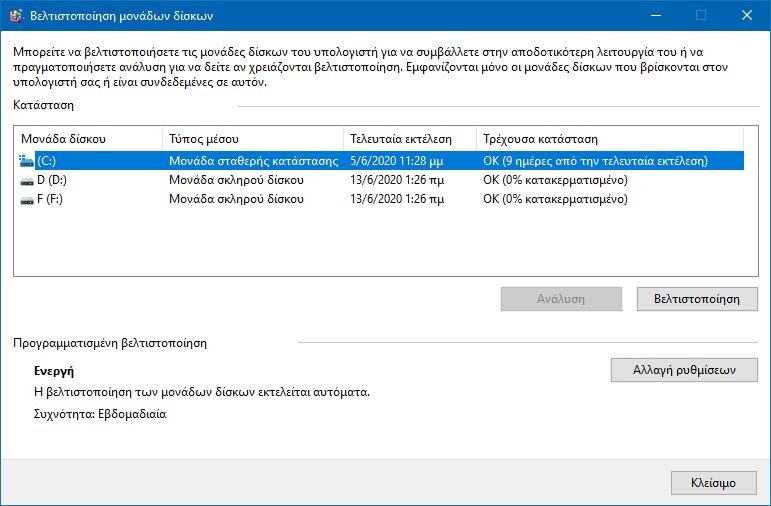
Windows 10 performs disk defragmentation when it realizes that it is required. However, once you have decided to clean your computer, it would be a mistake not to perform the rebuild manually.
You can find the Drive Reconstruction and Optimizer tool by performing a search or by going to Control Panel> Management Tools> Drive Reconstruction and Optimization.
To use the application, highlight your main hard drive and click Optimization in the lower right corner of the window.
pay attention if you have SSDs, as they do not really need reconstruction.
| 5. Delete old drivers |

Windows maintains old drivers. The logic behind retention is good: you will never get stuck if a new driver does not work as expected. The problem, however, is that your machine may be full of drivers from devices you have stopped using for years.
There are two easy ways to remove old drivers from your computer: h Command Prompt or the Environmental variables.
In Method 1, open a command prompt window with administrator privileges and run the following command:
SET DEVMGR_SHOW_NONPRESENT_DEVICES = 1
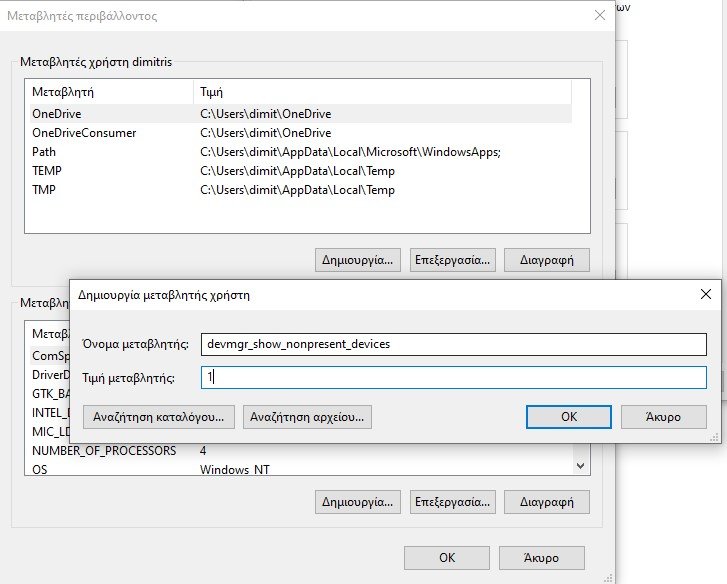
With the 2nd method, search for "Edit system environment variables" for your account and select the search result. The "System Properties" window will open. Go to the "Advanced" tab and click on "Environment Variables" at the bottom of the window. In the "Environment Variables" window that will open and in the "User Variables" section, click "Create".
In the new window, enter the variable name as devmgr_show_nonpresent_devices and the variable value as 1. Then click OK.
Plus, if you can handle the names and identifications of your devices, you can go to Device Manager and from the menu to select View> Show hidden devices. This will give you a list of all your active and inactive devices. Those that are inactive will be grayed out.
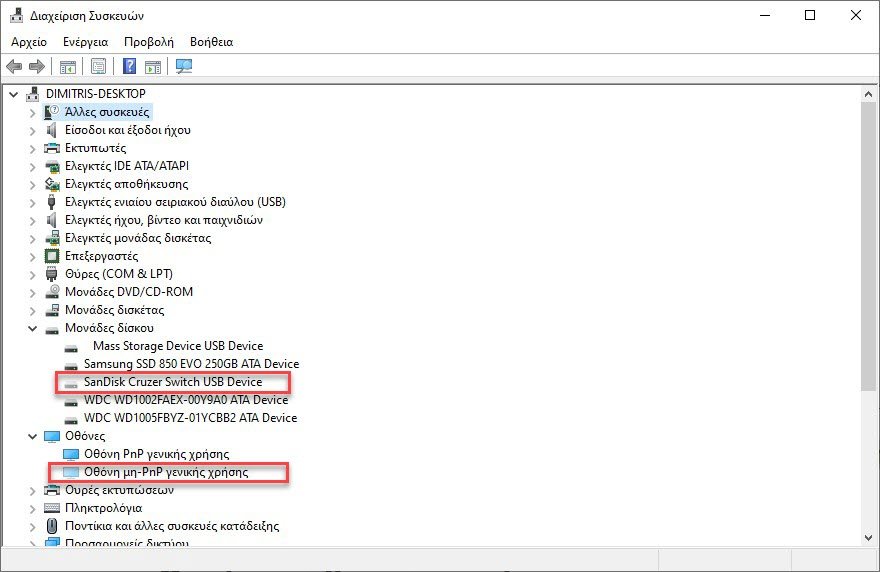
Right-click on the inactive device and then click on “Uninstall device”To remove it completely. You will need to do this in turn on each device you want to uninstall.
| 6. Refresh the startup list |

Every experienced Windows user knows that the operating system lags behind macOS, Chrome OS and Linux when compared to slow startup times.
Usually, the problem is caused by the number of programs that Windows tries to start when they first start. And the funny thing is that most of them are unnecessary.
To clear the startup list, press Ctrl + Alt + Delete and select "Task Manager”(Or in English Task Manager). In the new window, click More Details, and then select the Start tab at the top of the screen.
You should now look at all the applications that Windows is trying to run at startup. To disable an application, highlight it, right-click, and then click Deactivation.
| 7. Clear the AppData folder |

When you uninstall an application, you will often find remnants of its previous presence scattered around your machine. One of the most common sites is the AppData folder.
By default, the folder is hidden. You can find it at C: \ Users \ [Username] \ AppData or typing % AppData% in Windows search.
Inside the main folder, there are three subfolders: Location , LocalLow and roaming. Make sure you go through all three folders to find traces of your old software. Again, do not delete anything unless you are sure it is safe.
To prevent debris from applications that you will delete in the future, you can use a special uninstall tool. One of the best is the Geek Uninstaller. The application is so good that it is one of the "necessary" free computer maintenance tools.
| 8. Remove old program files |
The other place you will often find traces of old application files is in the Program Files folders.
On most 64-bit machines now, there are two program files folders. You can find them at C: \ Program Files and C: \ Program Files (x86) .
As with the AppData folder, carefully edit the contents of each folder and delete any files and folders that are no longer in use.
| 9. Clean the registry |
You've probably heard horror stories about registry cleaners. Excessively aggressive can easily damage your computer.
But it is important to keep your registry clean. Think of it as a library: the bigger the library, the more time you need to find what you are looking for. Similarly, the more junk in your registry, the more time and resources Windows needs to find the entries it needs.
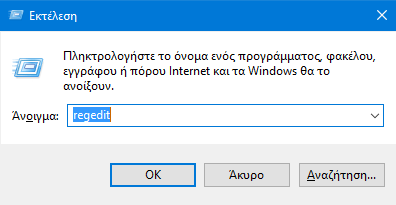
Why not take matters into your own hands? It's easier than it sounds. Do a search for regedit ή Registry Editor and press Enter. Then go to: Computer \ HKEY_LOCAL_MACHINE \ SOFTWARE and Computer \ HKEY_CURRENT_USER \ Software. For each entry there, slowly view the list and delete entries for software that you no longer use.
Warning: Deleting an incorrect registry entry can have serious consequences for your system. Make sure you have create a full backup of your registry data before continuing.
| 10. Clear all caches |

Windows 10 is full of caches. Simply put, and without much technical terminology, a cache is a non-permanent file that Windows may need again in the future.
But what if Windows doesn't need it again? There are many hidden caches in Windows and you will need to clean them up one by one. This work will take some time, but it is worth it.
Get started by clearing the Windows Store cache: Microsoft provides a utility called WSReset.exe that clears the cache for you. Open a Run command (using the Windows + R shortcut), type WSReset.exe in the text field and click OK. A black window will open and it may seem like nothing is happening, but wait. It may take a few minutes on slower computers.
When done, the Windows Store will start. This means that the cache has been cleared and you are ready.
Then there are the caches in the Temp folder, and the thumbnail cache. Logically you have already erased both in step 3, in the clearing of your disk.
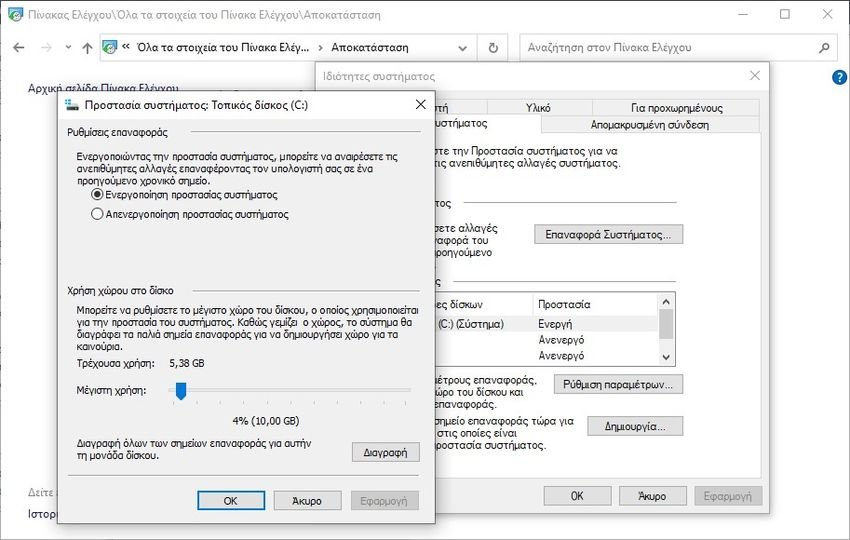
You can also delete your old system recovery files, especially if you have kept more than one. Ή reduce the space allotted for System Restore, but be aware that allocating too little space can cause System Restore to malfunction. go Control Panel> Recovery> System Restore Configuration> Configuration.
On the System Protection tab, at the bottom, click Delete to delete all restore points that have been saved for your system. If so, be sure to create another restore point right away!
Then clear all caches from them browsers and delete it dns cache. For Browsers follow the instructions of each Browser and for dns cache open a command prompt and type the command ipconfig / flushdns. Do not be afraid to delete the dns cache.
Each time Windows learns a specific path, e.g. from your computer to the iGuru servers, temporarily remembers this path in the DNS cache. However, when the DNS path changes, the cached copy of your path is outdated and this can cause problems (such as inability to load site).
| How do you clean your computer? |
So, here are some crucial steps you can take. if you want to keep your operating system clean. By editing all 10 of these steps, you are sure to see an increase in performance.
Of course, there are other ways to improve your computer speed, for example, you can upgrade hardware, but this is often an expensive sport for most.
