
Learn how to declare in Windows 10 to save your Documents to any part of the disk you want.
From beforechoice, The Windows save your personal "Documents" folder under the% UserProfile% folder of your account (for example: "C: \ Users \ Dimitris \ Documents").
You can change this option and your documents will be saved in a folder called "Documents" but it will be in another location on the hard disk or another disk, or even on another computer on the network.
Let's see how:
Step 1. Create a new folder named "Documents" (in English and not in Greek) in the desired location (eg on disk "D") to move your personal folder "Documents". That is, for our example, we simply created the D: \ Documents folder.
Step 2. Open File Explorer on your PC. For convenience, press the Win + E keys at the same time, find the "Documents" folder that is already saved and is logically located under C:\Users\Your_Name. We found him for convenience under the team"Fast access".
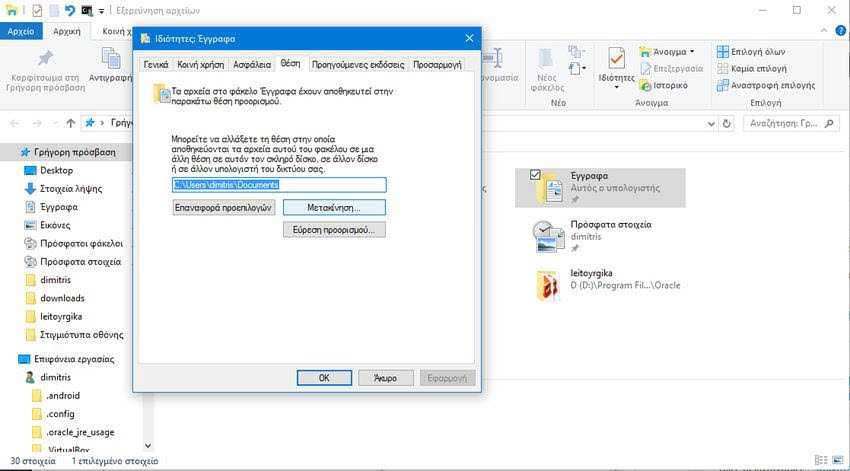
Step 3. Once you find it, right-click on the "Documents" folder and then click on "Properties" which is logically at the bottom of the pop-up list.
Step 4. In the properties window click go to tab “Location” and then click on button "Movement". (See screenshot below)
Step 5. Navigate to and select the "Documents" folder in the location you want (eg: "D: \ Pictures") from step 1, and click "Select Folder"
Step 6. Click the OK button to confirm the change
Step 7. In the Windows prompt to want to move all files to the new location Click "Yes" to move all files from their old location to the new location. (although this is your personal choice)
Step 8. Your personal "Documents" folder and all its contents should now have been moved to their new location (eg: "D: \ Documentrs") and you will logically see this new location in "quick access" to explore files like folder named "Documents"
