
You want to show your friends the Windows logon screen you made, but only with a picture of the mobile can you do it? Here's how to take a screenshot of the Windows logon screen.
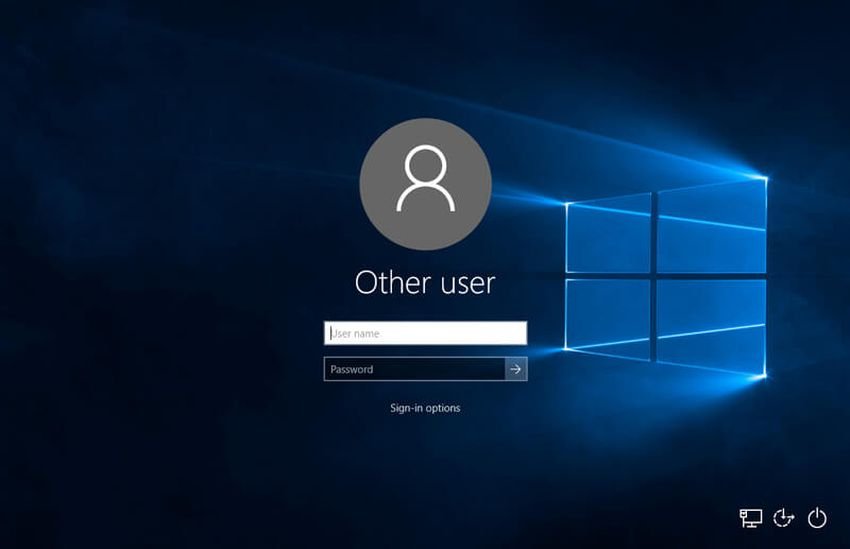
The Windows logon screen is a lock screen that controls access to the surface work of the user, through various connection options. For security reasons, the login screen does not allow you to save screenshots with most built-in tools and hotkeys.
After logging in to Windows, you will need to use either built-in tools or the Win + Print Screen keys to get a screenshot. All of these methods use a system request to capture the screen elements in the form of a JPEG image. On the Windows logon screen, however, there are some restrictions on taking screenshots from a command that is called Winlogon. It controls user login, logout, user profile upload, login screen details, and authentication.
There are many types of malware that use screenshots to steal them codeaccess and your files. As a result, Winlogon has an internal mechanism that prevents such tools from accessing the login screen.
However, there are ways to take such a screenshot. Let's go see them:
1. Remote management.
First you can view the login screen from another computer via a remote management program, such as the remote desktop or Anydesk or Teamviewer.
Remote management programs work like services and even run under the Windows logon screen. You can easily log in remotely from another computer and either enter passwords and make a normal Windows login, or just take a picture of the remote manager window.
2. Snip & Sketch
You can capture a login screenshot in Windows 10 using the Windows application Snip & Sketch. It is accessible from the Start menu search box.
Once Snip & Sketch is open, select a delay time to take the snapshot, either 3 seconds or 10 seconds to get more time. Use the Win + L shortcut keys to lock the desktop.
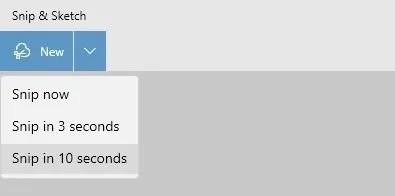
Ten seconds is enough time to set up the Windows 10 login screen as you wish. Whether you want to view login credentials, on-screen keyboard, magnifier, etc., you have 10 seconds to display before the Snip & Sketch window automatically appears and takes a picture of the screen.
You can also select the desired screen capture area. Once logged in to the desktop again, you can save the clipboard screenshot in Paint, Word, or other tools.
The Windows 11 they replaced Snip & Sketch with a new Snipping tool, which can be launched using Win + Shift + S . To capture the screenshot of the logon screen in Windows 11 using the snipping tool, enter a delay of 3, 5, or 10 seconds. The image is saved to the Clipboard and can be copied and pasted into Paint, Word or other programs after connecting.
What methods no longer work for saving Windows logon screenshots?
In the past, there were a few additional solutions for taking a screenshot of the Windows logon screen. With Windows 11 and the latest Windows 10 updates, these vulnerabilities have been filled. You can no longer use any of these methods to obtain a Windows logon screenshot.
- Add utilman.exe registry key : Until very recently, you could add a registry key called “utilman.exe” to HKEY_LOCAL_MACHINE and put its string value location in the snipping tool. This would make the Snipping tool available during the login screen from “Ease of Access”. Now when you try to do this, the Snipping Tool will open for a moment, but then it will automatically close and the registry setting will automatically be removed.
- Windows Game Bar: Windows Game Bar is a native screen recording tool that can be started using Win + G. However, the recording feature does not extend to the login screen.
- External screen recording software: Third-party screen recording tools can no longer capture the Windows logon screen.
- Cutting tool: The Windows Snipping Tool is removed in Windows 10/11 and no longer supports advanced features such as logon screenshots.
