
Windows has the dedicated, inaccessible WindowsApps folder. See how you can access it.

The hidden folder of the operating system Microsoft Windows called “WindowsApps” stores Microsoft application files and other important files to improve your experience.
In fact, WindowsApps generally takes up a lot of reusable space because it contains application files that you previously uninstalled from your computer.
You can remove unnecessary files from the WindowsApps folder to free up space, but it is a bit difficult to access because it is protected and hidden in Windows File Explorer.
Here are some ways to access the WindowsApps folder in Windows and make the necessary changes to it.
What is the WindowsApps folder?
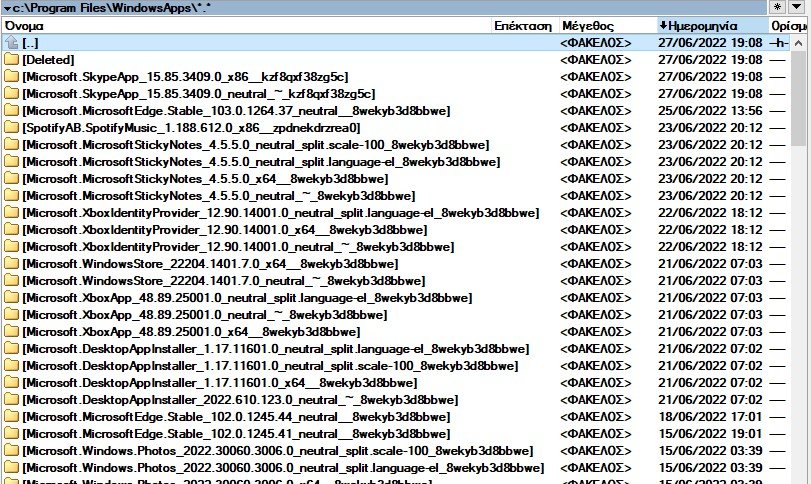
You can find the WindowsApps folder in the C: \ Program Files directory in Windows 10 and 11. This folder contains all files related to UWP packages or Windows applications that you download from the Microsoft Store or that are preinstalled on the Windows operating system.
The problem is that a Windows root user or even a system administrator user account cannot access or change the files in the folder. This is because it belongs to a Microsoft account named “TrustedInstaller".
Even if you uninstall or remove some of the applications in Windows, the basic application files are not removed from the WindowsApps folder. Thus, there is a possibility that such applications will reappear after an update.
There are many ways to access the WindowsApps folder and bypass the protection to access the necessary files. All the steps in this article are the same for both Windows 10 and Windows 11.
Read: When Windows does not let you delete a folder
Caution: If you do not know what you are doing, we warn you that modifying or deleting files in the WindowsApps folder could cause system errors or even cause your Windows operating system to shut down.

Access WindowsApps through File Explorer
You can easily find the WindowsApps folder in Windows File Explorer. However, to access the folder and make changes to the files, you must gain some additional permissions by changing the ownership of the folder.
Follow these steps to first view the WindowsApps folder:
- Open Windows File Explorer and go to the C: \ Program Files directory.
- Now, click on the View tab, located above File Explorer.
- Select the Hidden items check box to enable it.
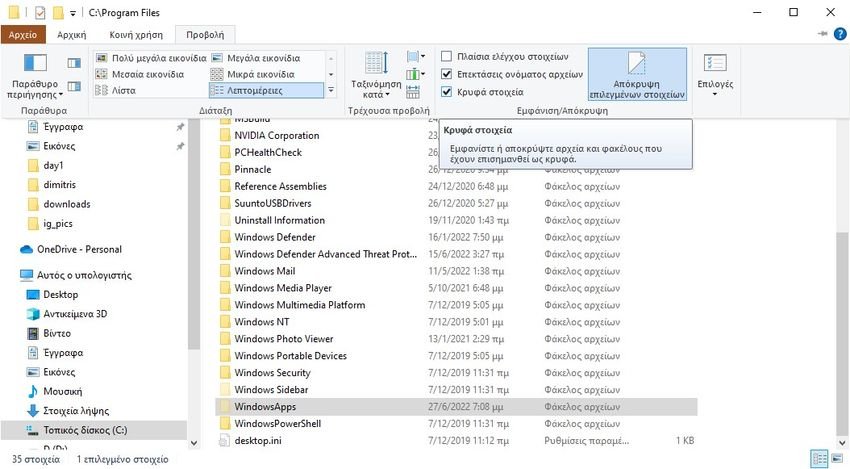
This is. You can now see the WindowsApps folder in the same directory.
If you try to open it, you will see one emerging information window that will say “You do not have permission to access this folder”. So to actually gain access and have read and write permissions, you need to do other things.
Change of ownership for easy access
For the next steps, you need a user account with administrator privileges. Follow the steps below to change the property rights and access the required folder:
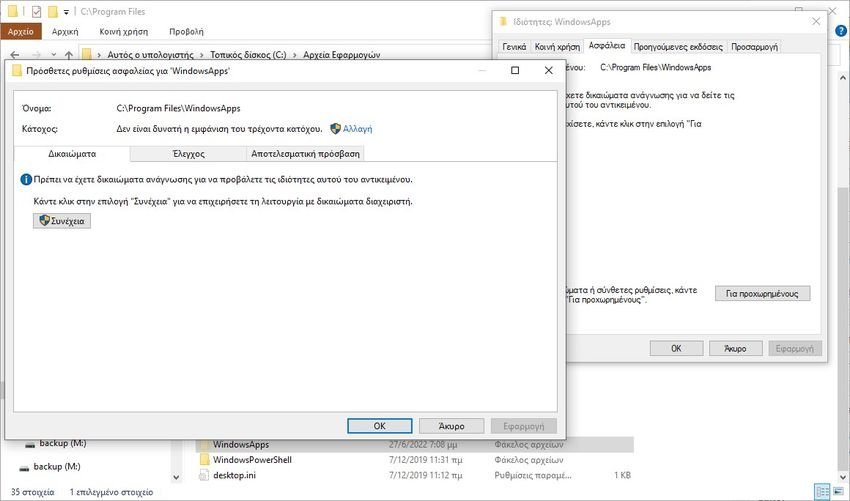
- Select the WindowsApps folder and right-click on it.
- Once the context menu appears, select Properties from the list.
- Now, under the Properties window. Click the tab Safety and then to choice For advanced located just below.
- After opening the Advanced Security Settings window, click the text Change text next to the Holder.
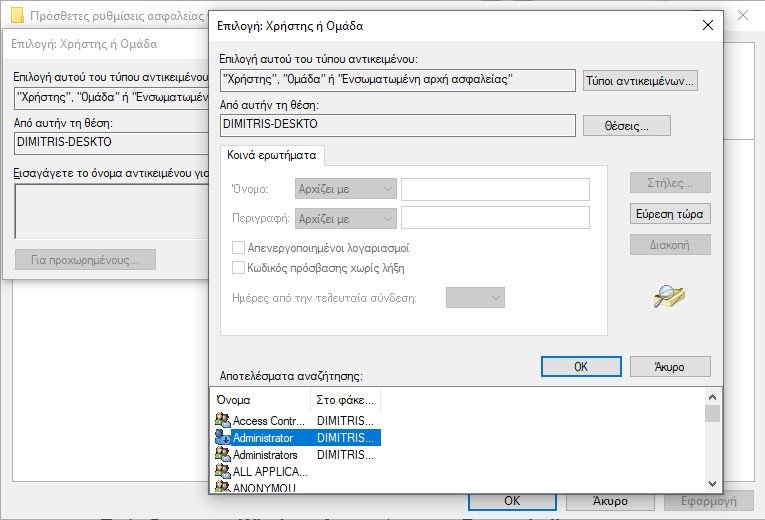
- Now click on Advanced> Find Now> Administrator.
- Finally, just click OK to select Administrator as the owner and OK again to save the changes.
- Then select the check box just before the text "Replacing holder in secondary containers and items".
- Now, click the Apply button followed by the OK button to start the property transfer process.
- When done, click OK in the next pop-up window.
If you followed the steps above to gain ownership of the WindowsApps folder, you can now move or delete files from that folder.
In addition, you can also use it Total Commander application as an alternative to File Explorer. Such tools allow you to gain full ownership of all your files and folders with a single click.
Access WindowsApps via Powershell
The method based on File Explorer is quite complicated for a beginner. If you are looking for an easy-to-use method, you can use PowerShell to get the job done. Using Windows PowerShell is a fairly simple and automated process and requires only one command.
Follow these steps to access the WindowsApps folder using PowerShell:
- Launch the Windows Start Menu or Windows Search.
- Now, type PowerShell and click on icon right arrow next to PowerShell to open more information.
- Click Run as Administrator to run PowerShell with administrator privileges.
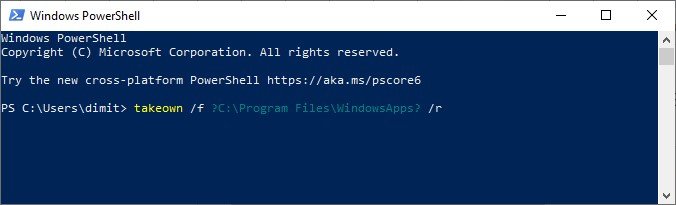
- In Powershell, execute the following command and press Enter:
takeown /f "C:\Program Files\WindowsApps" /r
The above command will bring all the files or folder ownership to the system administrator. It will take some time for the admin account to own the WindowsApps folder and everything it contains.
The access you gain by performing the above procedure is similar to that of the Windows File Explorer-based method.
Enjoy unlimited access to the WindowsApps folder
Using one of these methods, you should be able to view hidden files and folders on your computer. You can thus make changes to the UWP packages contained in it.
Additionally, in the WindowsApps folder you can remove the remnants of Windows applications, open any software directly from the .exe file, and inspect all removed packages.
