If you want to make a change to UEFI, such as changing startup priority, enabling or disabling Safe Boot, changing any other low level settings, etc. then you must enter UEFI and make the desired settings .
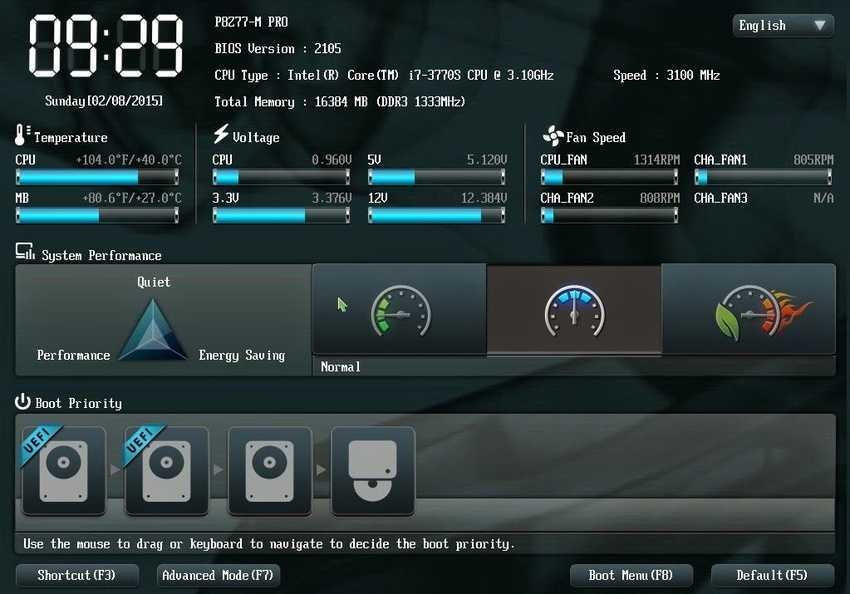
Depending on the motherboard manufacturer, you must press specific keys or key combination on your keyboard to start the computer. mode UEFI. Although your boot screen will usually prompt you with the keys to press, the whole process can be quite confusing for beginners users. You can make your life easier by entering UEFI mode directly from Windows by simply restarting it. This eliminates the need to press the relevant keys at startup as quickly as possible.
Booting Windows while importing into UEFI is not a difficult process. However, you can do so only if your motherboard supports it. If your motherboard does not support UEFI and is only with the old BIOS, you can not boot UEFI from Windows. Most modern motherboards are equipped with chip UEFI and support both UEFI and legacy BIOS.
If you do not know or are unsure whether your motherboard supports UEFI or not, you can easily verify it directly from Windows. See how.
Check if your system supports UEFI or the legacy BIOS
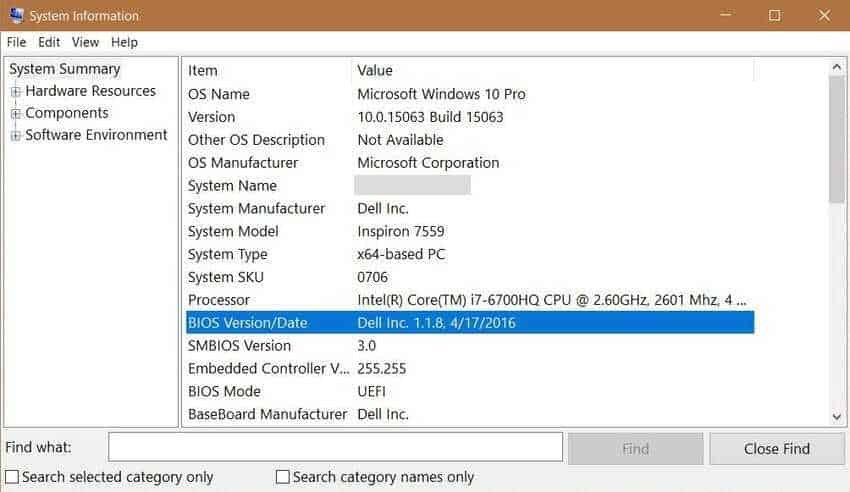
There are several ways to check if useste UEFI or BIOS. One way is Windows System Information. Windows displays all of your system information in a single application called System Information.
1. Press Win + R, and in the Run window that appears, type msinfo32 and press Enter. This will open the System Information application.
2. Select "System Summary" in the left pane. In the right pane you can see if you are using BIOS or UEFI next to "BIOS Mode". If you see UEFI, then your system is using UEFI. If you see the phrase "Legacy", then your system uses the BIOS.
Alternatively, you can also find it using the Disk Management tool.
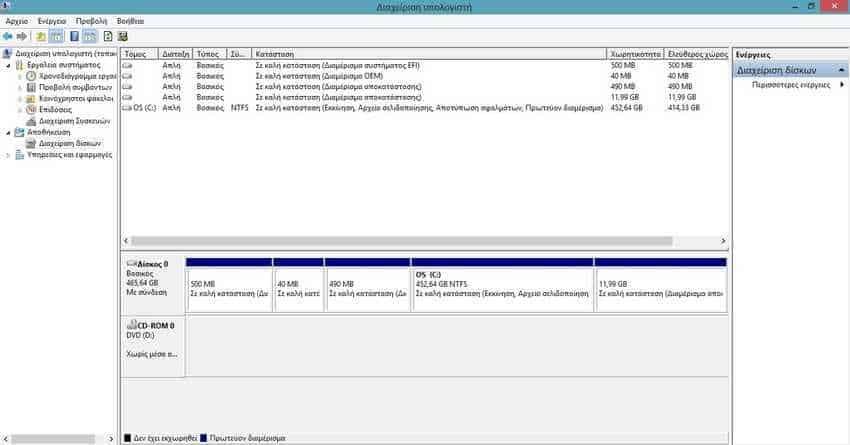
1. Open the Start menu and search for "Create and Configure Hard Disk Partitions" and open it. Don't worry, we're not going to split or format your hard drive.
2. If you see a partition called "Good Condition (EFI System Partition)", or in English "Healthy (EFI System Partition)", then your system supports UEFI. If you do not have this partition, then your system uses the legacy BIOS.
Once you confirm your UEFI native platform support, proceed to the next steps of starting UEFI directly from Windows 10.
Boot into UEFI from the Windows 10 Settings app
To start UEFI from the "Settings" panel, we will use the "Advanced boot" options.
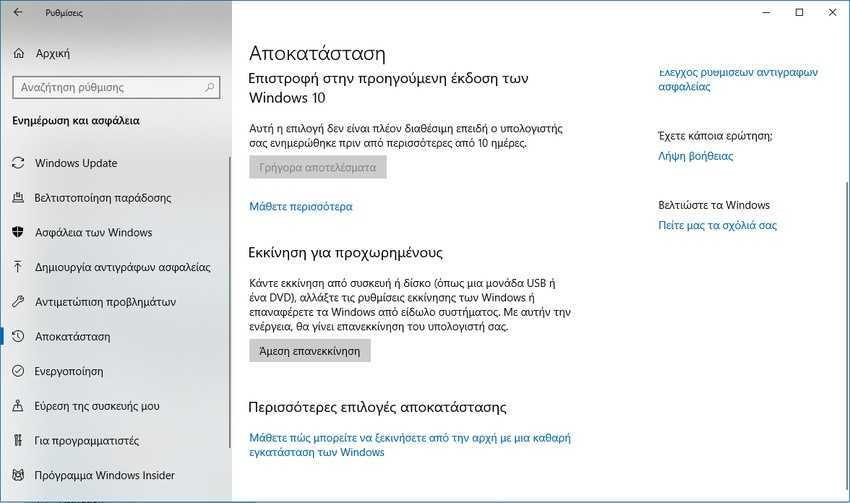
1. Open “Settings” from the Start menu or from the bottom right status bar. Go to “Update and better safety -> Recovery” (Update and Security -> Recovery) and click on button "Restart Now" under the "Advanced Start-up" section.
2. On the next "Make an Option" screen, go to "Troubleshoot Your Computer - or View Advanced Options" and on the next screen go to "Advanced options".
3. In this screen titled "Advanced Options" you will find various options with the probability of having more than 6 initial options and the screen low indicating "Show more recovery options". However you are looking for the option "UEFI Firmware Settings". Once you find it, click on it.
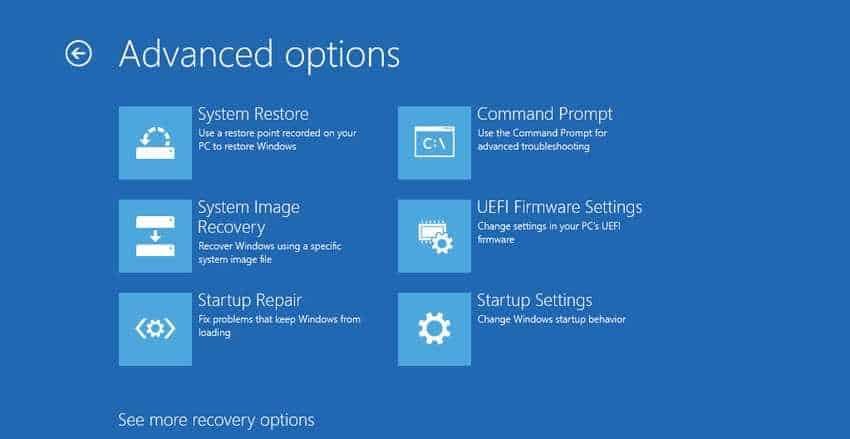
4. On the next screen, click Restart and you will be taken to the UEFI screen.
Boot into UEFI from Command Prompt
You can also restart Windows 10 by making an "automatic stop" in UEFI by running a single command from Command Prompt.
1. Open the Command Prompt with Administrator privileges.
2. Run the following command:
shutdown / r / fw

3. Windows will show a warning message indicating that the system will restart in less than one minute. Close the warning message and save all your work. The system will automatically reboot and will be put into UEFI mode.


Even if my computer can get into a uefi state, the article is flawed and problematic