
Below we will see how you can set a timer for the automatic shutdown of Windows10 / 11.
First, you should open RUN by pressing together two Windows keys + R. Then type cmd and press Enter to open it line of commands.
Then copy-paste the following command and press Enter. In the command 3600 is the time in parameter seconds. If you want to set automatic shutdown after 1 hour, set the time parameter to 3600.
Shutdown -s -t 3600

Note: Replace the 3600 with the time parameter in seconds for the time you want to schedule the automatic shutdown.
If this command does not work, try the following:
Shutdown /s /t 3600
A notification will appear notifying you that the Windows system will shut down automatically in 60 minutes. Thus, you can configure automatic shutdown via the command line.
But let's see how you can make your life easier. Below we will see how to run the automatic shutdown in Windows through a shortcut that exists on the desktop.
If you need to schedule terminations frequently, then you need to create a desktop shortcut. Let's see how it is done:
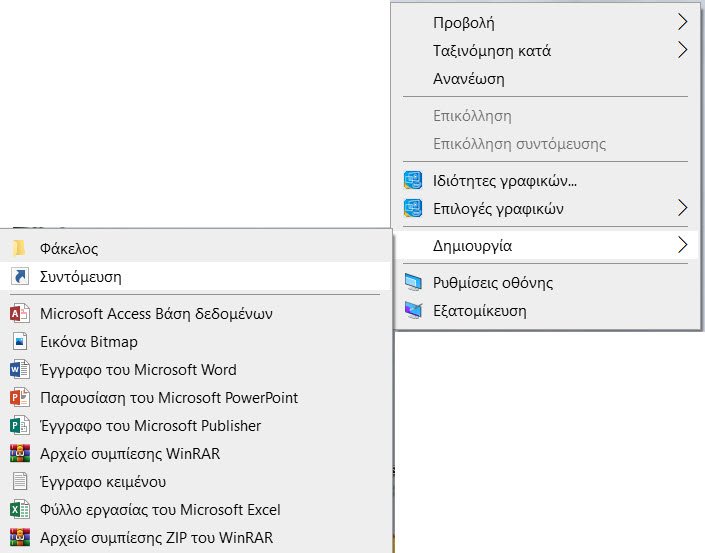
On your desktop, right-click on an empty space and select Create -> Shortcut.
In the window that will open, copy and paste the following command
Shutdown -s -t 3600

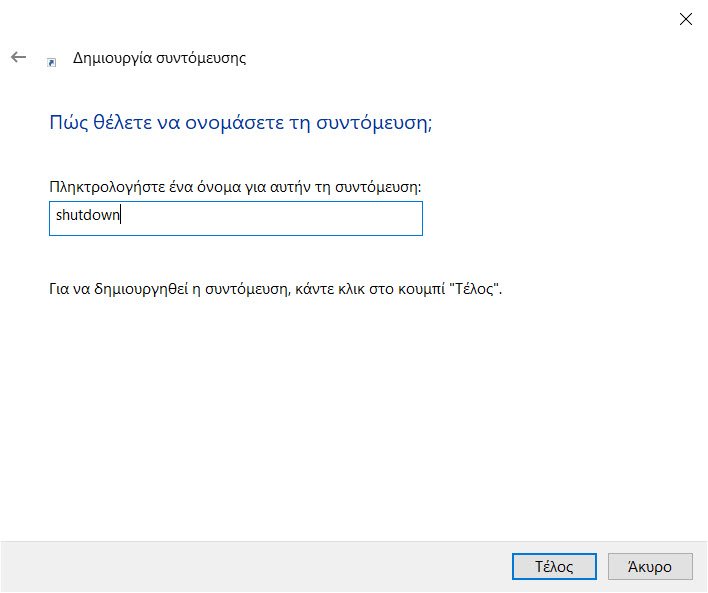
After that, give the shortcut a name. For example: Shutdown and press Enter.
Once the shortcut is created, double-click on it to schedule a termination.
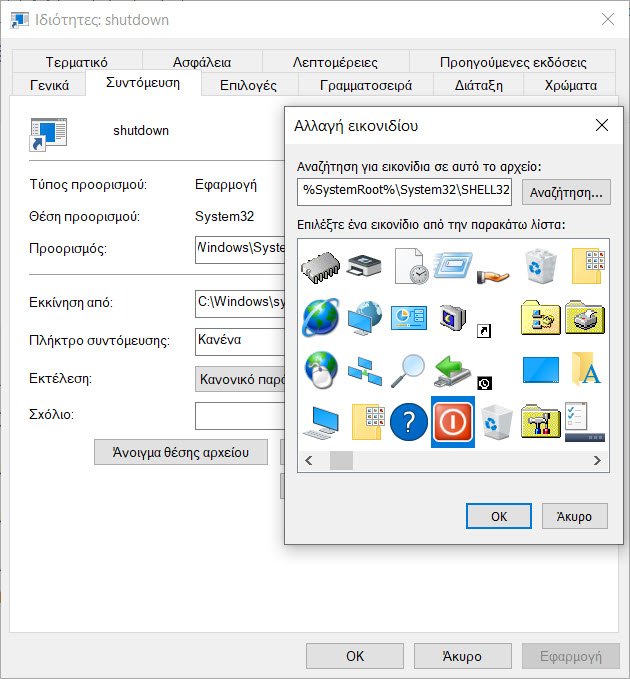
If you want to change the shortcut icon, right-click Properties click in the shortcut.
Then click on Change Icon on the Shortcut tab.
![]()
Select an icon and press OK.

So next time, you just need to double-click the shortcut icon to set up auto-termination immediately.
