
One of the most time-consuming, but necessary procedures in hacking is the recognition, commonly n recognition of the target. Before trying to hack a system, we need to know what operating system is running, what ports are open, what services are running, what applications are installed and running.
Recognition increases our chances of success and decreases our chances of detection. One of the best tools for this work it is hping3.
Because of its flexibility, hping3 is often referred to as a "packet generator", meaning that it can generate almost any type of packetu can imagine. This can be very useful in identification, as different packets will elicit different responses from the operating system's TCP/IP stack, giving us clues about the underlying operating system, ports, and services.
In addition, we can try various IDS and firewall bypass techniques such as fragmenting packets, slow scans, etc. There are so many things we can do with hping3, but I will limit myself to just a few in this guide.
Step 1: Run Hping3
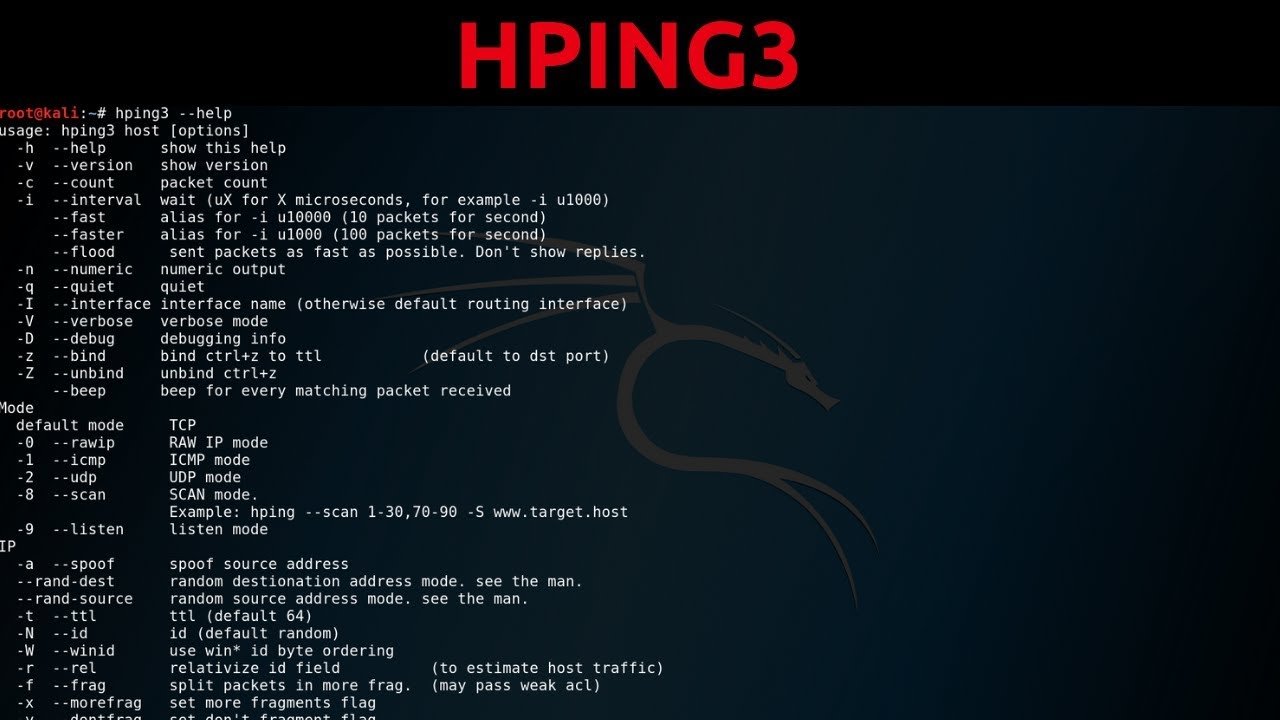
hping3 is a powerful tool with many features and functions. We'll go over some of the basic features that hackers need here, but if you invest some time in learning its additional features, you'll find it very useful. Let's look at the help screen first.
kali > hping -h
As you can see, the help screen for hping3 is very long and detailed.
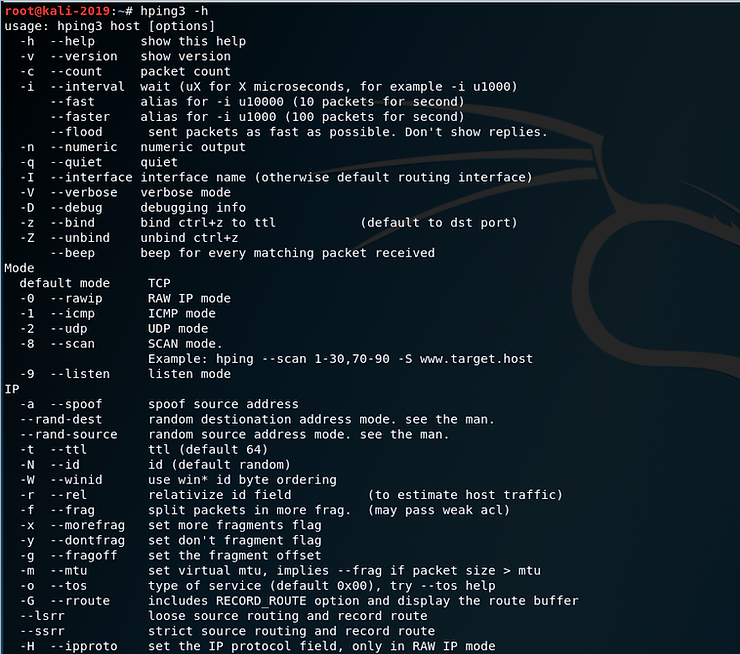
kali >hping3 -h |more
Note that hping3 can generate TCP, RAW IP, ICMP and UDP packets, with TCP being the default. At about the middle of the screen notice that:
-
-a The switch allows us to spoof our IP address
-
–rand-dest generates packets with random destination ports
-
–rand-source generates packets with random addresses
-
-t sets the time to live (TTL) of packets
-
-f fragments the packets
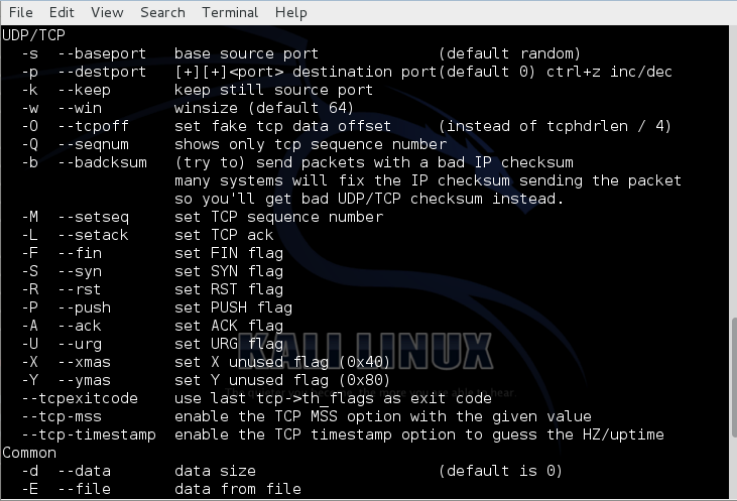
If we now scroll down a bit on the help page, we will see the following options. Note that as with nmap, we can set any of the flags in our package (FSPURA).
I want you to notice the following changes.
-
-Q it only shows the sequence number
-
-S scanning using SYN packets
-
–tcp-timestamp gets the timestamp from the tcp packet
Step 2: Default hping3
One of the most important features to understand about hping3 is that its default packet is TCP. This means that when a network device such as a router or firewall blocks ICMP (ping), we can still identify hosts with hping3.
Let's try running the SYN flag (this would be essentially the same as nmap -sS scan) and check if port 80 is open (-p 80).
kali > hping3 -S 192.168.1.116 -p 80
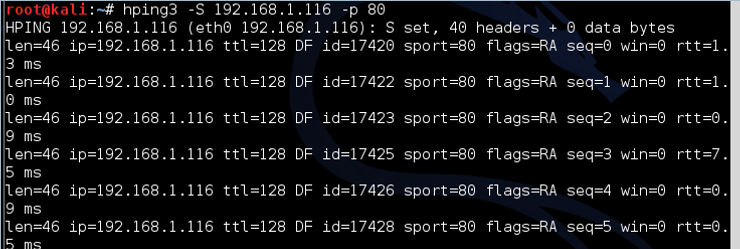
Note: in the above screenshot the packets are returned with the flags SA set, meaning the port is open. If the port was closed, the port would respond with RA.
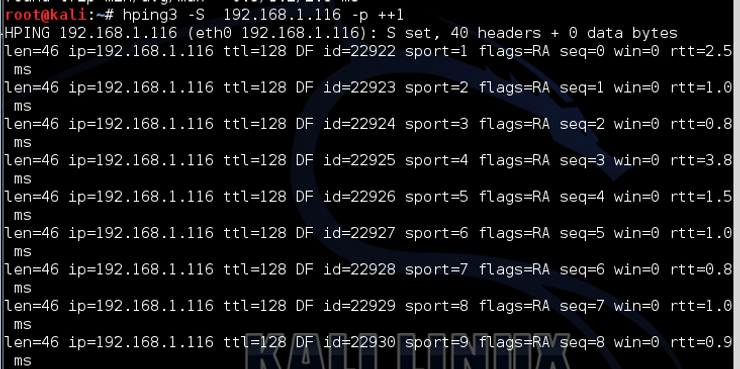
If we want to scan all ports starting with 1, we can simply add the increment switch (++) after Switch port (p) and the port number from where we want to start the scan (in this case 1), as below:
kali > hping -S 192.168.1.116 -p ++ 1
Step 3: Fragment packets with hping3
TCP was designed to be a robust protocol that would continue to communicate even in adverse conditions. One feature that ensures this robustness is its ability to work with packets that have been fragmented or corrupted into multiple pieces. TCP will reassemble these packets when they reach the target system.
This feature of TCP can be used against it by using a tool like hping3 to fragment one attacks into multiple packages to bypass IDS and firewall and then reassemble the malware into the target.
Although most modern IDS now try to capture fragmentation attacks (in Snort, there is a frag3 preprocessor that tries to detect fragmentation), older ones do not. Even newer IDSs can only detect the fragmentation they are designed to detect. The beauty of hping3 is that it allows us to design new attacks that the IDS has not yet updated.
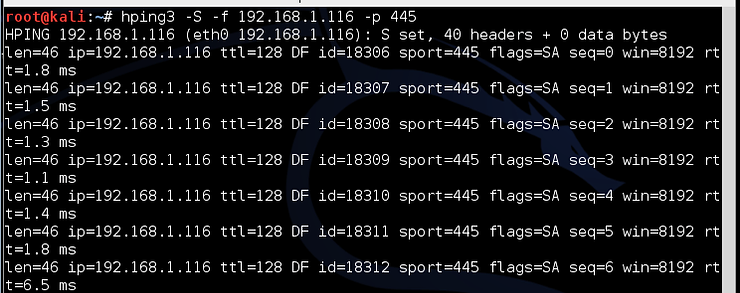
Let's try it fragmentation on hping3.
kali> hping3 -f 192.168.1.105 -p 80
Step 4: Send data with hping3
In addition to being able to create a packet with almost any attributes we can imagine, hping3 also allows us to put whatever data we want into those packets. Notice in the help screen from Step 1 that the Switch -E allows us to declare a file that we want to use to import our package payload.
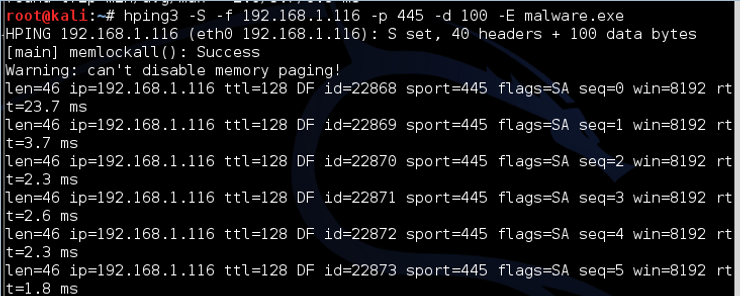
Let's say we have a file named malware that contains an exploit that we're trying to send to the target. Additionally, we are interested in whether this malware can be detected by IDS. We could use him fragmentation switch and load the malware into multiple packages where they will be reassembled by the target, avoiding IDS or AV software.
kali > hping3 -f 192.168.1.116 -p 445 -d 100 -E malware
Where:
-
-d is the size of the payload data (here we have defined it as 100 bytes)
-
-E tells hping3 to get the data from the following file
This command then sends the contents of the malicious file 100 bytes at a time to the target on port 445.
Step 5: Traceroute with hping3
Traceroute is a tool that allows us to trace the path a packet takes over the internet from client to target by manipulating the TTL (time to live) of ICMP packets.
It can be a very useful tool for diagnosing problems in a network, and can also be used by hackers to find devices on the network and the location of firewalls, routers, etc. For this reason, most network administrators block ICMP (ping).
Fortunately for us, hping3 allows us to do exactly the same thing, but using TCP, which almost every firewall allows (otherwise, it wouldn't allow internet traffic). Let's try to run a traceroute using hping3 with the SYN flag on google.com.
kali > hping3 -z -t 1 -S Google com -p 80
Where:
-
-z binds the command to ctrl z on the keyboard so that each time it is pressed, the TTL is incremented by 1
-
-t sets the initial TTL (in this case, we use 1)
-
-S sets the flag to SYN
-
-p 80 sets the destination port to 80
In the screenshot above, the TTL is still 1 and hping3 tells us that the device is unknown. We can then press CTRL+z and increment the TTL by one and find every device between us and the target.
This screenshot shows us two devices between me and google.com. Continuing to press CTRL+z will increase the TTL and find each device until I reach the Google server.
Step 6: Predict sequence numbers with hping3
Another feature built into TCP to ensure its durability is the ability to reorder packets at the destination, even if they arrive scattered.
Remember that packets do not always follow the same path to the destination, so very often they arrive out of order. TCP puts a sequence number on packets so it can reorder them where they arrive.
This feature has been used by hackers for many years, for man-in-the-middle (MitM) attacks. To protect against MitM attacks, operating system manufacturers modified the TCP/IP stack so that sequence numbers are no longer numbered serially. Instead, to make a MitM attack more difficult, the operating system uses an algorithm to generate the sequence numbers.
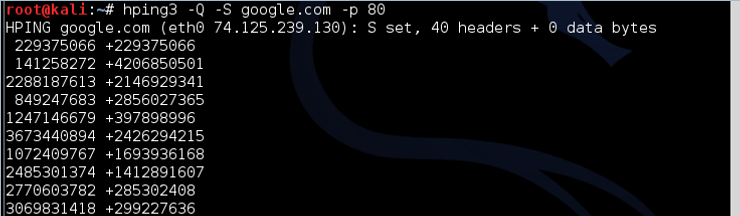
To perform a successful MitM attack, we need to predict the sequence numbers. hping3 can help us with this. We can make the target system respond with its sequence numbers and then from the sequence numbers we can decipher which algorithm the operating system is using. We can do this with the following command:
kali > hping3 -Q -S Google com -p 80
Where:
-Q displays the sequence numbers
As you can see, google.com responds with the sequence numbers, which hping3 captures and displays.
Step 7: hping3 for Uptime
Finally, we can use hping3 to find out how long the server has been up. This can be very useful information for the hacker, as usually the server needs to be restarted to apply updates and fixes. By knowing how long the system has been running, we can predict which patches have been applied and which breaches the system is vulnerable to.
For example, if we find a system that hasn't rebooted in three years, we can be pretty sure that any security patches released in that time haven't been applied. This means that all the vulnerabilities that became known during this time are still open in this system.
Hping3 uses the tcp-timestamp package to predict how long the system has been up.
Let's try this against google.com.
kali> hping3 –tcp-timestamp -S Google com -p 80
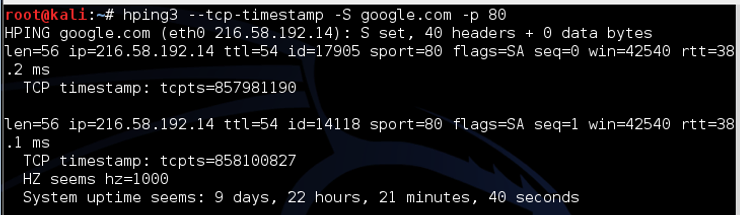
As we can see, this google.com web server is up for just 9 days, 22 hours, 21 minutes and 40 seconds. If you try this scan on other servers, you are likely to see much longer intervals between the last reboot, sometimes measured in years.
