The Windows 8.1 and Windows 8 have a very useful utility that allows you to create a recovery USB. If something happens to your operating system, say it can't start, then you can use the USB to recover to Windows 8, Windows RT, Windows 8.1, or Windows RT 8.1.
This disk will be very useful if you do not have other bootable media, eg. the installation tray Windows. Follow the steps below to create your own USB without third-party tools.
Connect a USB flash drive that is at least 4 GB in size to your computer. All data existing in it will be deleted, so if you have anything useful saved back it up before proceeding.
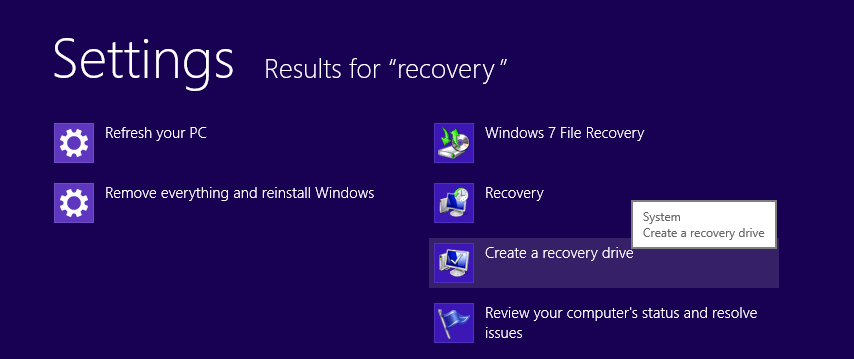
Open it screen Start and type Recovery. Select Create a recovery drive from the search results:

Alternatively, open the run by pressing the Win + R keys and type the following text in the box:
RecoveryDrive

Access the application from the UAC if the known window appears. Your Recovery Drive will run.
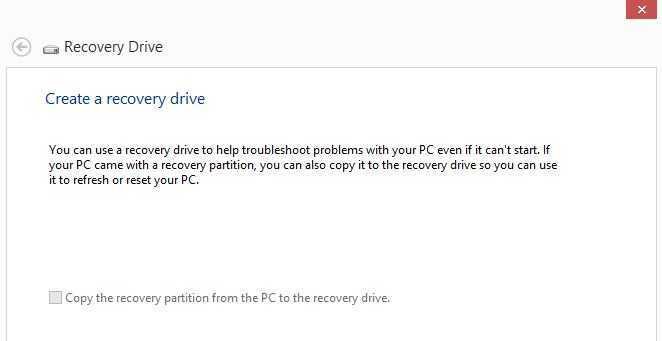
If you have a laptop with an OEM recovery partition, you will be able to copy its contents to your recovery unit. The "Copy contents from the recovery partition to the recovery drive" box must be checked.

Once you have copied the partition to the recovery drive, you can optionally delete the OEM partition, using the recovery drive driver.
We recommend that you do not delete it, as it may also spoil the built-in Windows 8 Renewal and Restore feature. It would be best to keep the recovery partition.
In the screenshot we used above, the “Copy contents from the recovery partition to the recovery drive” option is grayed out because the computer we created this guide on does not uses Windows in OEM version.
Follow the installation wizard and wait until all the necessary files are copied.
Are you ready. The next time your PC or laptop experiences a problem, you can use the USB drive you just created to recover your system.


