Gmail lets you schedule an email to be delivered to recipients at a specific day and time. In this article we will show you how to do it.
![]()
The ability to schedule the sending of an email in Gmail until a while ago was done through extensions, that is, through third-party developers. Gmail now gives you this possibility, without anyone's help extensionς. Η δυνατότητα να γράψετε ένα email σήμερα και να το αποστείλετε σε μελλοντικό χρόνο είναι ένα χρήσιμο χαρακτηριστικό και θεωρούμε ότι η πλέον διάσημη πλατφόρμα messages e-mail took too long to add to her quiver.
But let's see how to schedule an email in Gmail to be sent on a specific day and time.
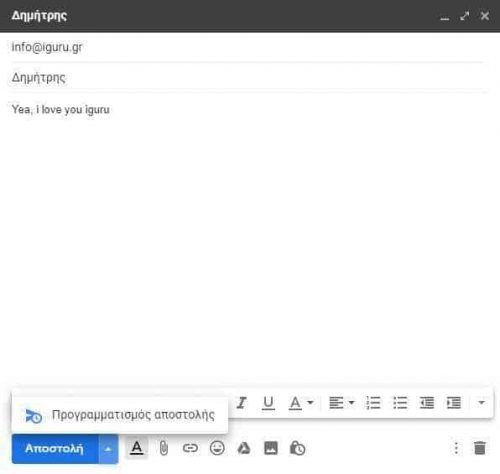
Step 1: Open Gmail and do click on the Compose button at the top left. Fill in the necessary details of your email, i.e. the recipient's email, the subject, and the text of your message.
Step 2: Now look a little better at the Send button. There should be an arrow next to it. From there you can access the programming mode. Click the arrow next to the word Send and you will see a drop-down menu from which to select Shipping Schedule.
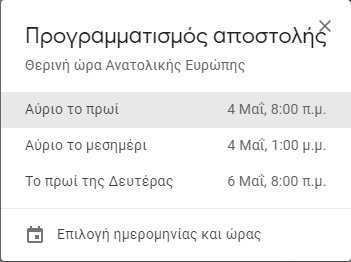
A small window will open with a few quick defaults on when you can send the email. If these defaults do not cover you, you can click on "Choose Date & Time".
A new window will appear with a calendar which allows you to select a desired date and time. You can have one minute precision in the date-time of the shipment. You can even schedule it for next year so you don't forget to send wishes to your loved one, for example Valentine's Day. After all, you know what will happen if you do not wish in as many ways as you can to your Valentine partner. You could even send it to yourself as a reminder (yes, you can email yourself to the same sender and recipient).
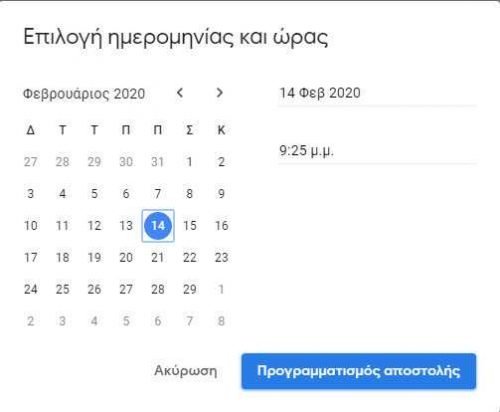
After choice of the desired date and time click Schedule Shipment. The email has been scheduled. If you later decide not to send the email (perhaps because you broke up with a loved one in the meantime) or want to edit it before sending it, you can do so.
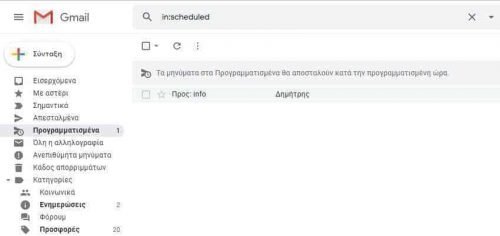
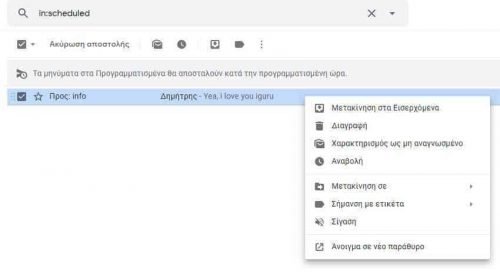
All you have to do is go to the "Scheduled" ones in the left column. Select "Scheduled" and inside it you will find all the scheduled emails. Select an email and you can edit it or cancel it or send it to the inbox etc.
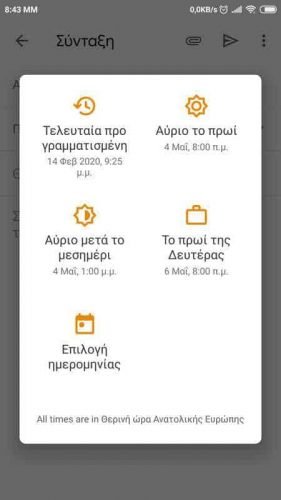
This feature works in addition to the Gmail web interface on the respective iOS and Android applications. On Android you will need to click on the three vertical dots next to the Mission signal to see a drop-down menu from which to select "Schedule Mission". The menu that follows is visually a little different from the web counterpart but has exactly the same logic. You will not find it difficult to understand.