If you have a Windows 10 device with a built-in monitor (eg laptop or tablet), you can change the brightness level of your monitor.

Logically if you have a Windows 10 device with a built-in display, you should by default see a brightness slider in the bottom center actions. If for some reason you don't have this indicator, see how to add or remove it, and by extension how to add or remove any indicator from Windows 10 Action Center.
If you do not have a Windows 10 device with a built-in display, the brightness slider will not be available. The reason is that built-in screens exist in Appliances that use a battery. And a brighter screen uses more power, which reduces battery life.
How to add the Brightness control in the Action Center
Step 1: Open the action center. If you do not know how to enter the Win + A keys at the same time
Step 2: If at the bottom of the action center you see the word "Develop" do it click on her. If you see the word “Shrink” go to the next step.
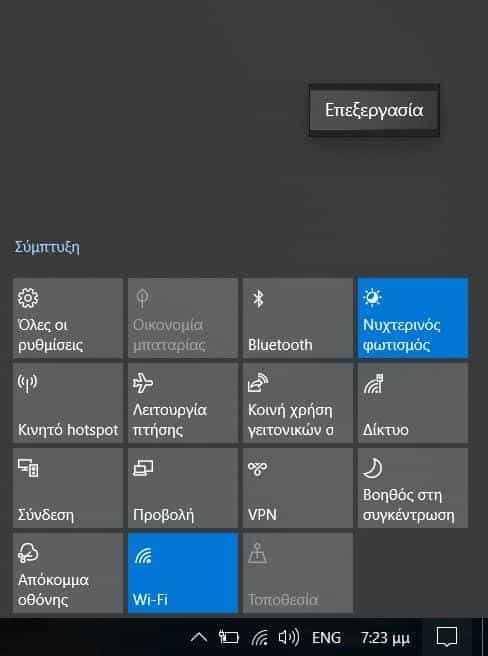
Step 3: Right-click or tap an empty area of the action center. Then click on the "Edit" tab that will appear.

Step 4: Click "Add".
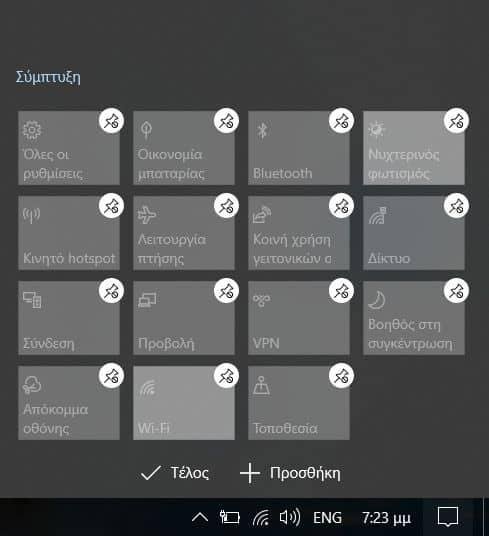
Step 5: Click on the word "Brightness" to add it.
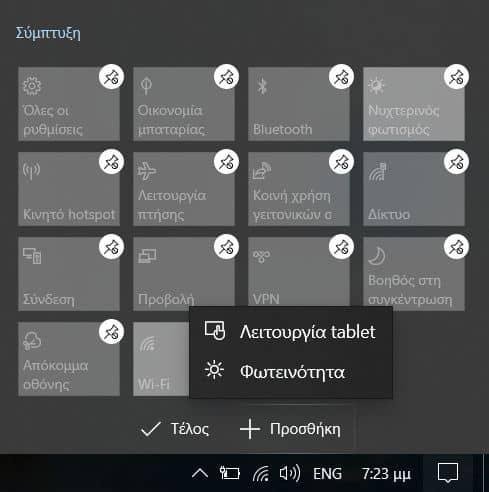
Step 6: Click "Finish".
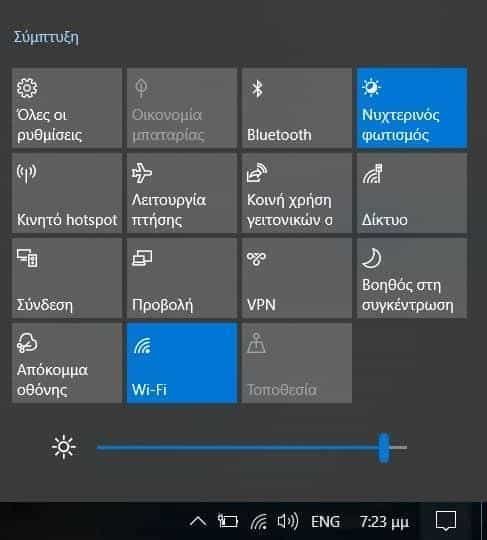
Follow the corresponding steps to remove the brightness adjustment, except that in Step 4 onwards, simply click on the pin in the upper right corner of the brightness and then press the "Finish" button.
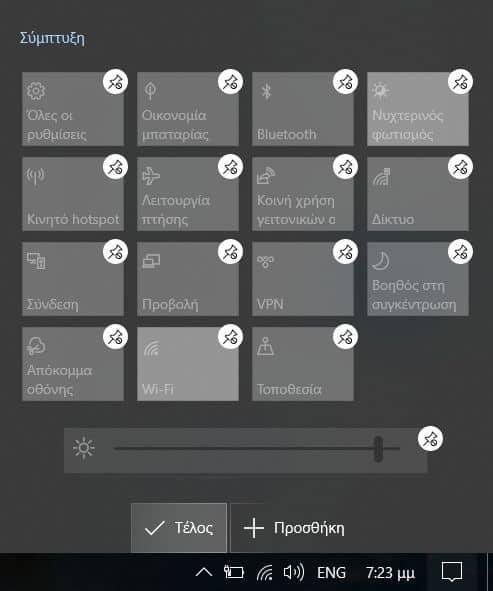
By the same token you can add or remove any action you do not want to appear. For example, if you do not have a touch screen, the "Tablet" action is completely useless and does not need to be present.


