
Ο File Explorer of Windows 10 comes with a useful feature called Auto Suggestion. When enabled, it automatically displays suggested text that matches the letters you type in the Run window, in the File Explorer address bar, and in the Open and Save dialog boxes of applications.
This way you speed up your work and save time. Auto-recommendation can be enabled or disabled in File Explorer with a simple Registry setting on all modern operating systems, including Windows 10, Windows 8, and Windows 7.
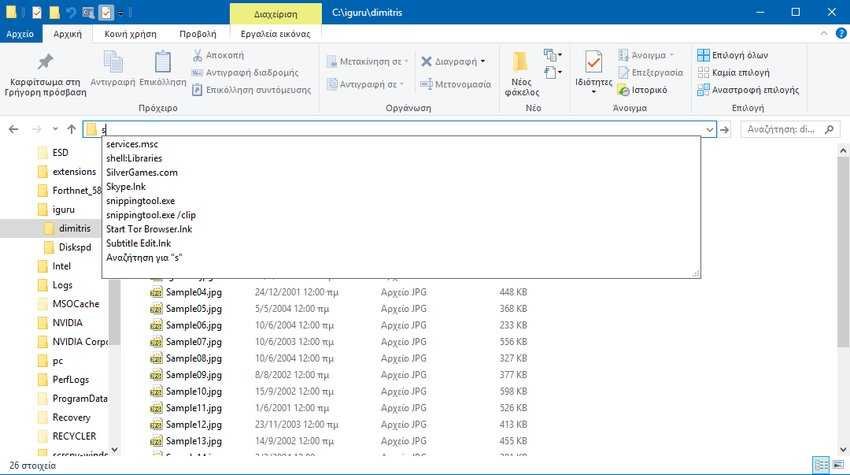
Auto Suggest is enabled by defaultchoice in Windows 10. When you start typing in Explorer's Run dialog or Address bar, a list of suggested matches from your navigation and command history automatically appears. You can save time by choosing a suggestion that Windows makes for you instead of having to type all the text.
If you find this feature annoying, or if you are IT in a company and you do not want Windows 10 employee computers to keep track of your own commands, you can disable it.
To disable auto suggestion in Run and File Explorer in Windows 10, do the following:
Step 1: Open Registry Editor. If you do not know how to do this, press Win + X at the same time, and in the Running window that appears, write Regedit and press OK.
Step 2: In the registry editor, go to the following registry key:
HKEY_CURRENT_USER \ Software \ Microsoft \ Windows \ CurrentVersion \ Explorer
Step 3: Create a new subkey named AutoComplete, if it does not already exist.
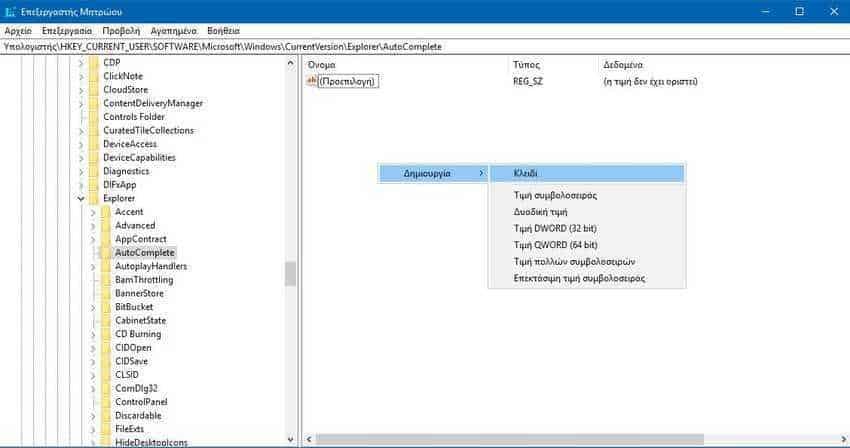
Step 4: Below the AutoComplete key, create a new string value named AutoSuggest.

Set the value data to “no” to turn off the feature. If you set it to "yes" then it will allow the operation.

Step 5: Close the registry editor. Your job will be saved automatically.
Step 6: Sign out of your account and sign back in. Alternatively, you can restart Explorer.
Alternatively, you can enable automatic suggestions through the classic Windows control panel. Let's see how.
Step 1: Open the classic control panel application. If you are not sure how to do it, just type the table in the Start menu and show you the control panel program.

Step 2: At Control Panel, go to Control Panel> Network & Internet> Internet Options.
Step 3: In the Internet Properties window that will open on screen, go to the Content tab. There click the Settings button under the Auto Enrollment section.
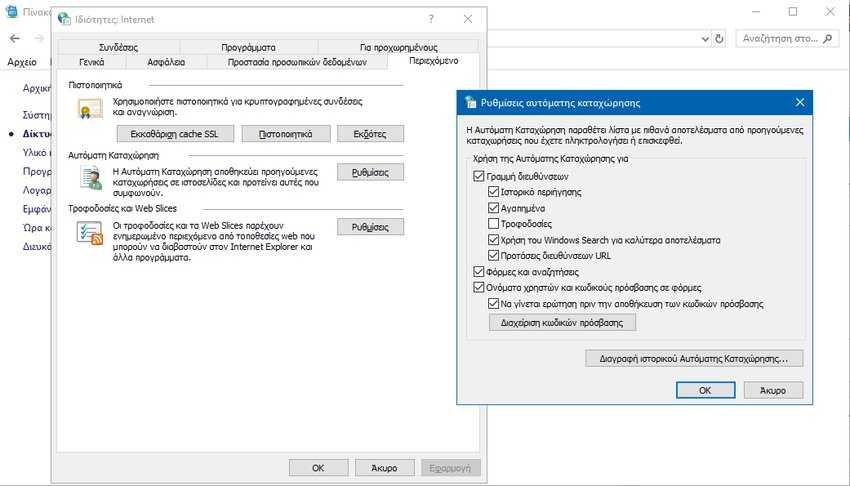
Step 4: In the next emerging dialog box titled “Auto-Enrollment Settings”, configure the “Use auto-enrollment for” option. Turn off the desired options. Press the OK button to save your changes.
