
The Windows 10 include the ability to create a history report of your WiFi connection. This report has interesting details about the networks your PC connected to, along with session duration, session start and end, errors and so on. Let's see how you can create this report.
To create a record of your WiFi connection history, do the following.
Step 1. Open a new one command line with administrator privileges.
Step 2. Type or copy-paste the following command:
netsh wlan show wlanreport
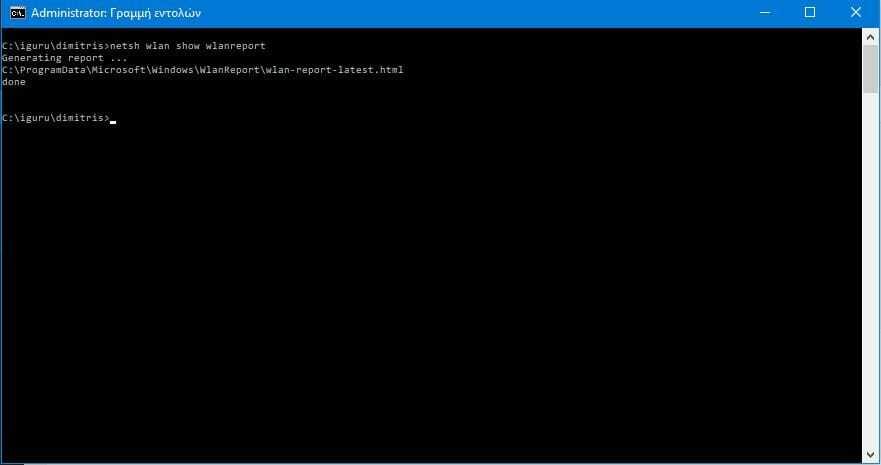
Step 3. The report will be saved in ProgramData\Microsoft\Windows\WlanReport folder. Will be created two files: wlan-report-latest.html and wlan-report-“simerini_imerominia”.html. To view the report, go to the ProgramData\Microsoft\Windows\WlanReport folder.

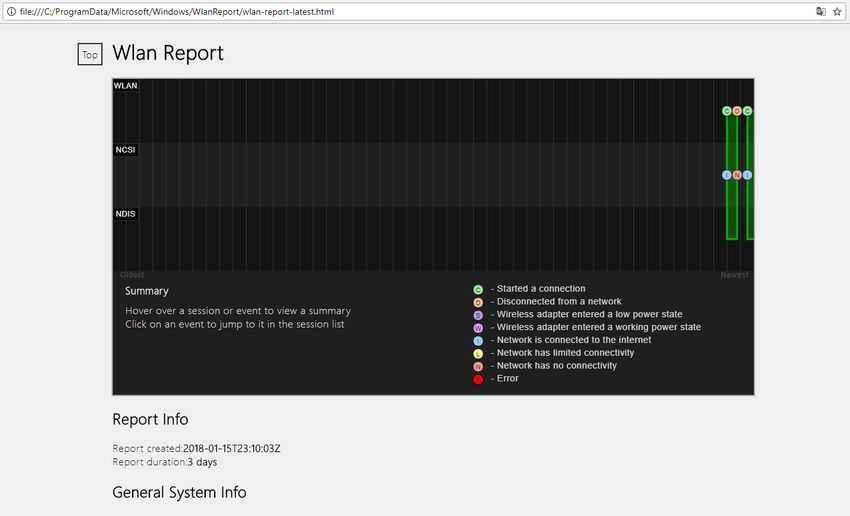
Step 4. Open the "WLAN-report-latest.html" file to view it with the default program touron your website.
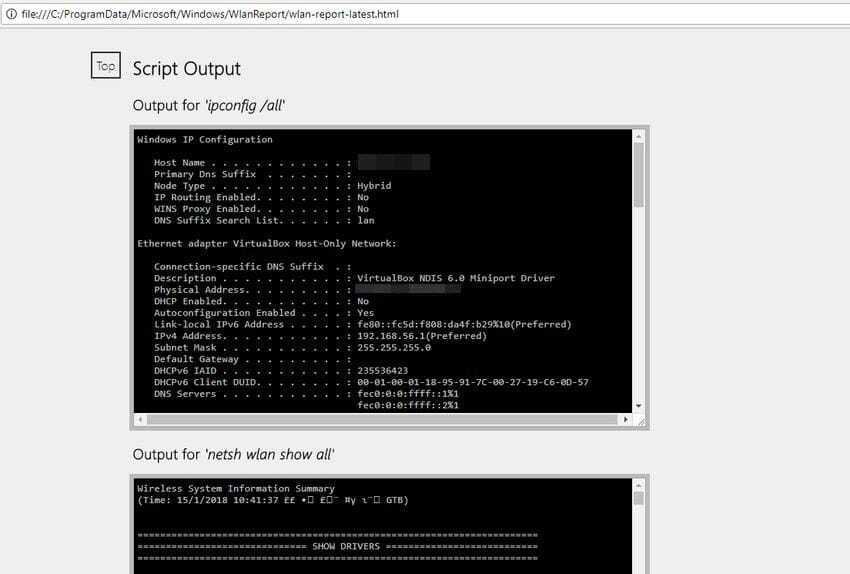
The report includes a number of sections, including system, user, network adapters, followed by a list of some embedded Windows tools such as ipconfig, netsh, etc.
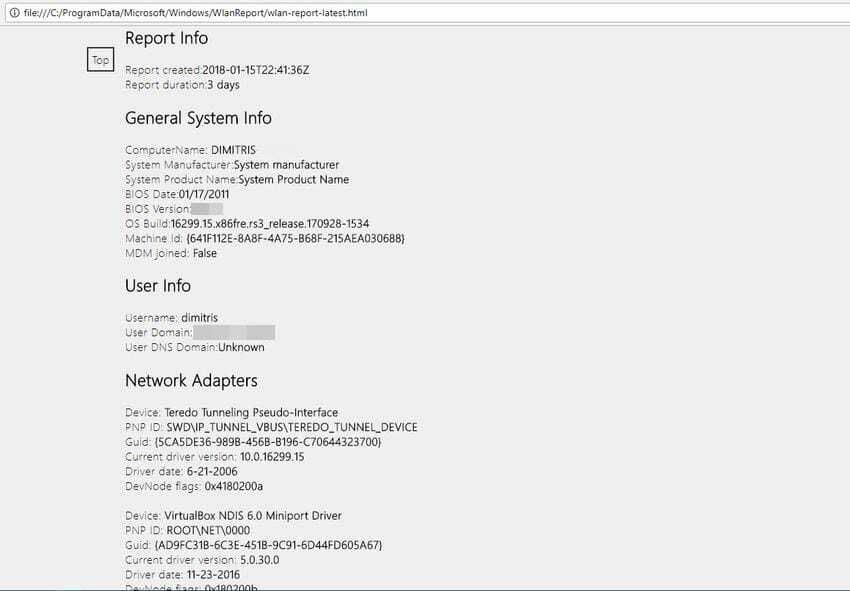
The system section (General System Info) contains some general information about the computer you.
The User Info section contains the current username and domain name.
The Network Adapters section lists all the physical and virtual network adapters on your computer.
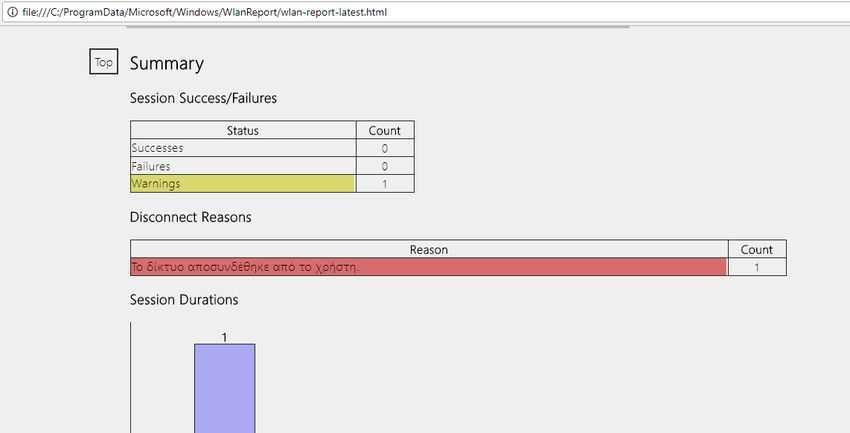
At the end of the section, there is a summary that states statistics, including the reasons for the disconnection WiFi.
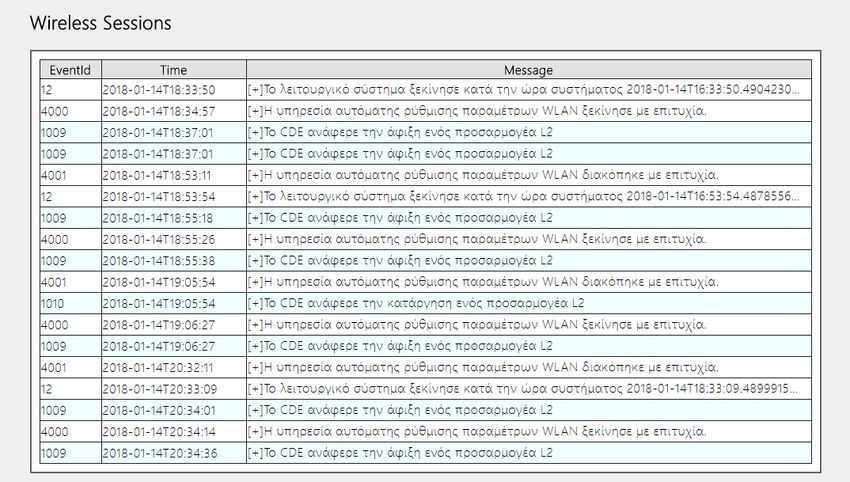
The unity "wireless Sessions" includes more details about each connection. This report is very useful when you want to check your wireless network usage in Windows 10 or troubleshoot connection problems.
The report generated by the built-in netsh tool. It is a command line utility that allows you to change many network-related parameters. In addition to wireless network management, netsh allows you to perform a wide range of maintenance tasks. With netsh you can enable or disable Discovery Network, restore the network connection, change the DNS server, and more.
