

A local WordPress site is a complete site that runs only on your computer. It’s invisible to anyone else, doesn’t require hosting or a domain , and works even without an internet connection. It’s the perfect way to learn WordPress, try out a new theme or plugin, or test a major update before implementing it on your regular site.
In this guide, we will look at two methods for Windows 11 : the easy one , with the Local app , which sets everything up in a few minutes, and the classic one , with XAMPP , where you set up the server, database, and WordPress yourself, and understand how each piece works. The guide is for WordPress 7.x , the current release series.
Which method to choose?
| Local (application) | XAMPP (classic) | |
| Installation time | About 5 minutes | About 20 minutes |
| Settings | None: does everything himself | Server, database and WordPress manually |
| PHP version | Choose (e.g. 8.3), different per site | One for all (8.2 in the current version for Windows) |
| Many sites | With one click, each with its own address (.local) | One folder per site in htdocs |
| HTTPS local | Yes, with one click | Not without additional settings |
| ideal for | Quick tests, themes, plugins | Learning how a web server works |
Method 1: with the Local app
Local is a free application for Windows, macOS, and Linux, specifically for local WordPress sites. It sets up the web server, PHP, database, and WordPress itself on its own.
Installation
1. Download the application from localwp.com (the form with your details is optional) and install it with the defaults.
2. Open Local. If prompted, allow firewall access for private networks only.
Website creation
1. Click the + at the bottom left and select Create a new site.
2. Give a name, e.g. iguru-testThe site will open at the address iguru-test.local.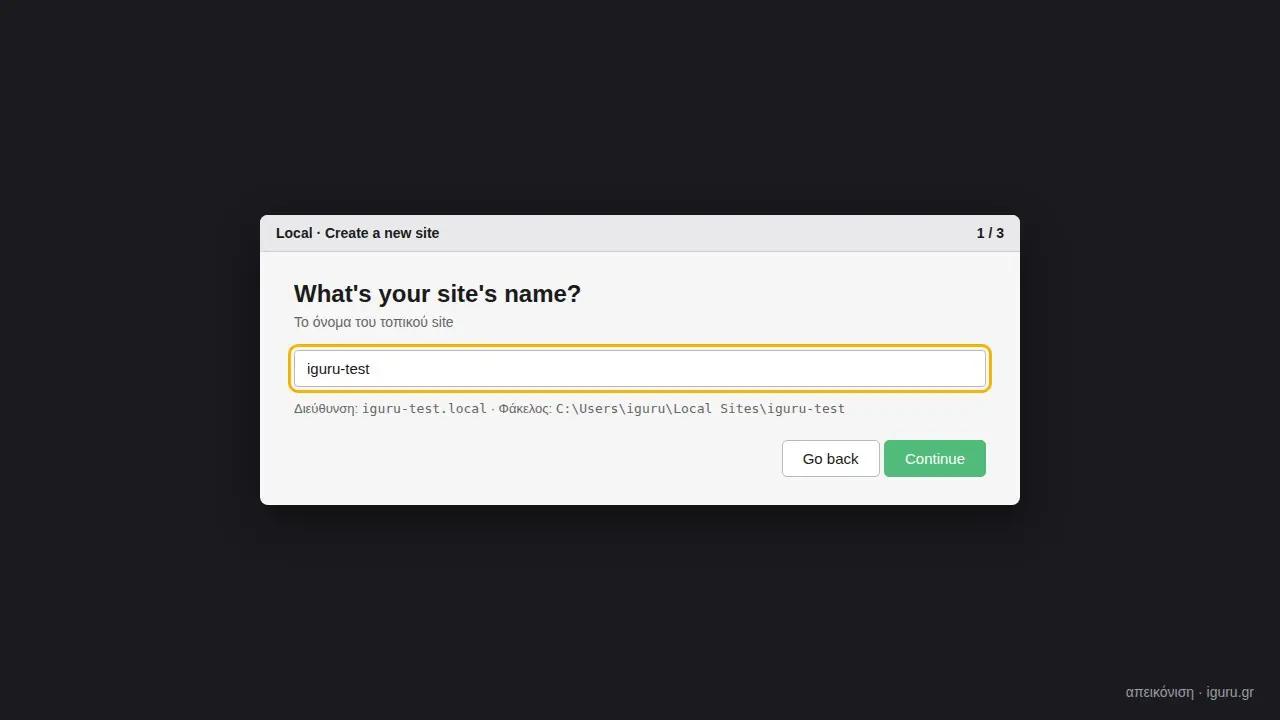
The first step: the name of the local site
3. In the environment, leave Preferred (recommended PHP, web server and database). With Custom you choose a specific PHP version, useful if you want to copy the environment of your regular server.
4. Set a username and password for the WordPress administrator and click Add Site.
5. Windows will ask for administrator permission: Local needs to add the address .place in the hosts file. Allow it.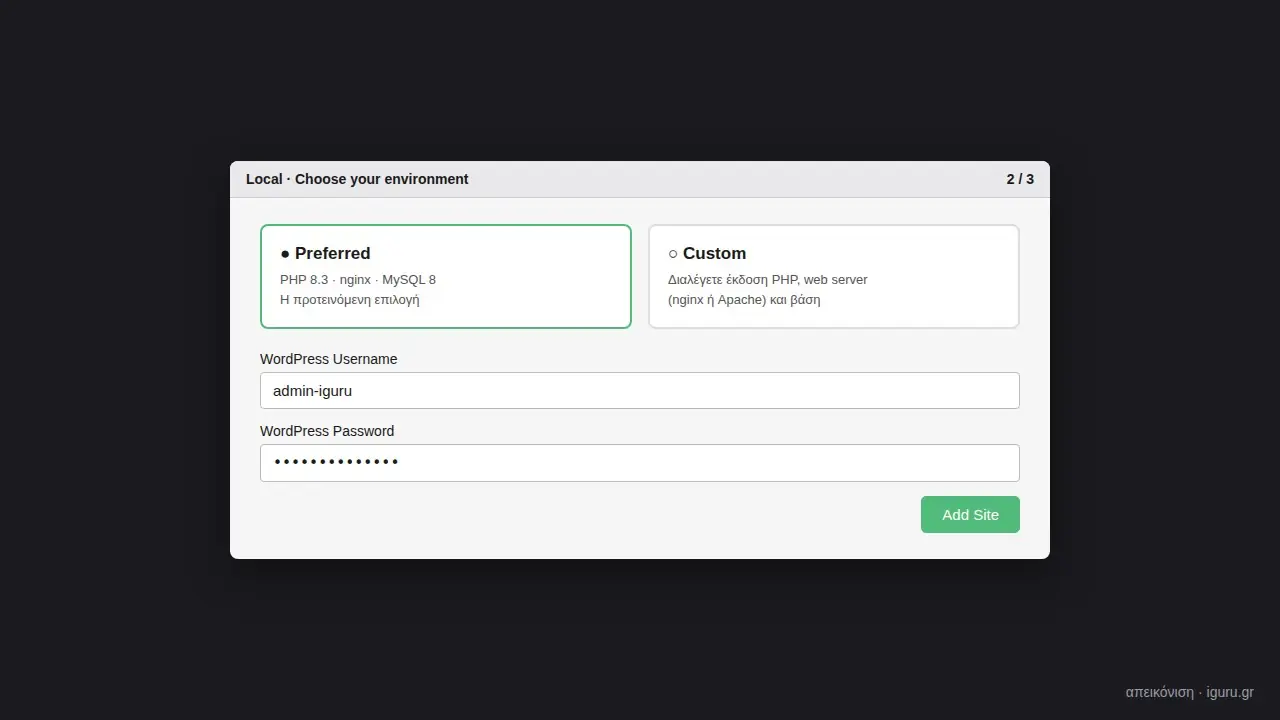
Preferred or Custom environment, and administrator details (display).
Use
In a few seconds the site is ready. With Open site you open it in the browser, and with WP admin you go directly to the control panel. Local also offers HTTPS with one click (Trust on SSL), access to database and Live Link, to temporarily show the site to someone over the internet.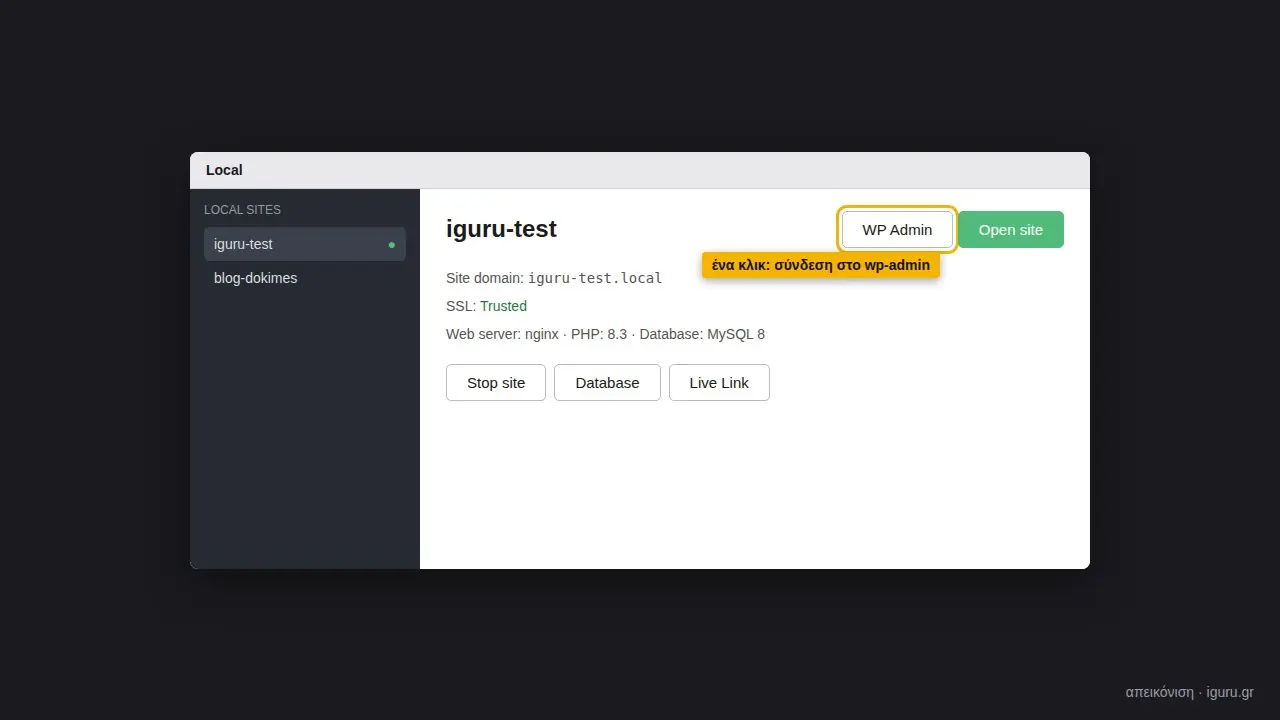
The site works: one click for WP Admin
When you're done, click Stop site so it doesn't consume resources.
Method 2: classic, with XAMPP
XAMPP is a free package that includes the Apache web server, the MariaDB database (compatible with MySQL), PHP , and phpMyAdmin for database management. The current version for Windows brings PHP 8.2, which meets the requirements of WordPress 7.x.
Step 1: Installing XAMPP
1. Download XAMPP for Windows from apachefriends.org.
2. During installation, Apache , MySQL , PHP and phpMyAdmin are sufficient . The rest (FileZilla, Mercury, Tomcat) are not needed.
3. Keep the folder C:\xampp . Do not install it in “Program Files”, because Windows User Account Control prevents entries there.
Step 2: Starting the server
Open it XAMPP Control Panel and press Start in Apache and MySQL. When they turn green, the server is running. If a firewall message appears, allow only the private networks.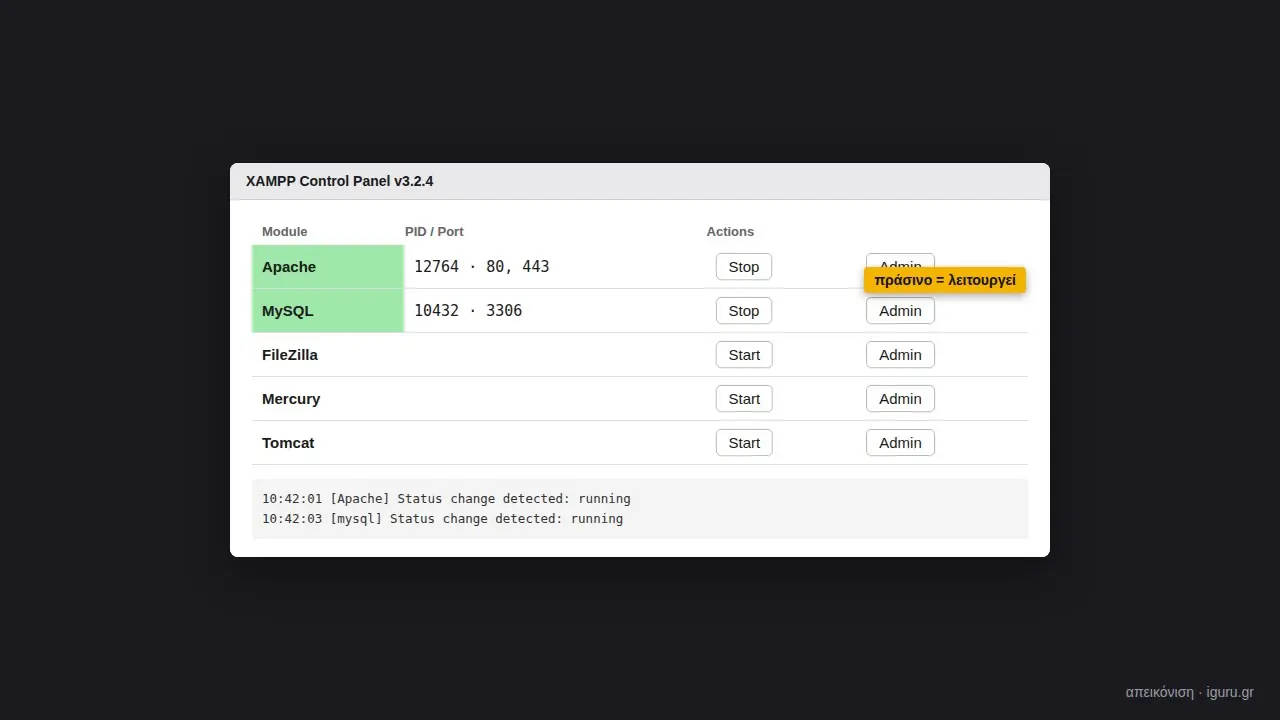
Apache and MySQL running in the XAMPP Control Panel
Apache not starting? Usually another program is already using port 80. Click Config → Apache (httpd.conf) , change the Listen 80 line to Listen 8080 , save and click Start again . From there, the addresses become http://localhost:8080/ ….
Step 3: Database
1. Open the address http://localhost/phpmyadmin in the browser.
2. Select Databases, write the name wordpress, choose the composition utf8mb4_unicode_ci (correct Greek and emoji support) and press Create.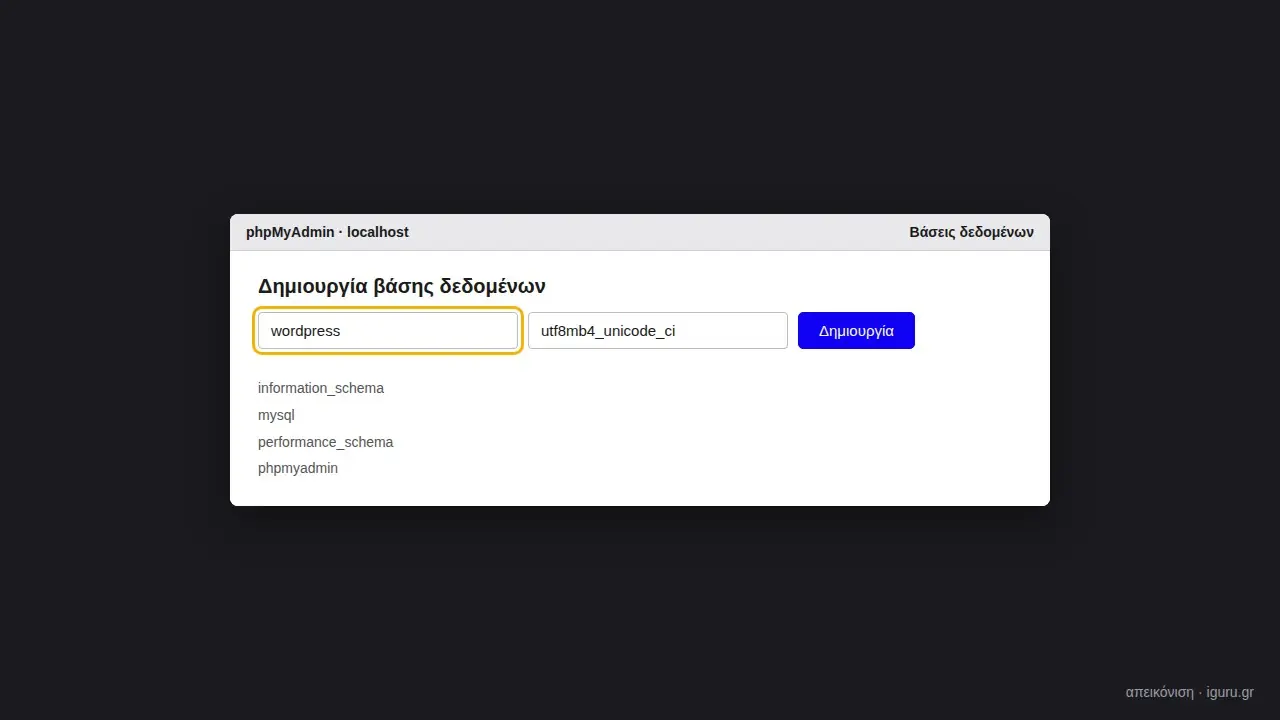
Creating the database in phpMyAdmin
Step 4: The WordPress Files
1. Download WordPress from el.wordpress.org (Greek version) or wordpress.org/download.
2. Unzip the zip file to the C:\xampp\htdocs folder , resulting in the C:\xampp\htdocs\wordpress folder.
Step 5: Installation
1. Open the address http://localhost/wordpress and the WordPress installation wizard will start.
2. Fill in the database details: name wordpress , user root , password blank (this is the XAMPP default), server localhost , prefix wp_ . Click Submit and then Run the installation.
3. Give the site a title, username, strong password, and email for the administrator, and click Install WordPress.
4. Log in to the address http://localhost/wordpress/wp-adminYour local WordPress is ready.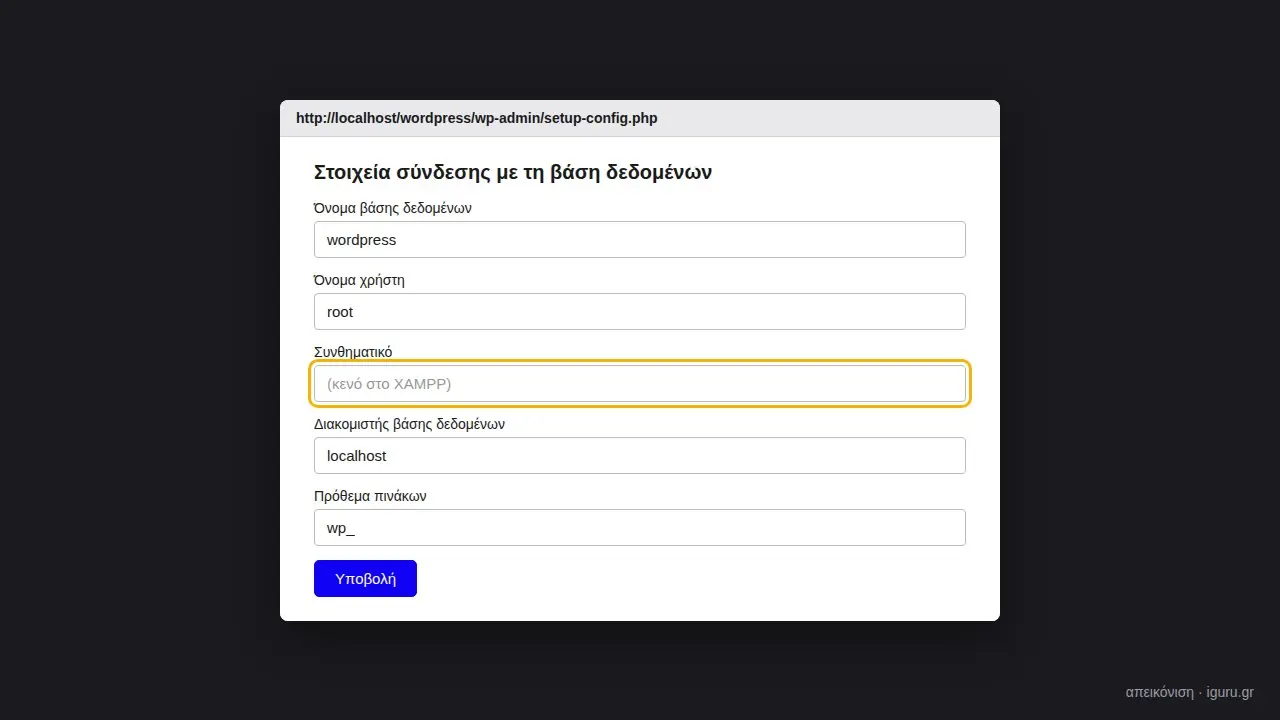
The database elements in the WordPress installation guide
Step 6: PHP Settings (optional, recommended)
XAMPP defaults are small for most themes and plugins. From the Control Panel, click Config → PHP (php.ini) , find and change the following lines, save, and click Stop and Start in Apache:
upload_max_filesize = 64M

post_max_size = 64M

memory_limit = 256M

max_execution_time = 300
If WordPress Tools → Site Health reports that the intl extension is missing , remove the semicolon from the ;extension=intl line in the same file and restart Apache.
Security: XAMPP is designed for local use. The root user of the database has no password and all functions are open. Never open ports on the router to this computer, and do not use XAMPP as a real server.
Useful tips
- From local to regular site: to move a local site online (or vice versa), Local has Export in zip, while in any case transfer plugins like All-in-One WP Migration or Duplicator.
- Copy of your real site: export the site with a migration plugin and import it into local WordPress. Test updates and changes safely, and only apply them to the live site when everything works.
- Email: Local sites usually don't send emails. Local collects them in the tab Mailpit, so you can see what the site would send.
- Updates: WordPress, themes, and plugins are updated normally from the control panel, just like on an online site.



0 reviews
iGuRu.gr