One of my most favorite features is Fedora as it follows a very short development and update cycle, which gives it the ability to offer the latest software and kernel to those who choose it. Below we will see what you can do after installing Fedora 25 Server edition.
It should be noted that due to the nature of the operating system (short update cycle - cutting edge distro) is not suitable for Server. Professionals use more stable distributions that offer more security.
Let us mention the close relatives of Fedora, CentOS and RedHat, which are currently two of the leading servers using thousands of businesses.
So you have finished installing and the black screen appears after the first restart:
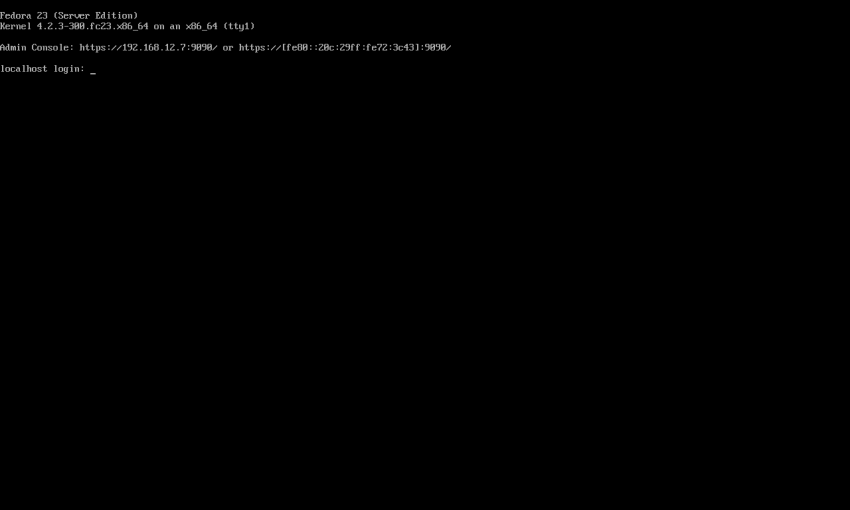
The first thing we need to do is update our operating system unless you have a NET install installing the latest updates.
On the black screen, which is basically a command screen after login (the name and password you chose during installation), give the following commands:
rpm -vh http://download1.rpmfusion.org/free/fedora/rpmfusion-free-release-25.noarch.rpm
dnf update
After upgrading the system we can add a graphical interface (optional).
We should mention that the system after installing the GUI will still be Fedora Server with all that this implies. In a nutshell, this means that it still has the default settings in Firewall. The system that will appear will look like a typical installation with the graphical interface you have chosen, but it may behave differently.
Updates or future editions of Fedora may cause additional changes. Most of the time, it will continue to work fine, but it works somewhat more paranoid than a typical installation because it's just a server system.
Let's start, give the order
yum grouplist
θα σας εμφανιστούν όλα τα διαθέσιμα graphical environments:
Fedora Workstation
KDE Plasma Workspaces
Xfce Desktop
LXDE Desktop
Cinnamon Desktop
MATE Desktop
Sugar Desktop Environment
Select the desired desktop (I chose Cinnamon for the example below) and give the following commands:
yum groupinstall "Cinnamon Desktop" - skip-broken
With -skip-broken at the end of the command we will avoid packages that may have malfunctions with the Server software.
Let's activate the interface:
systemctl set-default graphical.target
After a reboot you will see the desktop you installed. If you want to see it directly, please provide the following command:
startx
Let's change the hostname. Usually the hostname is localhost and you can change it during installation from the Network panel on the Anaconda feature selection screen (Redhat installer).
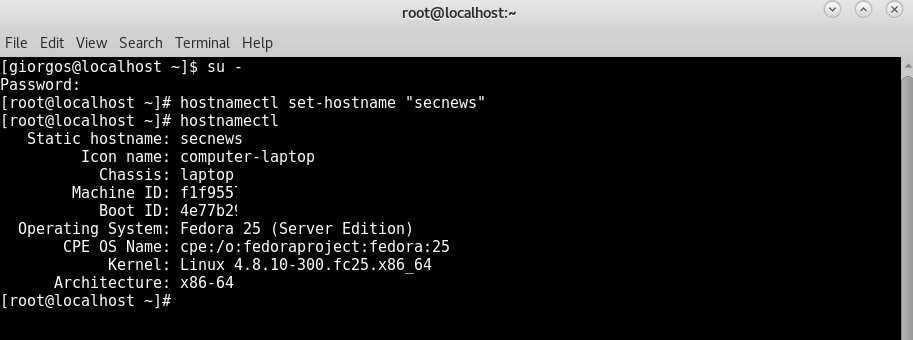
Provide the following command and change the content between quotes with the hostname you want.
hostnamectl set-hostname "Secnews"
Note: All commands do not need an interface.
Because I imagine you do not have a static IP to get your server out, let's look at a way out with your dynamic IP. There are several ways to do this, we will mention the two most easy.
We will do it through the router that useseven if your router does not support it, we will add a program that will find your dynamic IP at any time.
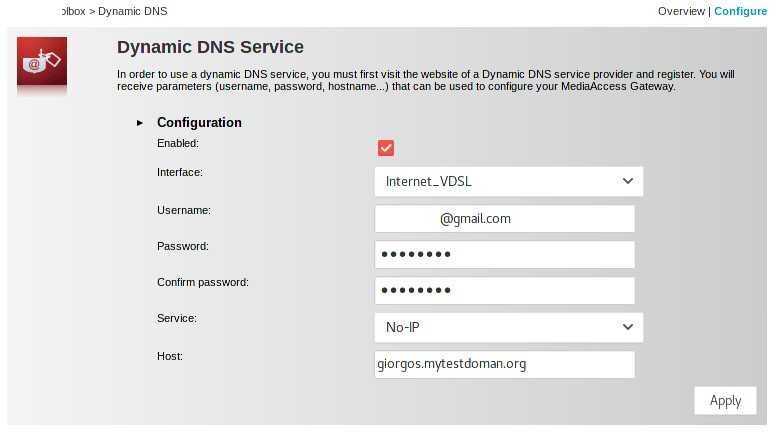
For starters, make an account at www.noip.com. (I used this because I already had an account and it supports my router). Find a free domain that matches your computer's IP. Normally you only have to find the domain, IP matching is done automatically.
Open it σελίδα router settings and find the settings (if available) for dynamic IP. Fill in the missing information (login email, service password and the domain you chose).
That's it. Your router with every IP change will update the service, which will match the new IP to the domain you selected.
If your router does not have the above settings, change the router or install the following application:
https://www.noip.com/download?page=linux
With make and make install, you can install the application. For more details, read the readme or the help pages of the service.
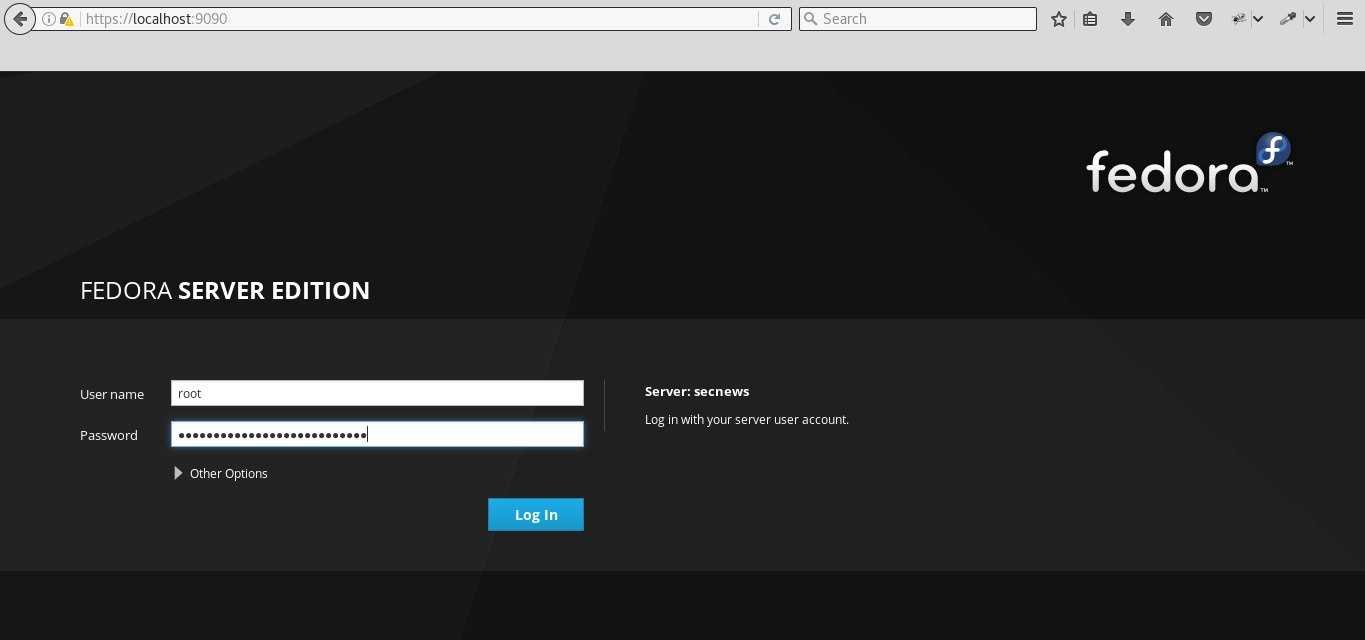
So now you have a graphical interface to work with, a host name, a static IP, and a pre-installed management panel from Fedora itself.
You will find it at
https://localhost:9090
Let's now see how you can install a panel with more web ui settings.
We will install Webmin an open source και δωρεάν web hosting control panel such as commercial cpanel.
Download webmin with the following commands
cd / opt wget http://www.webmin.com/jcameron-key.asc wget http://www.webmin.com/download/rpm/webmin-current.rpm
and proceed with installation
rpm - import jcameron-key.asc rpm -Uvh webmin - * .rpm
The control panel can be found at
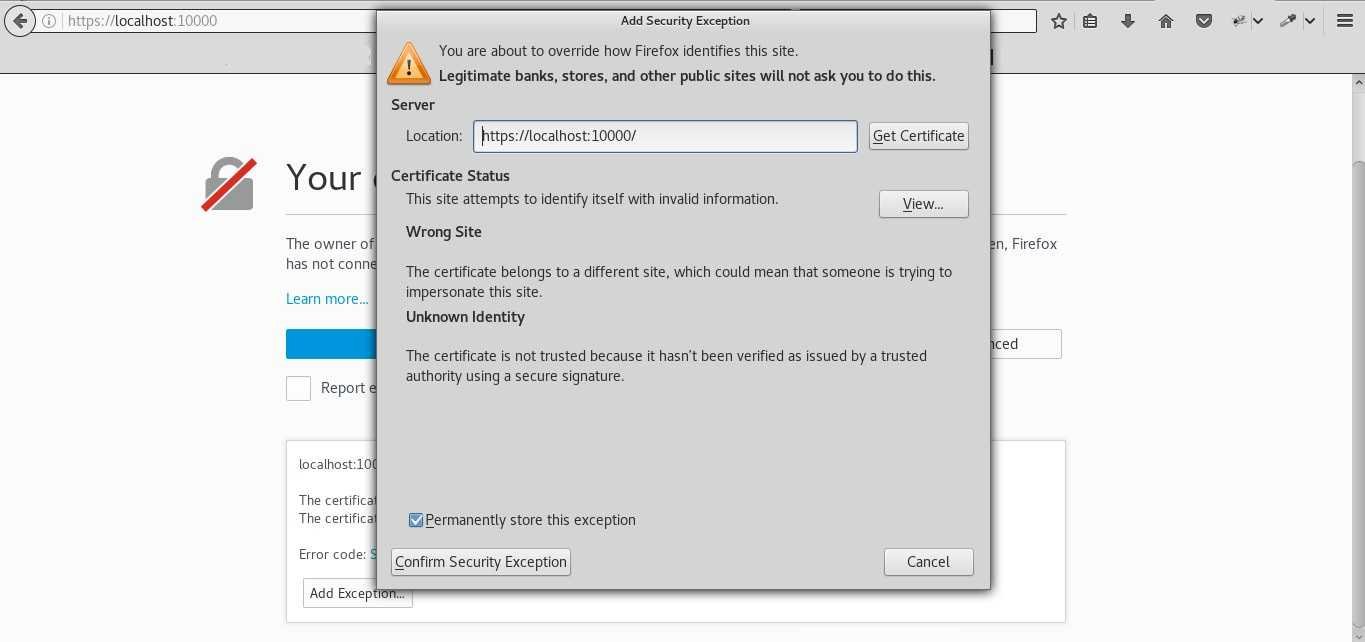
https://localhost:10000
To view webmin and the above Fedora panel, you'll need to add an exception to your browser:
You now have a Server ready. Before each move it will be good to read the documentation of each feature - service.
https://docs.fedoraproject.org/en-US/Fedora/21/html/System_Administrators_Guide/
http://www.webmin.com/docs.html
Good luck.


