
Access Denied? Have you ever tried to delete the Windows.old folder manually? One of the most "awkward" errorin Windows is the famous “Permission is required to make changes to this folder,” or the well-known “Access Denied.”

This problem applies to all Windows accounts, even for an Administrator's account that has all rights to the system.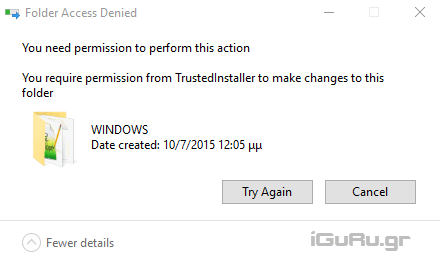
Did you think the administrator has unlimited and absolute rights to the entire file system? you should review your point of view.
With this guide, we'll see how you can get permissions on banned folders even on manager accounts.
Access Denied
Where are these envelopes? We have already mentioned one, the Windows.old folder that appears on your operating system disk, immediately after a new install that was not done in a clean way (disk format and setup from the beginning).
Another case is to copy Windows files or folders somewhere else on your computer and then try to delete them ... Impossible even if you are Super Admin.
Right-click the folder you want to banish in obsolescence and select Properties.
Let's see how it works, in our example we will try to delete the Windows.old folder on a system that runs Windows 10. The same way works in Windows 8, 8.1.
Right-click the folder you want to delete, and then click Properties, and on the Security tab, click Advanced
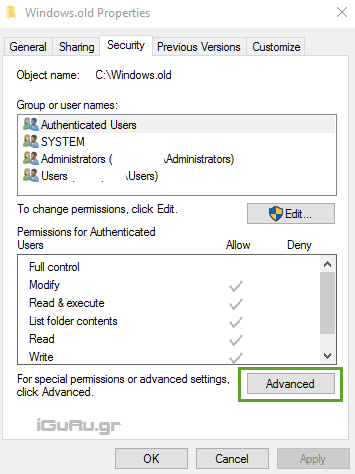
Along the top of the dialog box in Composites settings security settings for the folder, you will see the name and owner. In our case, owner is someone called TrustedInstaller who has exclusive rights to this folder.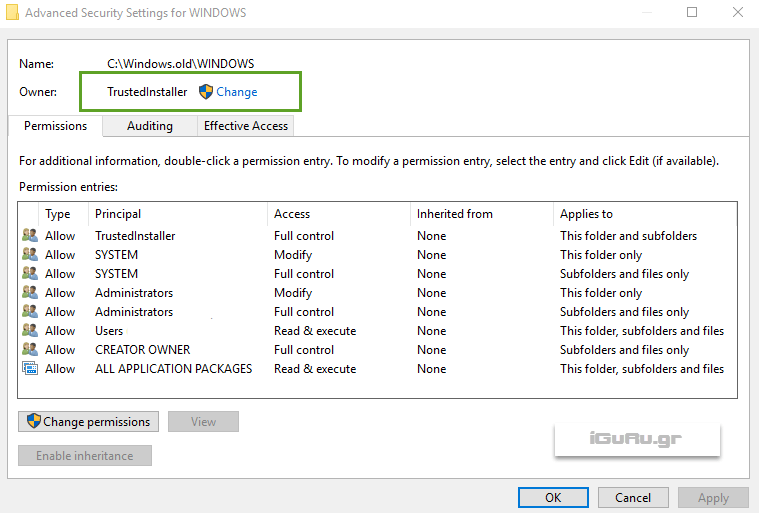
Who is this type of TrustedInstaller?
TrustedInstaller is a built-in account of Windows that installs, modifies, and removes operating system updates and components. Here's the problem: if TrustedInstaller owns a folder, then you can't take ownership of that folder, except if you know how to do it.
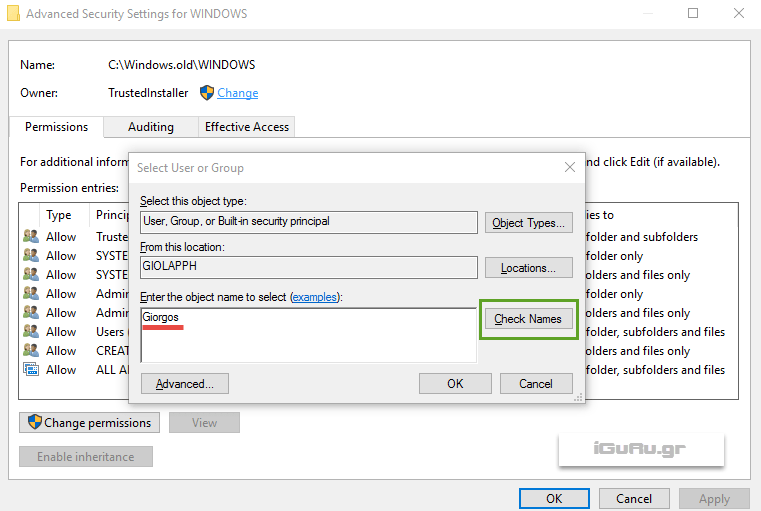
Let us change the ownership of this file.
Incidentally, if you are running Windows 7, Vista or an older system, you can change the owner by clicking on the tab while in Windows 7 or earlier versions you have to change owner from Owner Owner and selecting the Edit button.
Return to Windows 10, click Change or Change, type the user name you want to set as the owner, then click the Check Names button, and then click OK.
On the next screen you will see that the owner's name has changed.
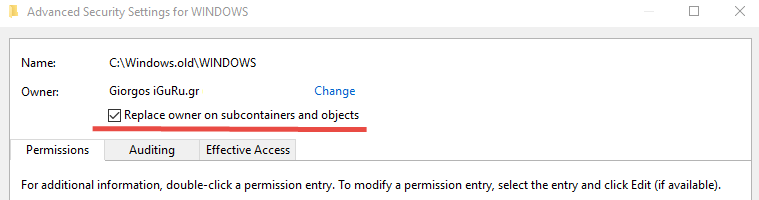
Make sure you check the small box to become the owner not only in the parent folder but also in the parent folder.
Click Apply.
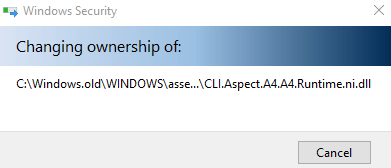
Windows will start changing the folder permissions.
If you see one message related to permissions click Yes.
There is still a step left to give yourself full control of the folder.
Right-click the folder again, select Properties, go to the Security tab again, and click Advanced.
From the Advanced Settings window, select the user you want to grant the extra permissions and click on the name you want to grant additional rights. 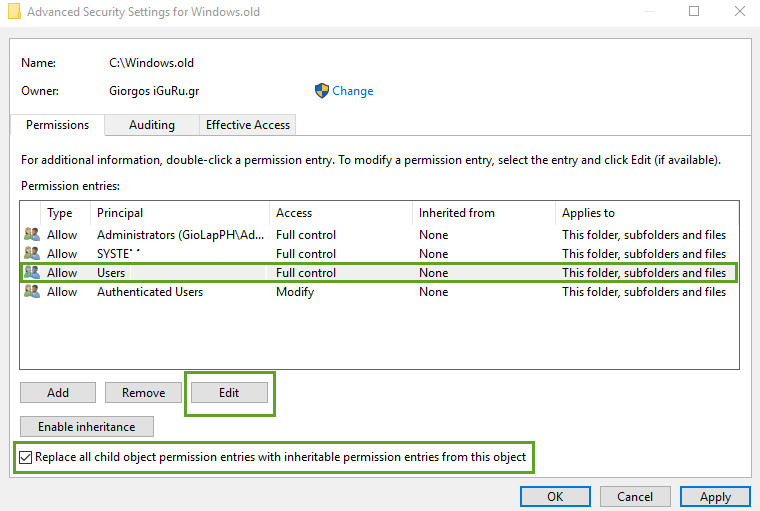
Check the box at the end of the window and click edit.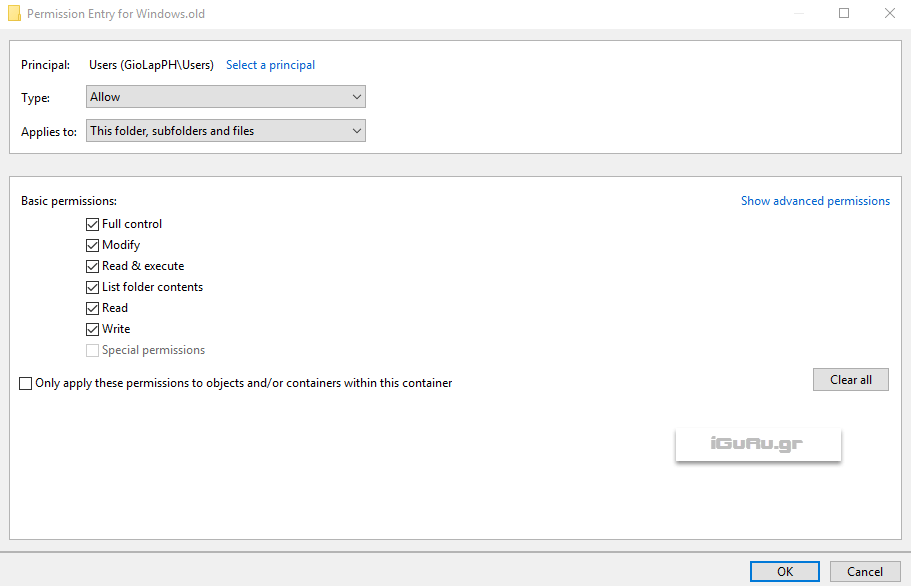
Select all permissions and click OK.
Windows will execute your command.
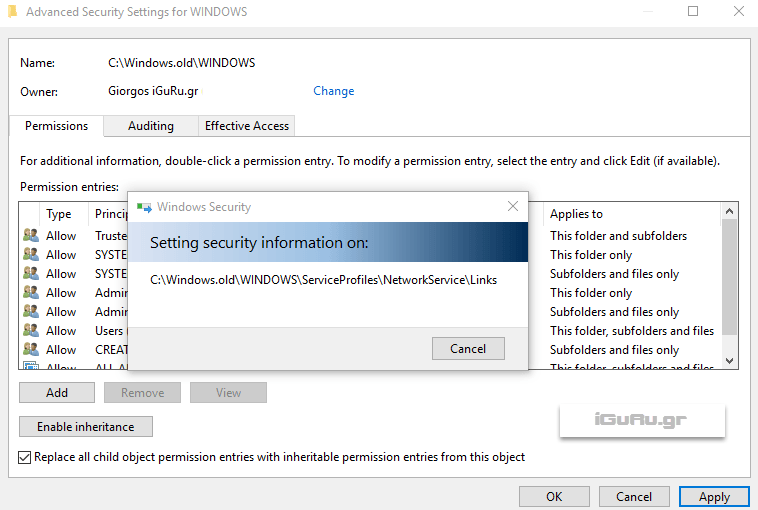
If you see a permission-related message, click Yes.
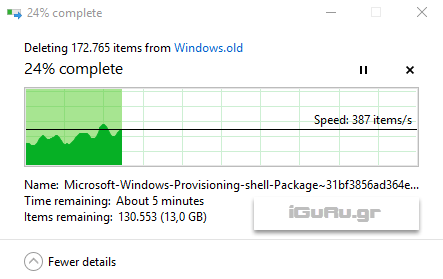
Now you can delete the folder that you did not want to delete without worrying Windows about not having the necessary rights.
- If a file continues to resist, check the rights with right-click and Properties and give your account as needed, as we did above.
