
In this article we will show you how to enable or disable Windows 10 access of applications on your microphone in three ways.

The microphone is one of the basic requirements for applications that need your voice. For example, Skype requires access to the microphone so that it can send your speech to your interlocutor. There are other applications with microphone requirements, such as voice recording applications, all chat applications, voice command applications, etc.
In Windows 10 you can set which apps can access your microphone using it application Settings or the registry or by using group policy. Let's look at all three ways.
How to enable or prevent applications from accessing the microphone in Windows 10
Method 1 - Through the Settings
1. Turn right click on the Start button or press Win + X and select Settings. Alternatively press the Win + I keys at the same time.
2. In the "Settings" application, go to Personal Data Protection> Microphone.
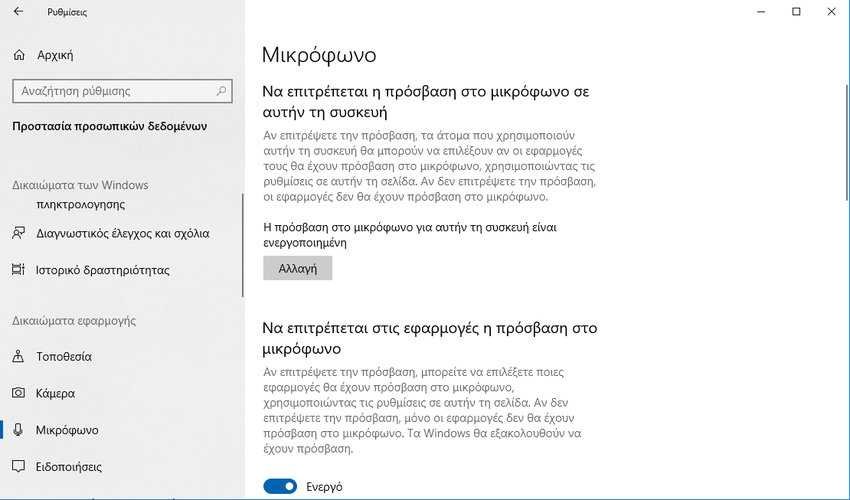
3. Now in the right microphone window, under "Allow applications to access your microphone", click On to enable or disable access to all applications on the microphone respectively.
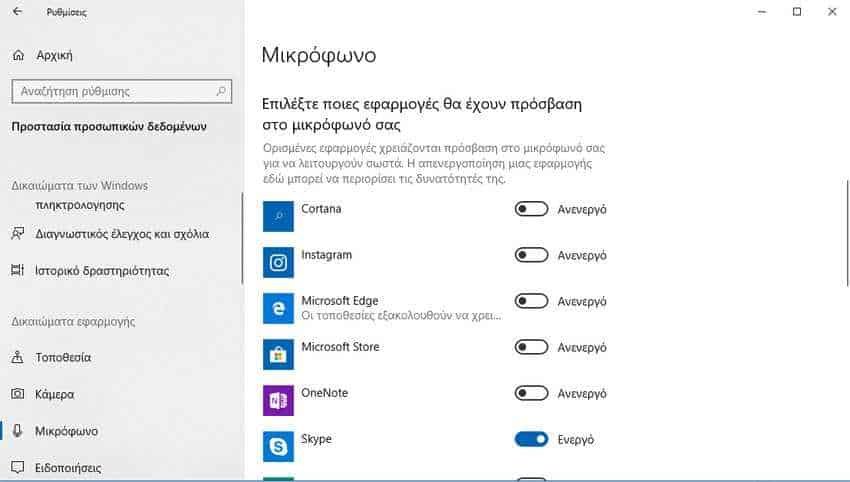
4. On the same page, in the "Choose which applications will have access to your microphone" section, you can select the applications that can use the microphone separately.
These options are automatically saved and the changes take effect immediately. You can then close the Settings app and return to your desktop.
Method 2 - through the registry
1. Create one registry restore point, for any case.
2. Press the Win + R keys at the same time and in the execution window that appears, type the word regedit and press the OK key.
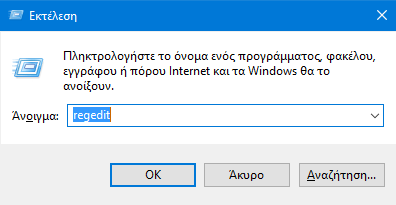
Answer Yes in the User Account Control window, which asks if you want to allow this application to make changes to your device (if asked).
3. On the left side of the Registry Editor window, go to the following registry key:
HKEY_CURRENT_USER \ Software \ Microsoft \ Windows \ CurrentVersion \ CapabilityAccessManager \ ConsentStore \ microphone
4. Under the “microphone” registry key, in the corresponding right part of the window, you will find the registry string Value ( REG_SZ ). Double click on it to modify its data prices of .
5. Set the value data to allow or not applications to access the microphone. Putting the word Allow allow access while putting the word Deny deny it. Click the OK button.
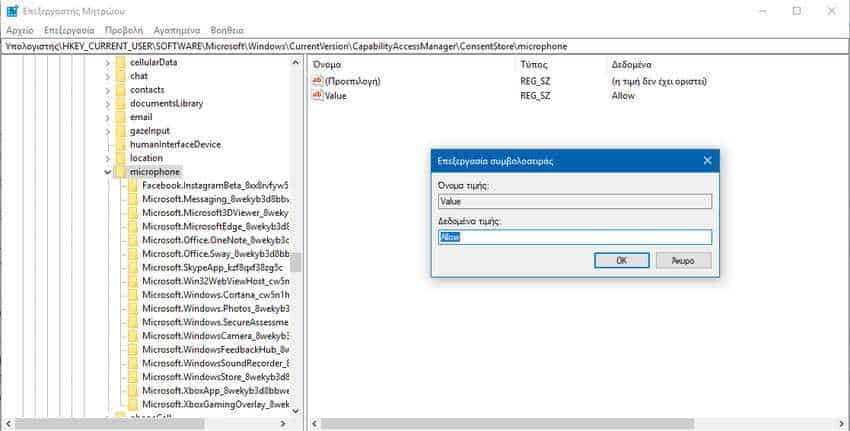
6. In addition to the general access of step 5 above, you can set access to each sub-application just below by setting application subkeys. The same logic applies to the words Allow and Deny. For each registry subkey, in the corresponding right pane, set the Value registry string value (REG_SZ) to Allow or Deny to set whether or not the application accesses the microphone.
7. Close Registry Editor and restart your machine for the changes to take place.
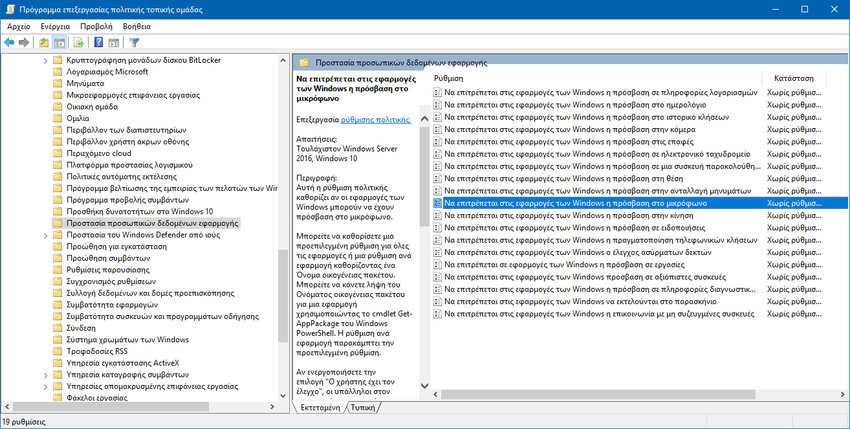
Method 3 - Set up a political group.
1. 2. Simultaneously press the Win + R keys and in the execution window that will appear type the word gpedit.msc and press the OK key.
2. In the left pane of the Local Group Policy Editor application, navigate to Computer Settings> Administration Templates> Windows Components> Application Privacy.
3. There, in the right pane, double-click "Allow Windows applications to access the microphone." In the window that will appear, click "On" or "Off" depending on whether you want your applications to have access or not.
In this method, unfortunately, you do not have the ability to configure your applications one by one, but we only have the master switch.
