Both Windows 11 and Windows 10 allow you to use them in different languages, depending on what you prefer. It's easy to add a new language pack and give them a look in the language you understand.

However, sometimes, you may want to do the opposite. That is, delete a display language that you no longer need. In theory, this is easy to do, as the application Settings allows you to remove a Windows display language with just a few clicks.
But there are times when the system it doesn't work properly and you just can't remove a language from Windows 10 or Windows 11 the easy way. See two ways to remove a Windows language, through Settings and through PowerShell.
What you need to know to remove the display languages from Windows 11 and Windows 10
When you remove a language pack using the Settings application, you are not actually uninstalling it. Simply remove it from the list of languages installed on your Windows PC or device. If you try to reinstall the same display language, Windows will not download it from Windows Update.

If this is the case, follow the first easy way of this guide. If you want to completely uninstall a Windows display language and all archives of then use the special PowerShell commands presented in the second way.
1. How to remove a language pack from Windows 10 and 11 using Settings
If you want to uninstall a language pack from your Windows 10 device, you must first open the Settings application. A quick way to do this is to press Win + I at the same time.
Then go to "Time and Language"
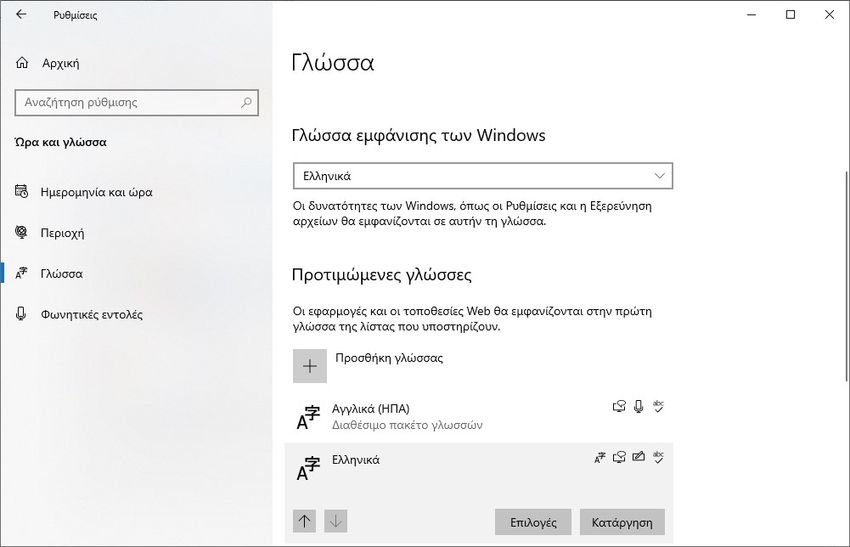
Click on "Language" or if you have Windows 11 on "Language & Area". You will see all the installed languages. Left-click on the language you want to remove and press the "Remove" button.

In Windows 11, click the three horizontal dots to see the "Remove" command.
Once you have removed the language pack, this language has been removed from your list and is no longer an option you can use to display Windows.
TIP: To get the language back, you must add it again. You can do this by following the steps in this tutorial: Windows 10 - Offline installation of the display language pack .
2. How to completely uninstall display languages from Windows 11 or Windows 10 using PowerShell
In Windows 11 and Windows 10, if you can not get rid of a particular display language, there is another, more radical way to uninstall using PowerShell. See how it works:
Start PowerShell or start Windows Terminal as an administrator and open a PowerShell tab from it. Then run the following command to get the list of Windows language packs installed on your computer:
Get-WinUserLanguageList
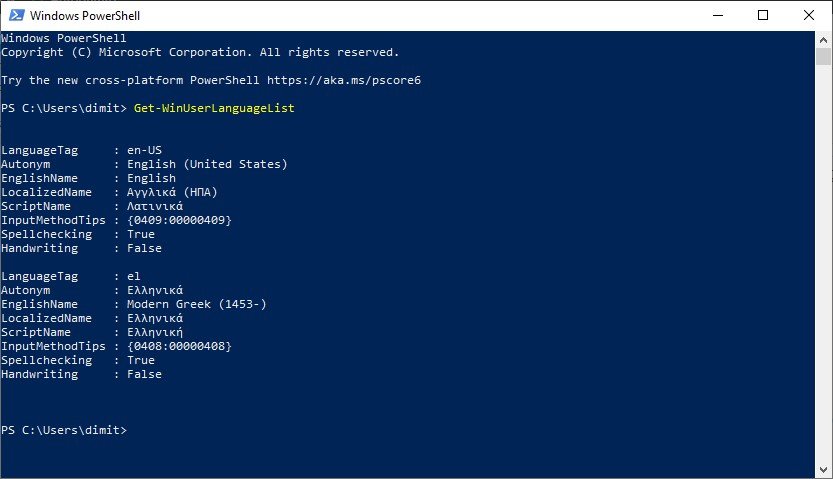
Look at the list of Windows language packs that are installed on your computer and note the LanguageTag of the display language that you want to uninstall. For example, we wanted to remove the Greek display language and LanguageTag is el, as you can see in the screenshot below.

Once you have identified the LanguageTag of the Windows display language that you want to get rid of, type (or copy / paste) and run the following commands, one by one:
$Languages= Get-WinUserLanguageList

$LanguageToUninstall = $Languages | where LanguageTag -eq "YourLanguageTag"

$Languages.Remove($LanguageToUninstall)

Set-WinUserLanguageList $Languages -Force
Make sure that in the second command you replace YourLanguageTag with the language label of the Windows display language you want to uninstall, the one you noted when you ran the first command. Do not delete the concealers.
In our example, because we wanted to uninstall the Greek display language of Windows, we replaced YourLanguageTag with el, and the command was:
$LanguageToUninstall = $Languages | where LanguageTag -eq "el"
Once you run these commands, the operating system immediately deletes the display language of Windows that you specified.


