
That's it AHCI (Advanced Host Controller Interface) is a technical standard that defines the operation of a Serial ATA (SATA) hard drive.

The AHCI mode (which has replaced the IDE mode) activates the NCQ (Native Command Queuing) if of course the disk supports it, as well as the Hot Plug (if the controller supports it). NCQ on the other hand improves hard drive performance and optimizes head movement (reduced wear and longevity of the disc)
Usually today's motherboards have been turned on by default AHCI in their BIOS. However, some older motherboards may have IDE default instead of AHCI. If you want to install Windows using AHCI instead of IDE, then you should normally have the AHCI in BIOS / UEFI enabled first.
The following example will show you how to enable AHCI on Windows 8 / 8.1 and Windows 10, after you have already installed the OS (operating system) with IDE. You must be logged in as an administrator to enable AHCI after you install Windows.
Warning
It is recommended to create a restore point before making the following moves. This way, if you make a mistake, you will be able to easily undo it by rebooting the system with the restore point.
1. From the original screen in Windows press Win + R to open the Run window, type regedit, and press OK to open the registry editor.
2. If you are warned by UAC that changes will be made to your computer, click Yes
3. In the left pane of the registry editor, go to the location
HKEY_LOCAL_MACHINE\SYSTEM\CurrentControlSet\Services\iaStorV
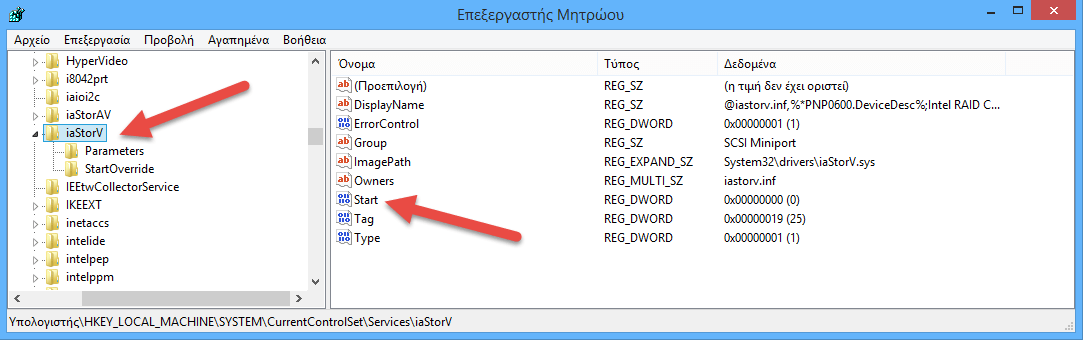
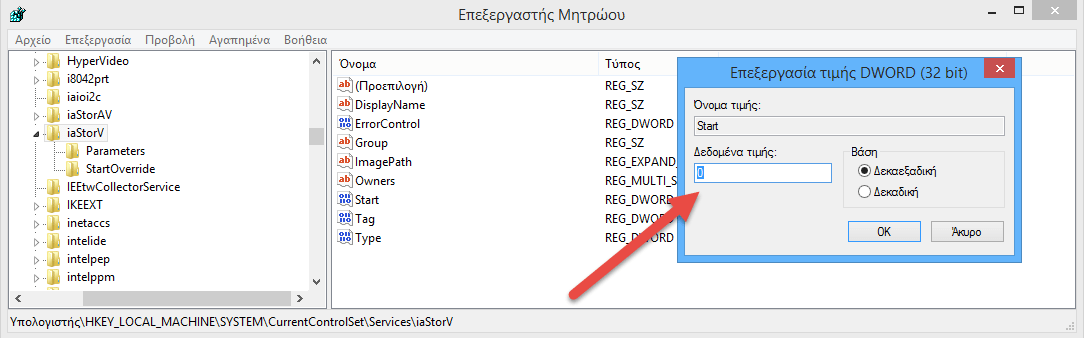
4. In the right pane of the iaStorV key, double-click DWORD “Home”To modify it.
5. Type 0 (zero) in the Value Data field that is marked Base in Hexademical, and then click OK.
6. In the left pane of Registry Editor, go to the location
HKEY_LOCAL_MACHINE\SYSTEM\CurrentControlSet\Services\storahci
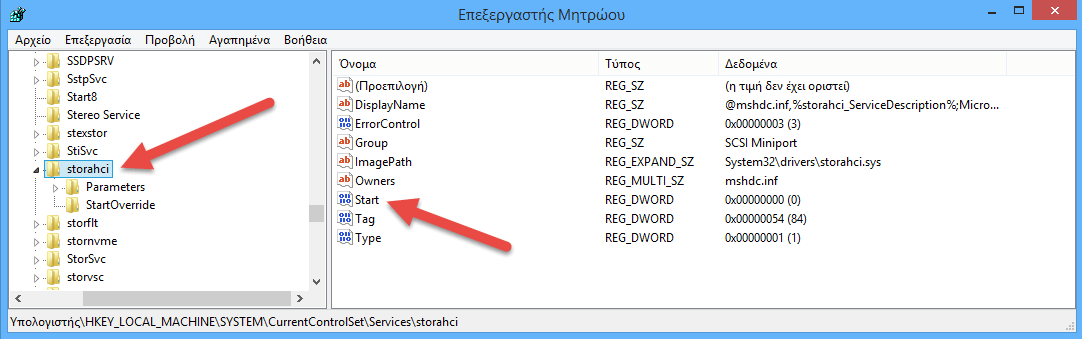
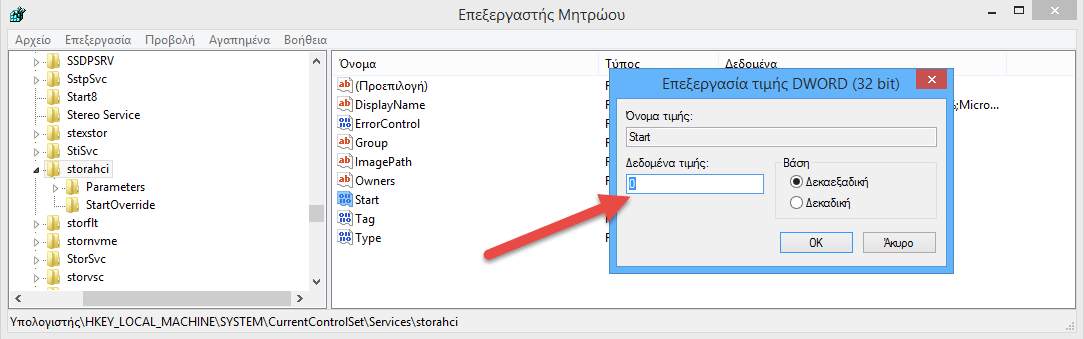
7. In the right part of the storahci key, double-click on DWORD “Home”To modify it.
8. Set the 0 (zero) value for AHCI just like in the previous 5 step and click OK.
9. When you are finished, quit the Registry Editor. Changes are automatically saved.
10. Restart your computer and go to BIOS when it starts.
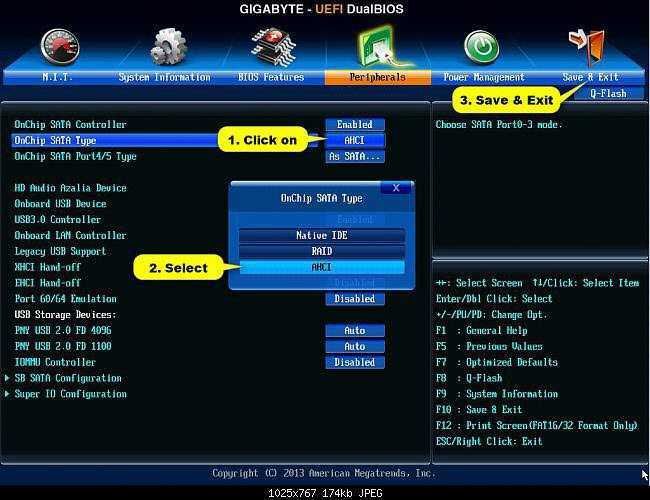
11. In the BIOS (or UEFI firmware) settings, enable AHCI, save your changes, and restart the computer.
Note
BIOS settings usually vary by brand and model number on the motherboard. Please read your motherboard manual for more specific details on how to change the SATA settings on it.
12. When it restarts, Windows will automatically install the proletterthe AHCI drivers.
13. When you're finished, you'll have to restart your computer for the last time.
