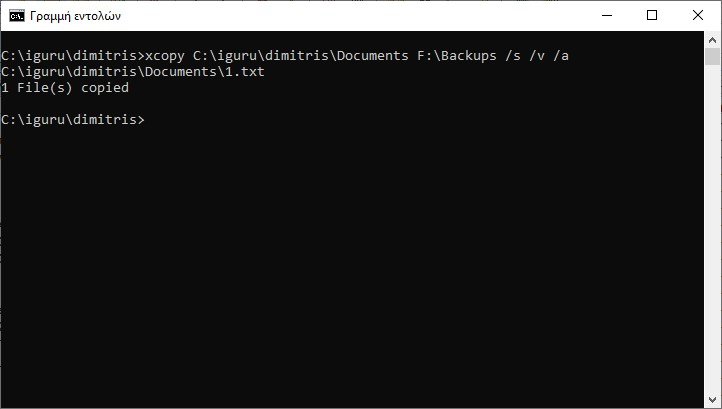
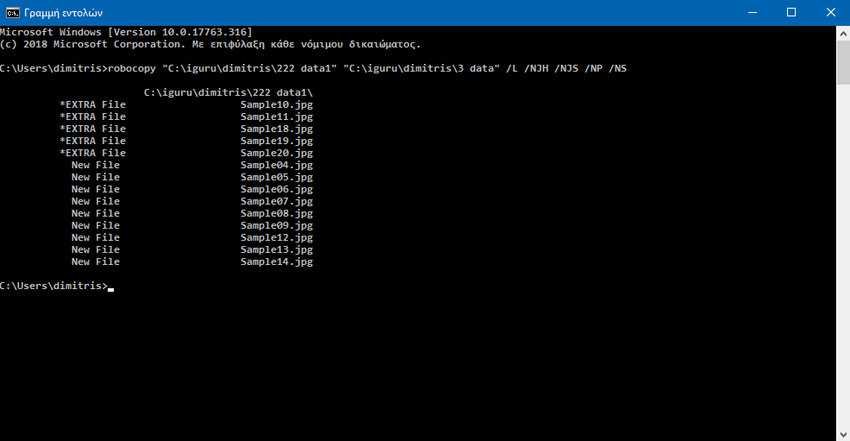
There are two basic commands in the Windows Command Prompt to backup your personal data archives. Xcopy and Robocopy? What are their differences and where should you use each?

What do you usually do if you want to copy a file to a computer running Windows? Normally you open file explorer and use the basic copy – paste command with the Ctrl + C and Ctrl + V shortcuts.
Did you know that there are more advanced tools for this task? We're talking about the built-in Command Line file copy utilities, Xcopy and Robocopy. Let's look at them in more detail.
Xcopy command?

The Xcopy command is a very powerful extended copy because it allows you to copy multiple files or entire directory trees from one directory to another, as well as across a network.
It has three important features: direct copy of the directory, recognition of updated files and exclusion of files based on file names and extensions.
Robocopy command?

Robocopy stands for Robust File Copy.
Built to be more robust than Xcopy as it performs complex or large file copy operations much faster than the basic copy command.
Robocopy is like a swiss army knife for system administrators. It is particularly beneficial for developers dealing with extensive directory structures and large file volumes.
Xcopy vs. Robocopy

Let's look at the differences of the two orders in five points: supported operating system, mirroring, features, monitoring and automation.
Supported operating system
- The Xcopy command supports Microsoft Windows, IBM PC DOS, IBM OS/2, MS-DOS, ReactOS and FreeDOS.
- The Robocopy command supports Windows XP/7/8/10/11 and other Windows operating systems later than Windows NT 4.
Mirroring
- Robocopy is used for directory mirroring or synchronization, while Xcopy has no such capability.
- Robocopy can check the destination directory and delete all files that are no longer in the main tree, instead of copying all files from one directory to another.
- Both can do differential backup, i.e. copy only files that have changed since the most recent full backup, to save time.
Specifications
- Both support file copying. However, Xcopy only supports a few features, while Robocopy can support copying all features, including security, owner, timestamps, and audit information.
These features are quite important to maintain a correct directory structure, especially when copying files as an administrator.
Tracking
- Xcopy is simpler and doesn't even have tracking support.
- Robocopy can take advantage of the /MON or /MOT command to monitor your files and directories.
The /MON:x and /MOT:y parameters in Robocopy work something like this:
/MON:x = copy file to destination with x or more changes
/MOT:y = will help you check the file every y minutes for any changes and then copy the file when there are some changes in it.
Automation
When you want to create daily backups or do some big patching jobs that might take some time but without any interaction, automation is a pretty good option.
The /RH parameter in Robocopy allows you to set when the copies should be made instead of setting the time of the command as with Xcopy.
At the same time, the robocopy.exe process will appear in your task list, as it will check the clock to look for when it should copy, and will also contain a log with the /LOG:file option.
Using each command

Xcopy command
The syntax of the Xcopy command is as follows: Xcopy [“source”] [“destination”] [options].
Let's look at an example:
Suppose you want to copy a file called Source.reg from the News2023 folder on drive C to the “News2024” folder on drive E. then using the Xcopy command you would write
XCOPY "C:\News2023\Source.reg" "E:\News2024" /I
It is recommended to add quotation marks to each path to avoid errors when the file and folder name is longer than 8 characters or contains spaces.
As for copying a folder including all subfolders, you need to use the following command:
XCOPY "C:\News2023" "E:\News2024" /S /I
About the most basic parameters of Xcopy:
- /C – Continue copying if an error occurs.
- /D:mdy – Copies files changed on or after the specified date. If no date is specified, it only copies files whose source time is later than the destination time.
- /E – Copy subdirectories including spaces.
- /H – Copy files with hidden attributes and system file attributes.
- /I – Running this option will force Xcopy to assume the destination is a directory. If you don't use it and want to copy to a non-existent destination, the /I command will prompt you to enter whether the destination is a file or a directory.
- /K – Copies the attributes. Normally Xcopy will delete read-only attributes.
- /R – Replaces read-only files
- /S – Copy directories, subdirectories and the files contained in them except for spaces.
- /Y – Unconfirms that you want to overwrite an existing destination file.
- /V – Verifies every copied file and folder.
If you want to see an example of how to make an automated backup of your files using Xcopy, read our article: xcopy - Windows 11: How to back up.
Example
If you want to make an automatic backup of various folders on a specific disk, then you can make a txt file and write the following text in it:
@echo off

REM Συγκεκριμένοι φάκελοι προς δημιουργία backup

set "source_folder1=C:\path\to\source"

set "destination_folder1=D:\path\to\destination"

REM Εκτέλεση του xcopy για τη δημιουργία του backup

xcopy "%source_folder1%" "%destination_folder1%"  /E /H /Y /I /D /C /K /R /S

pause
Rename the name.txt file to name.bat to make it executable, and run it either manually or through the Windows task scheduler.
The above example copies all files in source_folder1 to destination_folder1, along with all their subfolders ( /S ), and only the files that have changed, i.e. it does an incremental backup ( /D ).
Robocopy command
The basic syntax of the Robocopy command is: Robocopy [source] [destination] [files] [options].
Robocopy is such a powerful as tool file transfer that has more than 80 switches!.
Let's look at an example:
Let's say you want to move two files, arxeio1.doc and arxeio2.xls from C:\dimitris to D:\iguru as an example. You can replace these names with your own. In our example you should issue the command:
robocopy D:\dimitris E:\iguru arxeio1.doc arxeio2.xls
It is recommended to add quotation marks to each path to avoid errors when the file and folder name is longer than 8 characters or contains spaces.
If you just want to copy the entire C:\dimitris file to D:\iguru, the command will be simplified to:
robocopy D:\dimitris E:\iguru
as by default if you don't mention files it means all files ie *.*
About the main parameters of Robocopy:
- /S – Copy subdirectories and exclude spaces.
- /E – Copy subdirectories, even empty ones.
- /J – Copy using unbuffered I/O (recommended for large files).
- /COPY:copyflag[s] – What to COPY with files (default is /COPY:DAT). It can accept D=Data, A=Attributes, T=Timestamps, X=Skip alt streams data, S=Security=NTFS ACLs, O=Owner info, U=aUditing info.
- /PURGE – Delete files/dirs that no longer exist in the source.
- /MIR – Mirror a directory tree (equivalent to /E plus /PURGE).
- /XO – Exclude older files and is usually done with the /maxage:n parameter.
- /XC – Exclude changed files.
- /XN – Exclude newer files.
- /SL – Copy symlinks as links instead of target links.
- /SEC – Copy files securely (equivalent to /COPY:DATS ).
- /FAT – Create destination files using only 8.3 FAT filenames.
- /CREATE – Create directory tree and zero-length files only.
And these are only a small part of the parameters. There are a bunch that will meet your every need.
Example
If you want to make an automatic backup of various folders on a specific disk, then you can make a txt file and write the following text in it:
@echo off

REM Συγκεκριμένοι φάκελοι προς δημιουργία backup

set "source_folder1=C:\path\to\source"

set "destination_folder1=D:\path\to\destination"

REM Εκτέλεση του robocopy για τη δημιουργία του backup

robocopy "%source_folder1%" "%destination_folder1%"  /MIR /J /COPY:DAT

pause
Rename the name.txt file to name.bat to make it executable, and run it either manually or through the Windows task scheduler.
The above example copies all files in source_folder1 to destination_folder1, along with all their subfolders, but only the files that have changed. At the same time, it deletes from the destination any files it has that no longer exist in the source ( /MIR ).


We thank Giorgos T. Kanellakis for his kind suggestion on the exact syntax of the differential backup.
And as he rightly mentions "this difference between incremental and differential backup has driven people crazy :)"