
We can run one server on Ubuntu, without being Ubuntu Server or LAMP? The Ubuntu operating system is also known as the beginner's Linux, as it allows every Windows user to try the Linux philosophy in a very accessible and easy way.
How would you feel if we were introducing the Beginner's Server, or better to say how to convert the existing Ubuntu installation you use into a Server that contains all the features a server offers and not just a LAMP clipboard (from the originals Linux, Apache, MySQL, PHP):
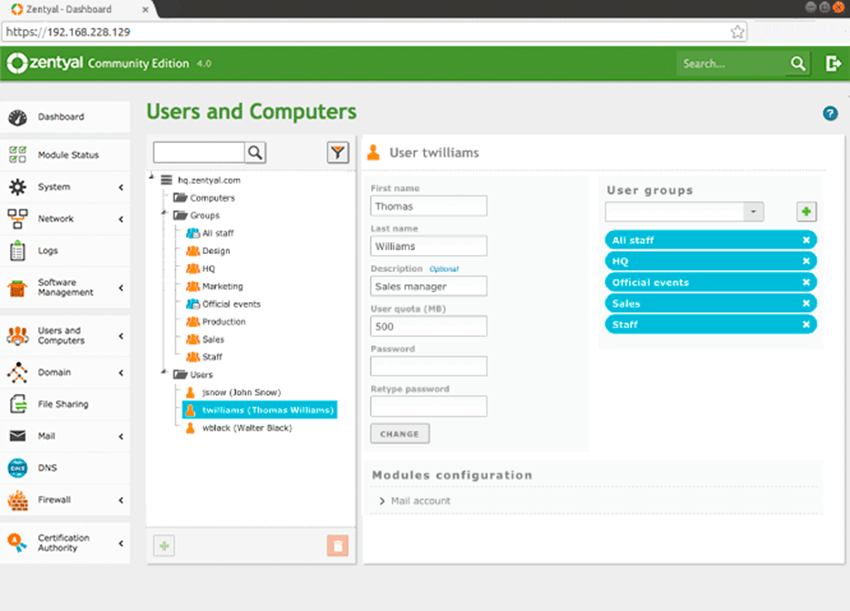
Domain & Directory, Central domain and directory management, Users, Security groups, Distribution lists, Contacts, Multiple Organization Units (OUs), Group Policy Objects (GPOs), NETLOGON scripts, Roaming profiles, Single Sign-On (SSO) authentication, Supported OS: Windows® XP/Vista/7/8/10, File sharing in Windows® environments (CIFS), Users and Groups access and modification permissions (ACLs)
Network Configuration, Routing, Gateway, Firewall, HTTP Proxy
Mail Supported protocols: SMTP, POP3, IMAP, CalDAV, CarDAV, SIEVE
Supported clients: Mozilla Thunderbird®
Webmail
Synchronization to mobile devices via ActiveSync
Multiple virtual mail domains
Single Sign-On (SSO) authentication
Management via Zentyal or Microsoft Active Directory®DNS Server, DHCP Server, NTP Server, Certification Authority (CA), Virtual Private Networks (VPNs)
If you are interested, we can see how easy it is with 5 command lines.
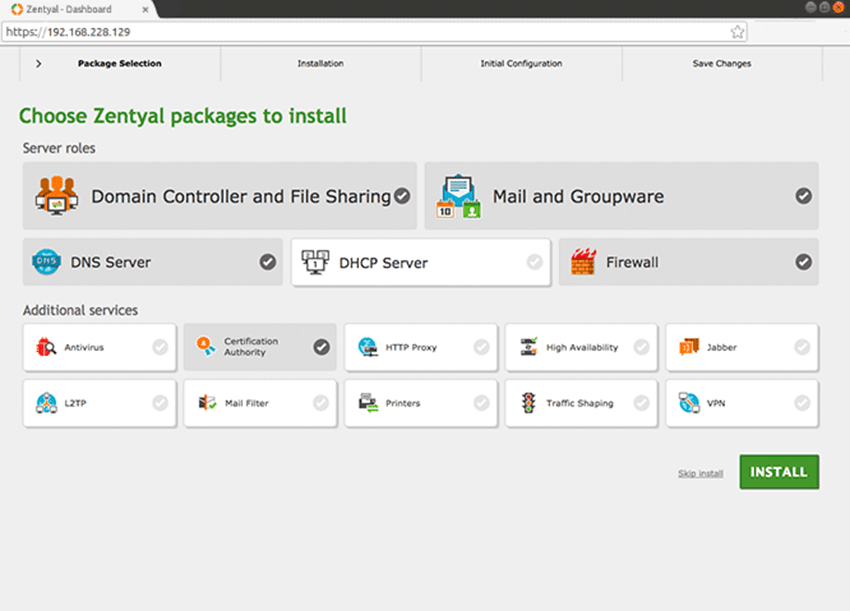
Introducing the Zentyal Server based on Ubuntu 16.04 LTS. It is an open source Linux distribution for Small Business Server that provides, as you have seen from the features mentioned above, interoperability with Microsoft's Active Directory.
Distribution as mentioned above is also released in ISO files for a clean installation. But we will see how we can convert a regular Ubuntu installation into Linux Server with UI.
As you may know, all of the operating servers come with as few features as possible and without a graphical interface to not use system resources except for the necessary server functions.
So the lack of working environment makes managing such systems virtually impossible by new users as it requires terminal management.
Quite the quotes. Let's see how it works:
Let's first add the necessary ppa to source.list
Open the terminal and type
sudo add-apt-repository 'deb http://archive.zentyal.org/zentyal 5.0 main'
or add the following line with nano to the /etc/apt/sources.list file:
deb http://archive.zentyal.org/zentyal 5.0 main
Authenticate to packages from the Zentyal repository by adding this public insurance key with the following commands:
sudo apt-key adv - keyszerver.ubuntu.com --recv-keys 10E239FF
wget -q http://keys.zentyal.org/zentyal-5.0-archive.asc -O- | sudo apt-key add -
Let's update the database with new packages using the following command:
sudo apt-get update
Then start the installation:
sudo apt-get install Zentyal
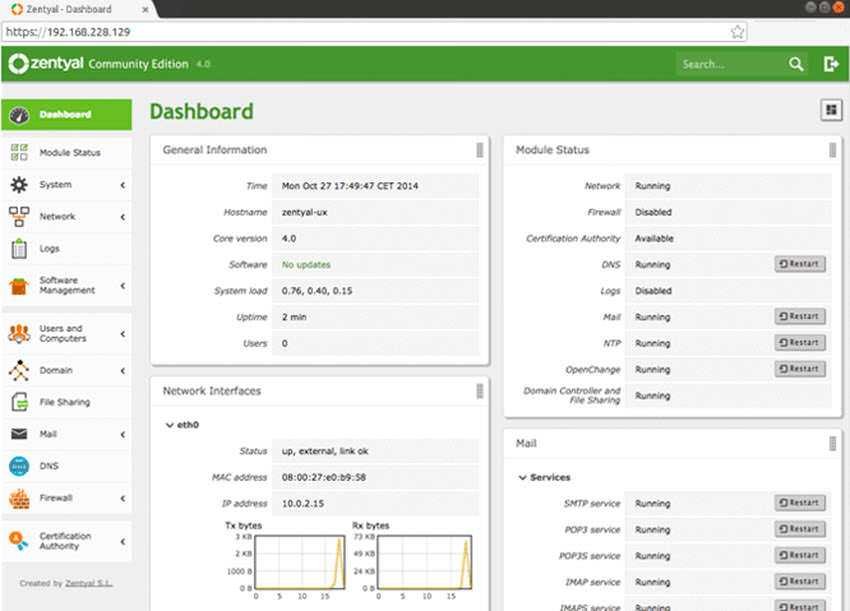
When finished, open your browser at the address to see the first screen of the server:
https://localhost:8443
The connection port on your server is the default one. You can choose a different one during installation and after installation from the web administration panel.
At the first screen of the server that will appear in your browser you will need to log in using your Ubuntu user name and user password.
But let's go with the installation for those who want zenbuntu-desktop outside the Server:
sudo apt-get install zenbuntu-desktop
Finally, let's add all Zentyal packages:
sudo apt-get install zentyal-all
More details on all the features of your new server on the official website
https://wiki.zentyal.org/wiki/Zentyal_Wiki
