
See how to replace the DVD drive from your laptop by replacing it with a second hard drive or a second SSD.

DVDs are becoming more and more useless. With the advent of flash usb drives that can now reach several hundred GB in capacity, DVDs have fallen into disuse.
Unless maybe you want to keep your backups on dvd and so your dvd drive is still useful. But if you are not interested in its existence that you do not even remember when you put a dvd to play on your laptop, then see how you can replace the DVD drive of your laptop with a suitable SSD or HDD, which will work as a second disc .
In fact, the newer laptops no longer have DVD drives as the manufacturers saw the lack of demand and took care to use the space of a dvd for other needs. After all, space on laptops is valuable! But the older ones are all equipped with this gadget.
So see a guide that explains how to replace your laptop DVD drive with a 2,5-inch SSD or HDD.
The following procedure is very cheap in money as you will need a special frame (caddy) that will be placed in place of the DVD drive and of course a disc. The frame costs only from 3,00 to 15,00 euros and the drive depends on its capacity and whether it is SSD or HDD (hard).
Step 1: Order a Hard Disk Caddy
The DVD drive is a single thin box that slides into the laptop and is secured with a screw. This drive is considered upgradeable and thus has a standard shape and dimensions (such as RAM, hard drives, etc.)
The frame that will replace the unit has exactly the same shape and the same fastening.
Do a search on Internet with the words “hard drive enclosures” or “laptop drive caddy” and you will see various e-commerce pages. Indicatively we mention this page.
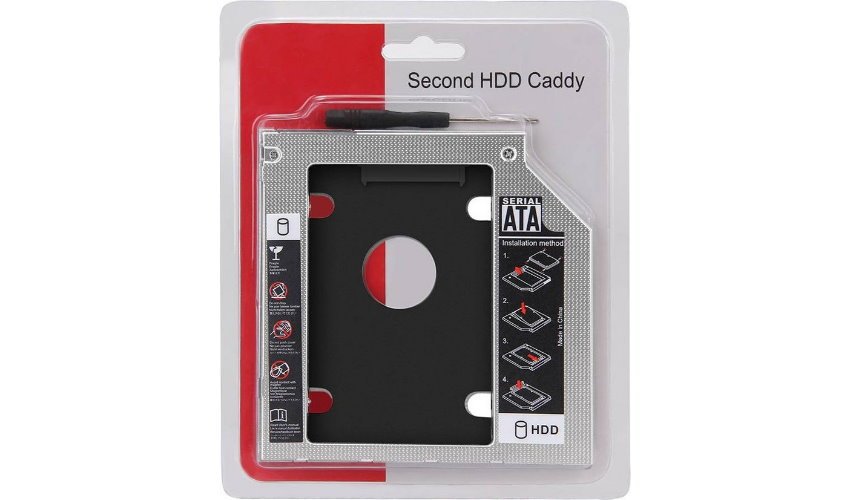
But you will see they are extremely cheap as they start at around 2,76 euros and go up.
The frames are equipped with a SATA socket both to the new drive and to the chassis connection to the laptop.
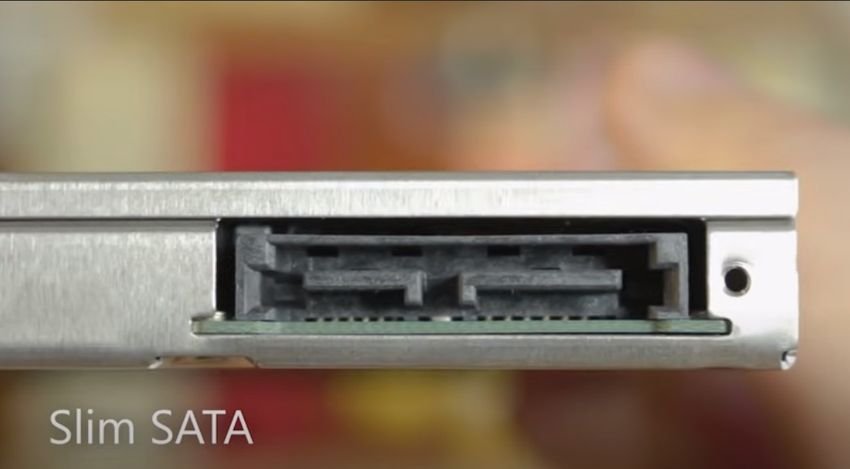
There is a small case, if your laptop is extremely old the DVD connection to laptop is IDE. In this case, we think that it is not even worth dealing with such a laptop.
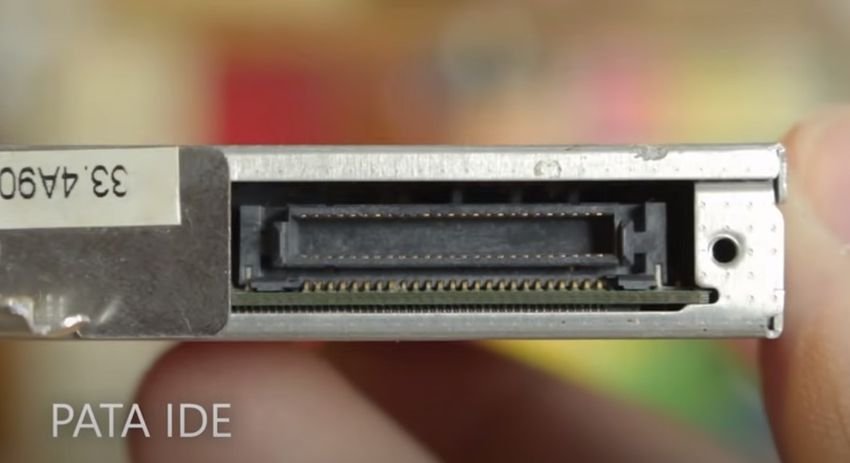
You will find out what you have in step 3 when you unplug the dvd drive and take it out of the laptop case.
Also note that there are available two variants of caddy discs, to fit disks. With height 9,5 mm and height 12,7 mm. The difference is noticeable, in step 3 again you will see what height you need, when you take out the dvd drive and measure it.
Step 2: Select SSD or HDD to replace the optical drive
As the idea is to expand the available storage space, you will need a new drive to attach it to the chassis. This can be a 2,5 ”hard drive or a faster SSD.
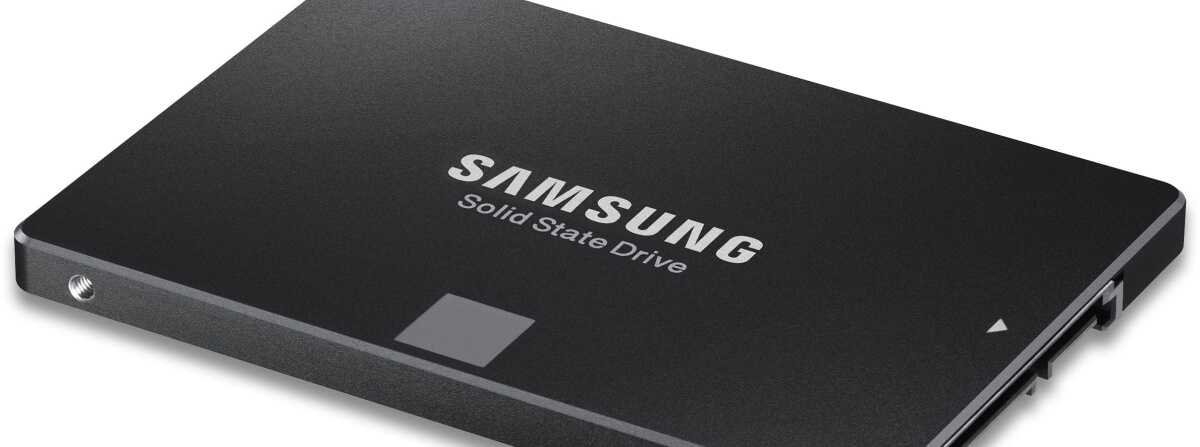
Obviously, the capacity of the unit will depend on your requirements. However, we recommend that you install as large a drive as possible, as most users will use it for Backup.
Here's the most expensive part of the story, as the records are generally very expensive.
Step 3: How to remove the DVD drive from your laptop
With your new sub-drive ready for installation, it's time to remove the DVD drive.
Removing a DVD drive is usually simple, although this will depend on the manufacturer of the laptop (the photos are from an old acer we have in our hands).
The typical method of removal is:
- Place a towel on your table
- Place the laptop on its towel with the lid down
- Find the DVD locking screw. This is usually indicated by a small DVD icon and is located approximately in the middle of the dvd and at a depth of about 14 cm
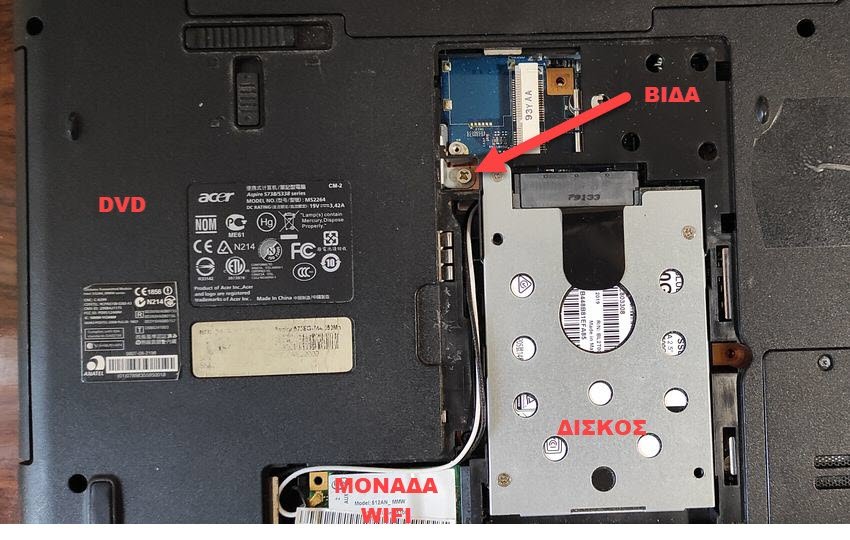
- Remove the screw
- Pull out the optical drive
- Remove the DVD drive from the laptop
Some laptops have a button system for removing various components. Others may have the dvd retaining screw under the cover of the main hard drive (as in our photos). Ή the retaining screw from the cover to hold the dvd drive.
Anyway search the internet and see a relevant one video with your own laptop. When you unscrew the retaining screw, logically the unit is now only held by the sata connector. Gently press outwards to remove. You should feel the same resistance as when removing a laptop battery.
In rare cases, you may need to use a sharp plastic object, such as a credit card or plastic knife, to remove the drive. However, we repeat the resistance should be minimal.
Watch a related video:
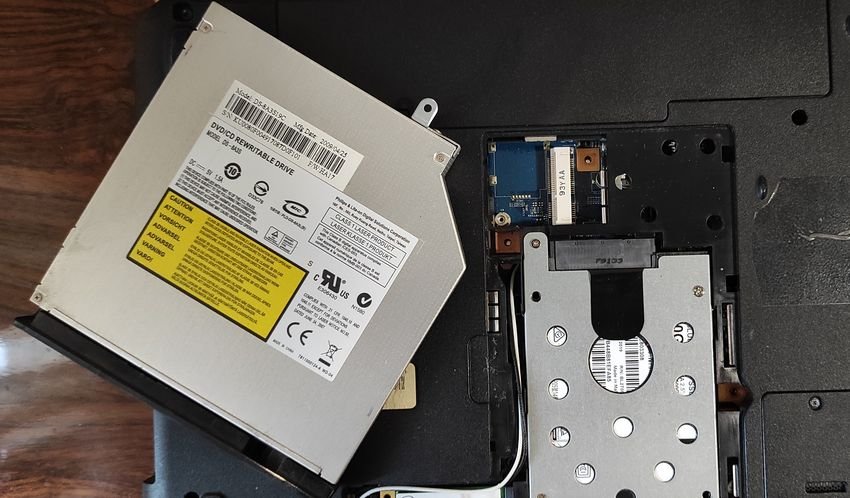
Once completely removed, use a screwdriver or plastic knife to gently remove the DVD drive cover.
If your laptop does not have a spare, blank mask for the DVD drive case, then you will need it later. Either way the DVD cover of your laptop matches the colors and design of your computer better.
You may also need to remove the retaining plate (including the screw) from the DVD drive. This is attached to two (or one) small screws and can be easily attached to the frame you purchased to secure in place.
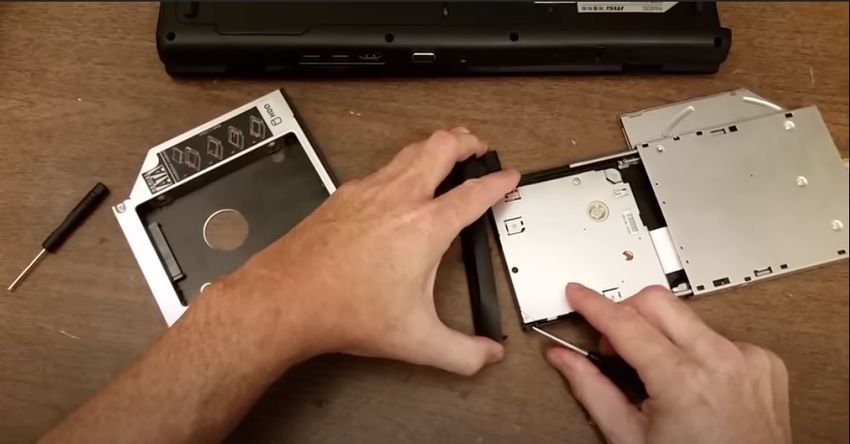
Step 4: Insert the hard drive or SSD into the Caddy
This must be the easy part! When the hard drive or SSD is not packed with its own case, it should be easy to put the drive in the box.
Depending on the disc and its manufacturer, you may have received a small screwdriver and screws with the disc. These will need to be tightened to secure the hard drive or SSD to the chassis.
Make sure these screws are level with the frame when you tighten them, otherwise the unit will not slip sweetly on your laptop.
Step 5: Install Caddy on your laptop
Next, find the mask of the dvd drive that you removed in step 3 and put it in the box. Because the eject button must be in a specific position for accessibility, the mask attachments hold the clips in the same position.
Simply attach the mask by pushing the handles into the slots. Hot glue may be needed here, especially if you break a handle.
With the notebook upside down on the towel again, slide the hard drive or SSD into the slot on the CD drive and use the mounting screw to secure the box in place. Your laptop has a new storage device, ready to use with any operating system you have installed.
Reuse your old DVD drive
So you have replaced the DVD drive of your laptop with SSD or HDD. But what about the discarded DVD drive? Well, you can still use it.
It is possible to install the dvd drive in an external enclosure that you can easily connect and disconnect to your laptop via a doors USB. All you need is a laptop DVD case and a couple cables USB for data and power.
An external DVD drive can be used in tablets, ultrabook or any other device that does not have an optical drive. To find prices search with the words: External Optical Drive Case.
Can you replace the laptop DVD drive with USB ports (or whatever)?
Your laptop's removable DVD / CD drive can theoretically be replaced with other things, such as additional USB ports.
However, few manufacturers have followed suit. While you may find a USB 3.0 DVD drive hub for some Dell laptops (starting around 2015), such devices are rare and hard to find, even on eBay.
This is a pity, as such a hub could include things like a card reader, new audio, or even an HDMI port.
Replace a laptop CD or DVD drive with an SSD or hard drive: It's that easy!
If your laptop has a DVD or CD drive unnecessary for you, using this space for extra storage is a good idea.
With the huge file sizes that HD photos and videos require (not to mention games) the extra capacity could prove to be extremely valuable.
