
In Windows you can use your keyboard to do all the mouse movements and clicks. See how.

If your mouse suddenly breaks and until you fix it, you can temporarily replace it with some keys from your keyboard. You can easily have right and left, but also with a small Windows setting you can also have a pointer using the keyboard.
Your operating system having anticipated that you will run out of mouse battery at some point took care of it. It has some fast ones shortcuts keyboard you can use and a feature called Mouse Keys that allows complex interaction without using a mouse. See how it works.
Double left click from the keyboard
By default, the double-left-click equivalent is the Enter key on your keyboard. You can either use the Tab key on your keyboard to navigate between multiple items on your desktop, then press Enter to double-click an item, or use the navigation arrows on your keyboard to get to the desired place and press Enter to double click.
If you still don't know how to left click read this article.
Right click from the keyboard
If you want to right-click using the keyboard, first navigate to the item you want to right-click using either the Tab key or the navigation arrows, then when the desired item is selected, press SHIFT+F10 simultaneously on the keyboard.
It doesn't matter whether you use the SHIFT key on the left side of the keyboard or the one on the right side.
Enable the keyboard as a mouse
You can use the keyboard as a mouse with the help of a feature called Mouse Keys, which is built into Windows, macOS, Linux, and other operating systems.
In the Windows world, this feature was present in Windows 95 and continues to be available in the latest versions such as Windows 10 and Windows 11.
Its functionality and options have improved over the years. However, the basic idea remains the same since its introduction: Mouse Keys allow you to use the number pad on your keyboard to navigate to items on the screen, select them, right click or double-click.
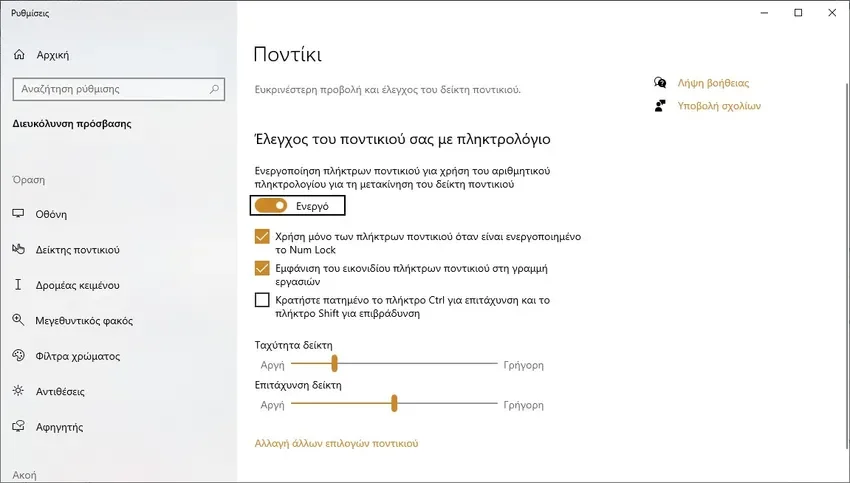
Enable Mouse Keys in Windows 10
We're assuming you have a non-working mouse, so what we're talking about from now on will be keyboard-only movements. Put the mouse aside and try:
step 1 : Press the Win + U keys at the same time to open Settings and find yourself in the “Ease of Access” section.
step 2 : Next, press the Tab key once, then use the down arrow on your keyboard to access the “Mouse” section in the “Interaction” area. Press Enter once you get there.
An alternative to get to the same place very quickly using the keyboard is to press the Windows key on the keyboard, type “mouse keys” (Mouse keys in English Windows), select with the arrows “Enable or disable mouse keys” and press Enter. This takes you straight to the mouse page in the Settings app
step 3 : To move to the right side of the screen, press Tab again and the “Control your mouse with keyboard” switch is selected. Press the spacebar on your keyboard to activate it. Then you can configure many options about the mouse buttons and their operation.
Navigate through each of them with the Tab key and use the spacebar to check or deselect the options you want to enable.
You also have sliders to configure it speedof the index and its acceleration. Again, navigate to them by pressing Tab, then use the navigation arrows to increase or decrease their value. Press SHIFT+Tab to return to the previous item.
By default, the Mouse Keys feature displays an icon on the taskbar when enabled, but depending on your settings, it can be hidden.
Press the Num Lock (or Num ) key on your keyboard to temporarily disable the mouse keys. To turn it back on, press the Num Lock key again. To disable Mouse Keys completely, follow the same steps used to enable it and turn off its switch.
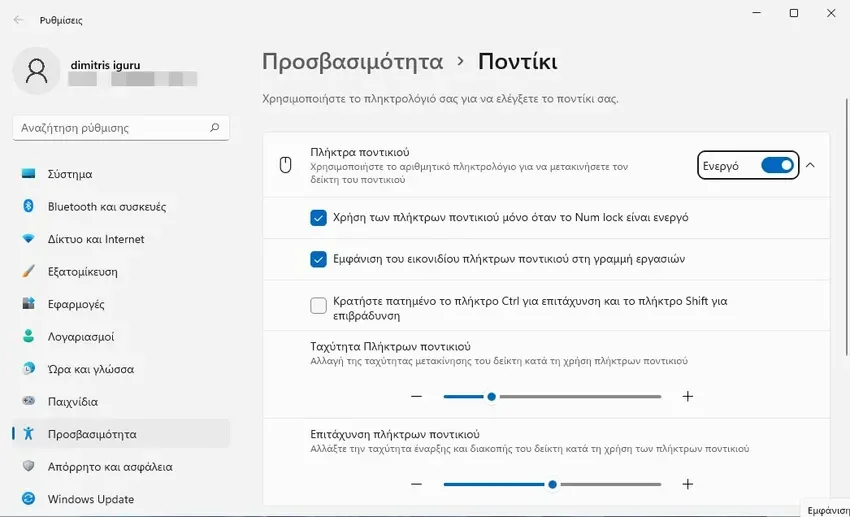
Enable Mouse Keys in Windows 11
In Windows 11, the procedure for activating the mouse keys is slightly different.
step 1 : Start by pressing Win + U to open the Accessibility section of the Windows 11 Settings app.
step 2 : Then press Tab once to select Accessibility in the column on the left. Press the Tab key again to select Accessibility at the top of the Settings window. Press Tab to select the Visual Imaging section (Vision) and then use the arrow keys to navigate to the bottom of the list. You should press the down arrow key fifteen times until you see “Mouse” selected under Interaction. Press Enter to access the mouse settings.
Another way to access these settings with the keyboard is to press the Windows key, type “mouse keys”, use the arrow keys to select “Mouse keys” and press Enter. This takes you straight to the mouse button options in the Settings app.
step 3 : The switch for mouse buttons should be selected automatically. Press the space bar on your keyboard to enable this switch and enable this accessibility feature.
The mouse buttons are now enabled and you can enable other functions. Press the Tab key to navigate through them and the Space key to check or deselect the options you want.
- Use mouse keys only when Num lock is on: if you enable this setting, the mouse keys are only active after pressing the Num Lock key on the keyboard. If you disable this setting, the mouse buttons are active as long as their switch remains on in the Settings app.
- Show mouse buttons icon on taskbar: I recommend leaving this setting On to see the icon of this feature appear on the taskbar and understand when it is enabled.
- Hold down Ctrl to speed up and Shift to slow down: This setting is self-explanatory, allowing you to speed up or slow down the way you navigate using the Mouse Keys.
There are also two sliders to adjust the speed and acceleration of this feature. Use the left and right arrow keys to decrease or increase speed/acceleration.
Unfortunately, when enabled, the mouse buttons icon is hidden in the system tray and does not appear directly on the taskbar. You have to drag and drop it to the taskbar to see it at any time.
This icon is useful because a red X symbol on it indicates that the mouse keys are disabled and you need to press the Num Lock key on your keyboard to enable it.
When there is no X in it, the feature is enabled and should work as expected. This icon also shows you the active mouse button, which is extremely important.
To disable the mouse buttons completely, follow the same steps used to enable the feature and set the switch to Off.
How to use your keyboard as a mouse
After enabling mouse keys, it's time to use your keyboard for navigation instead of your mouse. If you haven't changed the default settings, you turn the mouse keys on and off using the Num Lock key on your keyboard's number pad.
When mouse keys are active, all number keys except from 0 to 5 move the mouse pointer in the direction shown in the image below.

For left or right click or both together the following applies:
Left click : Press slash ( / ) and then 5
Right click : Press minus ( – ) and then 5
Both keys together : Press the star ( * ) and then 5
Essentially, you first activate what you want to click and then do it by pressing 5. If you activate the left or right mouse button, it remains active until you select another button. Once you've selected a mouse button, you don't need to make that selection again, and you can only press 5 unless you want to use another mouse button.
When you want to drag and drop, use the following buttons:
0 – to move the selected item
. – to drop the object where you want.
NOTE: For more information on how this feature works, check this document published by Microsoft.
