This series of posts will guide you through creation of your own Command and Control (C2) server, specifically using the Havoc C2 Framework. Before diving into the technicalities, let's first define what a C2 server is in the context of cyber business.

A server Command and control (C2) is an integral component of advanced cyberattacks, providing attackers with a mechanism to maintain communication with compromised devices after post-infection.
The architecture of C2 can be implemented in many ways, including:
-
Development of a remote Trojan access(RAT) to create a backdoor on the victim's device, thus allowing remote control.
-
Using a dedicated command server and control, managed by the attacker, to relay commands to compromised devices.
-
Using a botnet, a network of compromised devices, to carry out coordinated malicious activities ranging from Distributed Denial of Service (DDoS) attacks to spreading malware.
The importance of a C2 server in cyber business cannot be overstated. It offers attackers the ability to destroy data, conduct targeted attacks, and cause a range of damage to the victim's network.
Countermeasures against C2 activities are multifaceted and include:
-
Implementing firewalls and intrusion detection/prevention systems (IDS/IPS) to filter and block malicious traffic.
-
Leverage anti-virus solutions to detect and eliminate malware.
-
Regular software updates with the latest security patches to address known vulnerabilities.
-
Conduct cybersecurity training for staff to adhere to best practices.
While these defenses may not offer total protection against C2 threats, they significantly increase the organization's security posture, making it increasingly difficult for attackers to create a successful Command and Control infrastructure, but that's a discussion we'll have another time.
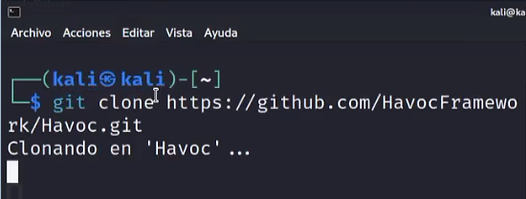
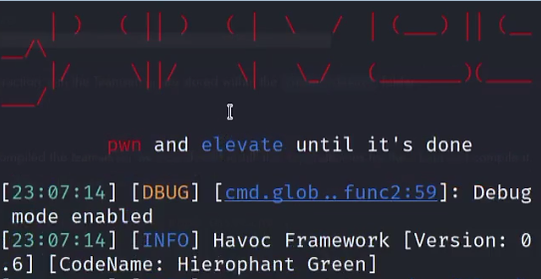
Having made the introductions of the case, let's get down to business and install our first server Command and control and for that we need to open a terminal in Kali Linux distribution:
step 1. git clone https://github.com/HavocFramework/Havoc.git
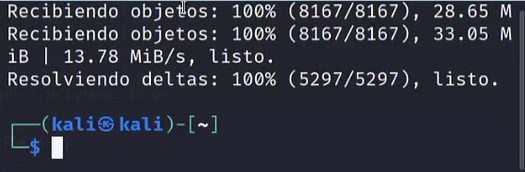
and if all goes well, you should see the following:
now if you run the command ls, you can see the directories shown in the image below, then run the command cd Havoc:
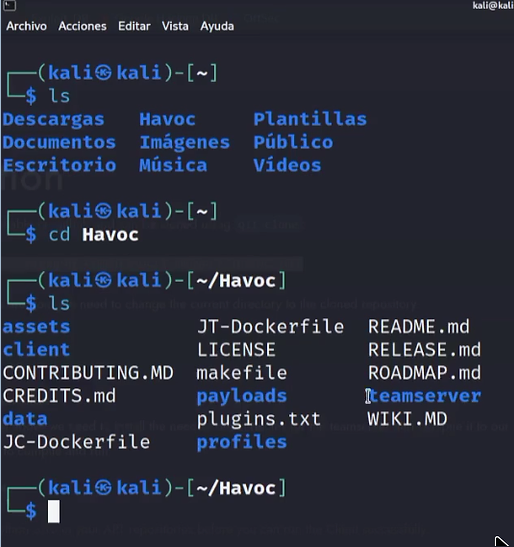
step 2. You are now inside the Havoc directory and there you will run the following command:
sudo apt install -y git build-essential apt-utils cmake libfontconfig1 libglu1-mesa-dev libgtest-dev libspdlog-dev libboost-all-dev libncurses5-dev libgdbm-dev libssl-dev libreadline-dev libffi-dev libsqlite3-dev libbz2-dev dev mesa-common-dev qtbase5-dev qtchooser qt5-qmake qtbase5-dev-tools libqt5websockets5 libqt5websockets5-dev qtdeclarative5-dev golang-go qtbase5-dev libqt5websockets5-dev python3-dev libboost-all-dev mingw-w64 nasm
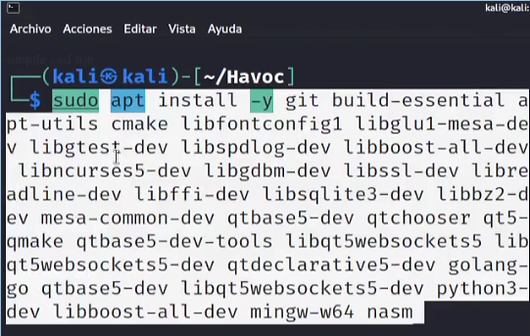
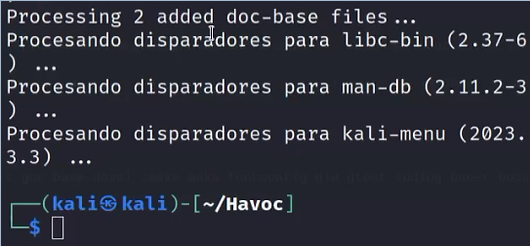
In this way, you will install various packages that are necessary for the correct one mode of our Command and Control server and if all goes well, you should see the following results:
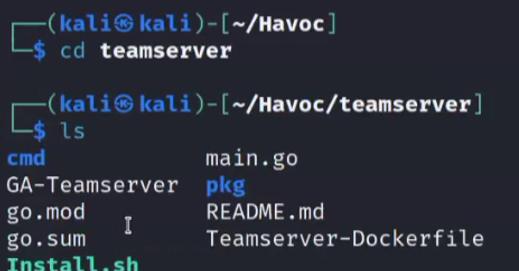
then you should enter the directory teamserver by typing cd teamserver and if you do one ls you should see what is shown in the image below:
step 3. Now you need to perform the following:
go mod download golang.org/x/sys
go mod download github.com/ugorji/go
If all goes well, you should see something similar to the image below, and then you should exit this directory by running the command Cd ..

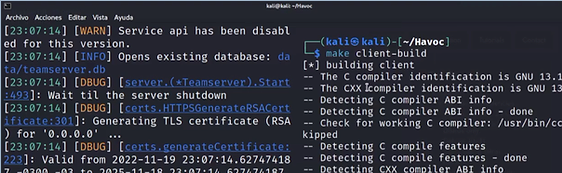
step 4. Now from the Havoc Root directory we are in, we will create the server side by running:
make ts-build

If all goes well, you should see something similar to the image below:

Now we should run the teamserver, but first, I recommend that you split your terminal screen in two with a vertical view, this is to make it easier to monitor and operate at the same time, especially useful when working with Command and Control servers like we do here.
Do the following:
./havoc
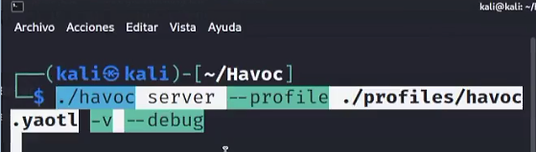
after that, you should see something like the image below:
step 5. Now we have the split view, so on the left screen we have the teamserver running and on the right screen let's build the client side by running the following:
cd Havoc
make client-build
after that, we will run the client as we did with the server:
./havoc client

after this process, it should show you the following screen:
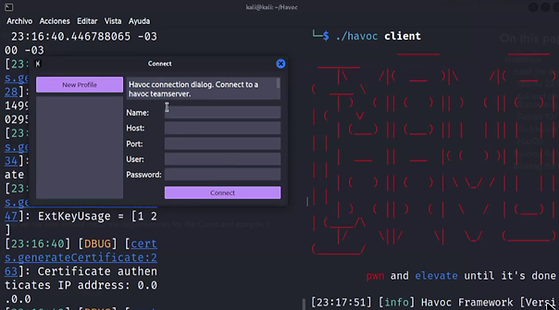
Now to complete this message you need to follow the next step:
step 6. Open a new terminal and run the following commands
1. cd Havoc
2.ls
3. cd data
4.ls
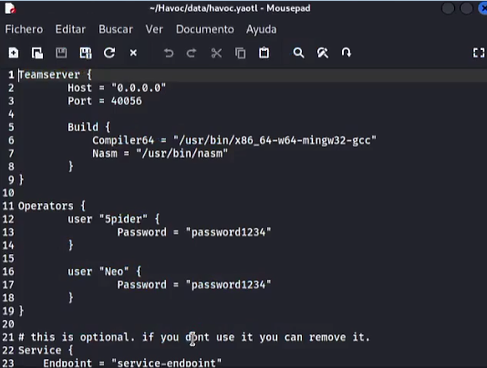
5. mousepad havoc.yaotl
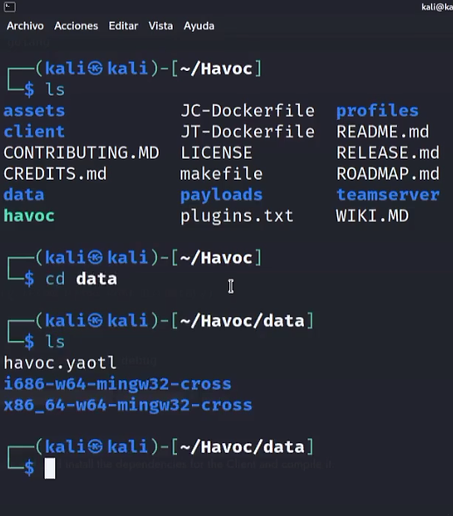
and what you will see is the actual C2 profile and you need the data you have inside that file to fill in the final question we got in step 5 and what you will use is this:
-
Port: 40056
-
User: Neo
-
Password: password1234
These are the default credentials:
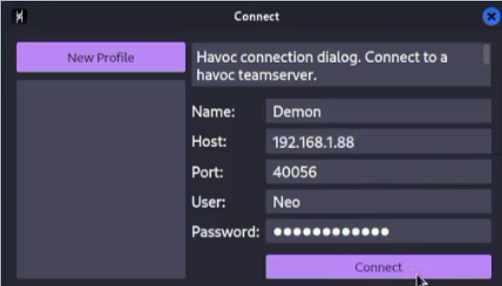
Now you can close the mousepad and then go to your terminal and get the IP of your virtual machine using the command ifconfig
Then use all the information you have to fill in the prompt like the one you see in the image below. You can choose the name you want, I choose Demon.
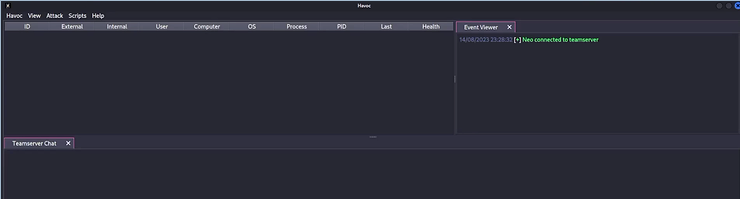
Now press the button Connect and you'll be ready to go. The final screen that will appear is the one below and this is because you are now in control of your own C2 Server.
Next time we will teach you how to handle and control the victim machine with your C2.
