See how you can install Kali Linux on a live flash USB and run it from any of your computers.

Kali Linux is the most popular Linux distribution for penetration testing and ethical hacking. It is not considered functional for everyday use, such as answering emails, playing games or communicating via Facebook. That's why it's better to run Kali Linux from a USB drive with cmmovements.
The hacker-friendly Debian-based distribution in late 2019 changed its default desktop environment from heavy Gnome to a lighter Xfce, making Kali easier to use. But we still can't recommend it as a daily operating program unless you hack 24/7team.
Using Kali in dual boot mode is the best way if you have a dedicated machine, but for something more portable, the live version on a USB flash drive is what you need. If you still have a backup computer that you are only going to use for your ethical hacking efforts, then yes, install Kali as the main system so that you can make full use of your computer hardware.
What you will need

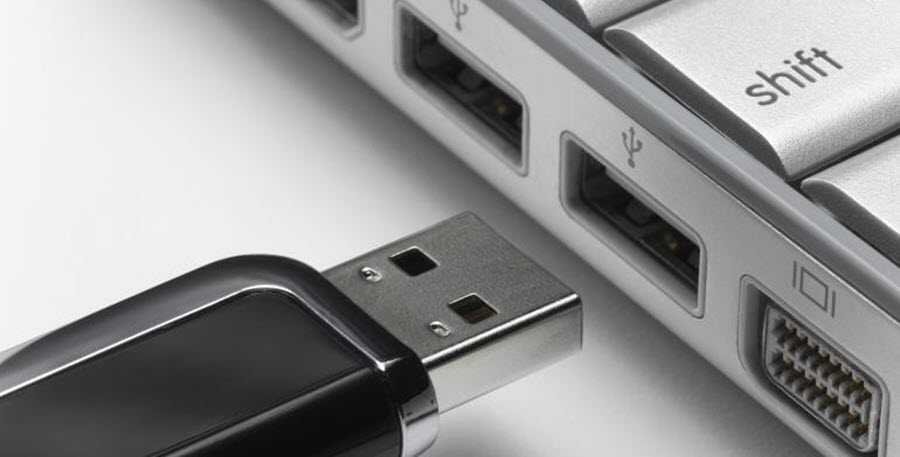
You will need a USB flash drive to follow. You could start by using a 4 GB usb flash drive for the basics or 8 GB if you want some relative space comfort, but a larger one may come in handy, especially if you need data storage. Of course if you have a USB 3.0 and 3.1 port buy a USB flash drive respectively, for speed reasons.
You will also need the Kali Live ISO file and an imaging program such as Etcher or Rufus, which we will describe below.
Step 1: Download the correct version of Kali Linux
While there are many different types of Kali Linux images, the one you want for a portable live version is the "Live Boot" download. You can choose between 64-bit for AMD (for Intel chips), 64-bit for ARM64 (like M1 chips on newer Macs) and 32-bit for i386 (which you will probably never use because it is obsolete).
Visit it kali.org/get-kali and download the appropriate Live ISO. We will use 64-Bit for AMD since we use a simple Intel. Whichever you choose, note that you will only be able to use the Xfce desktop environment and will not be able to specify additional (meta) packages to install.
Step 2: Install a USB formatting tool
On Linux and macOS computers, you could use the command dd to copy the Kali Live image to the USB drive, but you always run the risk of choosing the wrong drive and messing it all up by replacing an important drive. Because of this, we recommend that you use a USB formatting tool. If you use Windows, Rufus or Ventor are good tools, but you can also use Etcher running on Linux, macOS and Windows.
Go to balena.io/etcher and the "Download" button, which should detect which system you are on and give you the correct version. If not, press the drop-down button next to it to select your operating system. Once downloaded, install it like you would any other application.

We in our example we will use Rufus because first we are in Windows and second because it is portable and we do not want to install another utility. It is purely a matter of taste.
Step 3: Record the live image of Kali to the Flash drive
Depending on the program you have selected, do whatever it takes to burn the live Kali iso file to the flash drive. Just remember that all the files you have in flash will be deleted so make sure if you want to keep something to copy it to your hard drives first.
Step 4: Boot from Kali Live USB
Now it's time to boot your computer from your new Kali Live USB flash drive, but the process will vary depending on the brand, operating system and processor of your computer.
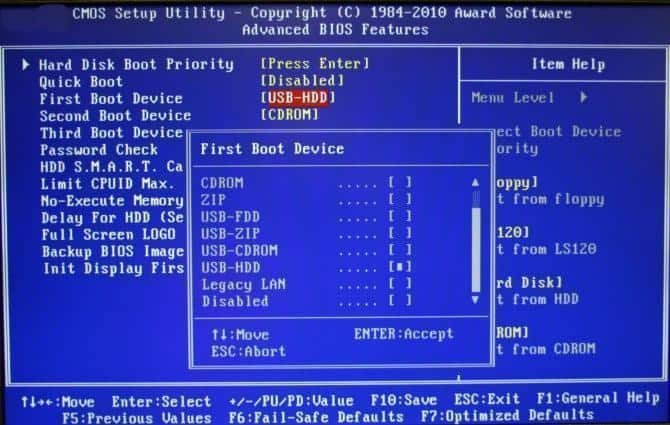
If you have a computer BIOS or UEFI you need to log in to them and configure the range of units your computer is looking for to find and start. To learn how to enter the BIOS and change the boot settings and / or load the boot menu, do a google search for "boot from USB drive" by typing in your computer model and find the appropriate instructions. There are too many parameters for this setting to list here.
The logic, however, is this: When your computer starts, it runs the bios or uefi (depending on what you have) which in turn looks for your connected drives (hard drives, dvd players, usb ports) to find your operating system system. The first one he finds will automatically run it and stop searching. The order he will look for is determined by you through the bios. This is exactly what you are going to change. In other words, tell him to look at the usb ports first and then the hard drives.

On macOS, it's much easier. If you have an Apple M1 chip, just turn off your Mac, then turn it on and hold down the power button until you see the boot window. On Intel-based Macs, press the key Option immediately after turning on or restarting the computer until you see the startup window. Then just select the Kali Live flash drive to boot.
Step 5: Select How you want to start Kali
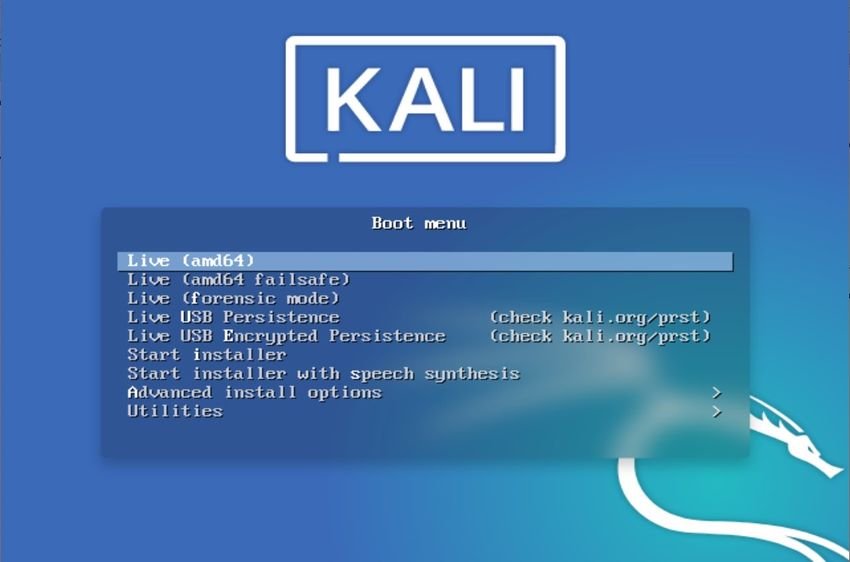
After booting into the Kali Live USB flash drive, you should see some different options for the version of Kali you want to load.

May include:
- Live: This will launch Kali Live. In this mode, you can not save any changes. No reports, logs, any other items, any of these changes are not saved. This way, you start with a fresh Kali Live every time you start it. The data is stored only in RAM, not in the flash drive.
- Live (fail-safe mode): The same with the live system, but in safe mode, ie in a more powerful version in case the system fails. This way, the failed system will not damage the flash drive. This is a good choice if you need to troubleshoot a problem computer.
- Live (forensic mode): Same with the live system with search-friendly tools, so you can retrieve files, collect data, and perform other research tasks on a central machine. However, the internal hard drive is never touched and the external devices and media will not be inserted automatically, so you have complete control over what you can connect to.
- Live USB Persistence: Like the live system, only the changes will be saved and allow you to inspect the central system without having to worry about running or locking processes.
- Live USB Encrypted persistence: Same as Live system (persistence), but encrypted only with LUKS, so it is more difficult for others to access your data.
- Start installer: This allows you to start the installer to install Kali on an internal drive.
- Start installer with speech synthesis: Same with the Start installer, only with voice instructions to help navigate.
- Advanced installation options: Includes options such as MemTest, Hardware Detection, etc.
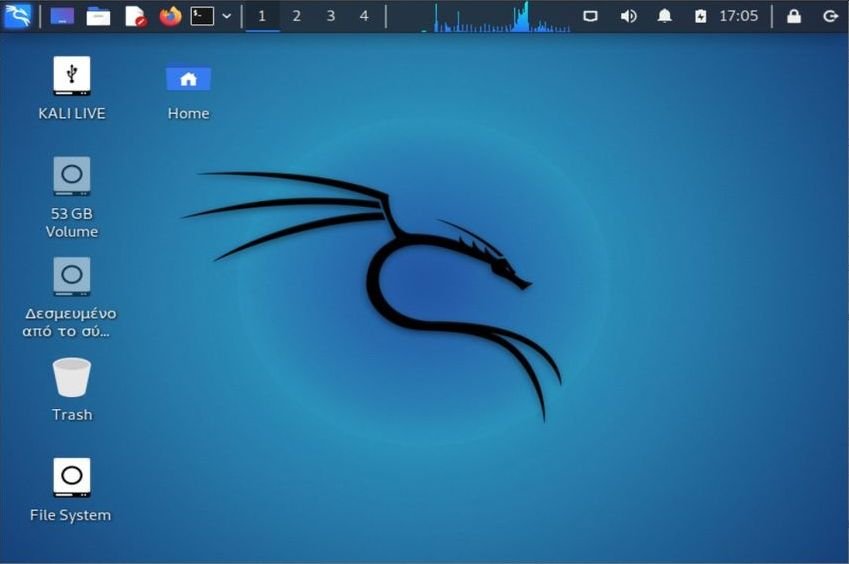
To boot it without saving any changes, just select the "Live system" option, which will take you directly to the new Xfce desktop environment as a rootless user. However, if you want to save your changes, start using "Live system (persistence)" or "Live system (encrypted persistence)".
Step 6: Set Persistence to Kali Live
Selecting one of the Persistence options does not mean that it will work independently except usb flash. There is some configuration you need to perform first, mainly creating a new partition to store all your data. Kali has some great instructions on this.
To create a partition where you have the Kali Live partitions (and which is 7 GB), enter the following three commands in a terminal window as a kali user, which will retain the Live options in the 7 GB partition, freeing them. balances for storing your data. Make sure you do this from the Kali Live system you just started on.
In the following commands, make sure that you enter the correct file name that you downloaded and that the sdb (mentioned in the 3rd command) is on your usb. To find the correct name, first type sudo fdisk -l as the root user
Then proceed by correcting the following:
~$ end=7GiB ~$ read start _When this is done, you should now have a third partition labeled / dev / sdb3 or / dev / disk1s3. Check the ID because you will need it for the rest of this process (sudo fdisk -l).
Next, run the following two commands as kali to create an ext3 filesystem labeled "persistence". If you chose to skip encryption, use the following:
m $ mkfs.ext3 -L persistence / dev / sdb3 ~ $ e2label / dev / sdb3 persistenceNext, create a mount point, attach the new partition there, create a configuration file to enable persistence, and then disconnect the partition.
~ $ mkdir -p / mnt / my_usb ~ $ mount / dev / sdb3 / mnt / my_usb ~ $ echo "/ union"> /mnt/my_usb/persistence.conf ~ $ umount / dev / sdb3Now, restart Kali Live and select the appropriate system and everything should be ready.
In Kali's model here, you can follow the corresponding instructions so that the new partition is encrypted in case you think that someone can steal your usb drive.
Step 7: Add a password for the Root user
In newer versions of Kali, you are not a root user by default, but you can issue root commands as a regular user using:~ $ sudo suIf you are prompted for a password, use the user kali. However, Kali Live may not attach a password to the root user, so you will need to create one if you do not want other people to log in and get involved with your system. If it has one, you can change it to something better.
Use passwd root with root privileges to do this. Enter the password you selected, then verify it.
~ # passwd root New password: Retype new password: passwd: password updated successfullyExplore your new Kali Live system
Now all you have to do is use Kali. You can do a search on iguru with the word Kali to see our guides on tools included in the operating system, as well as their settings to adapt to your environment.


