
Are you using VirtualBox and can not change the screen resolution of the virtual machine? See how you can do it.
Oracle's VirtualBox virtualization software is one of the two most popular options for users who want to test new versions of operating systems. If you install Windows in VirtualBox, you may notice that you cannot change the default screen resolution of 1024×768.
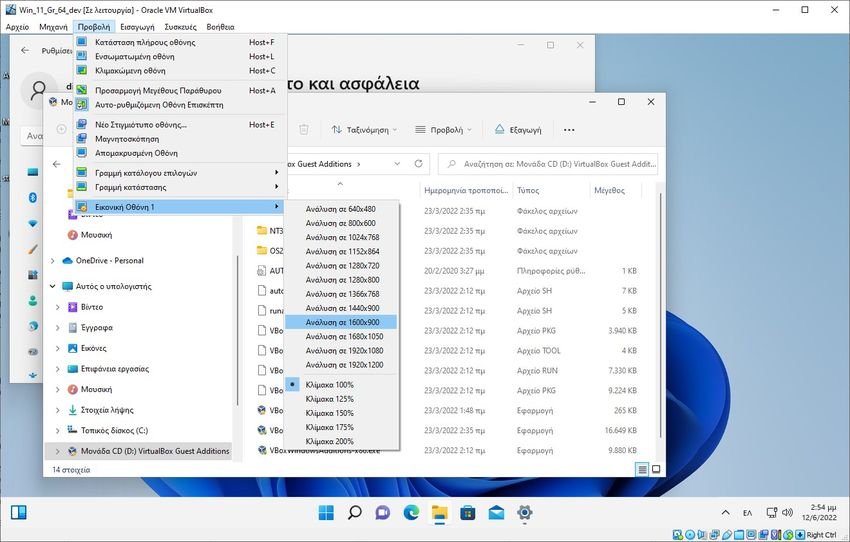
This low resolution may be sufficient for some tasks, but many times you may want a different one. The VirtualBox application View> Virtual Screen menu lists all available resolutions and scaling options.
The "resize to" options are all inactive, as they are grayed out and cannot be selected. Percentage scaling options, however, are unlocked and available.
However, it is quite easy to unlock all supported screen resolutions in VirtualBox. And saying supported, you'll unlock your physical screen resolution as well as all down.
In no case will it give you the right to choose a higher resolution than your physical one. The following instructions explain in detail how this is done.
Adjusting the screen size of Windows in VirtualBox
The repair requires the installation of Guest Additions. Although it may sound difficult and complicated, it is essentially a simple process that is completed on most systems in minutes.
The description may sound like you need to insert a CD image, but you will not need to download anything or bother with discs. VirtualBox will attach a virtual CD image on its own and do everything for you, with a simple command.
Everything is done only through the virtual operating system you are running and the movements from below have nothing to do with your physical computer. So open the Virtual Box, run your virtual operating system you want and when it is fully deployed and login, do the following:
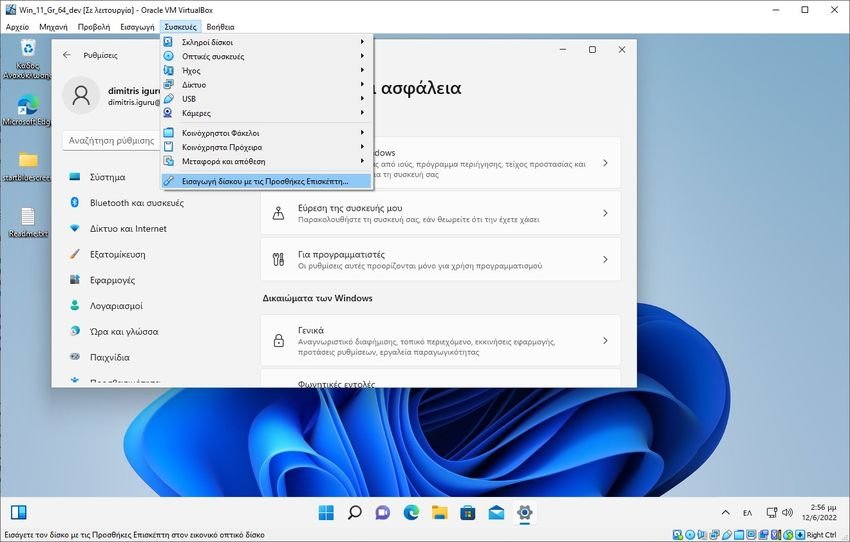
Step 1: From the virtualbox menu select Devices > Insert Guest Additions CD image. The disk image already exists inside the virtual machine and so all VirtualBox will do is load the guest plugins CD into the VirtualBox cd-player so you can access its contents. You will probably hear a sound indicating that the CD has been loaded.
Step 2: Next, open your Virtual Operating System File Explorer on your system and open the "Virtual Guest Additions" CD drive.
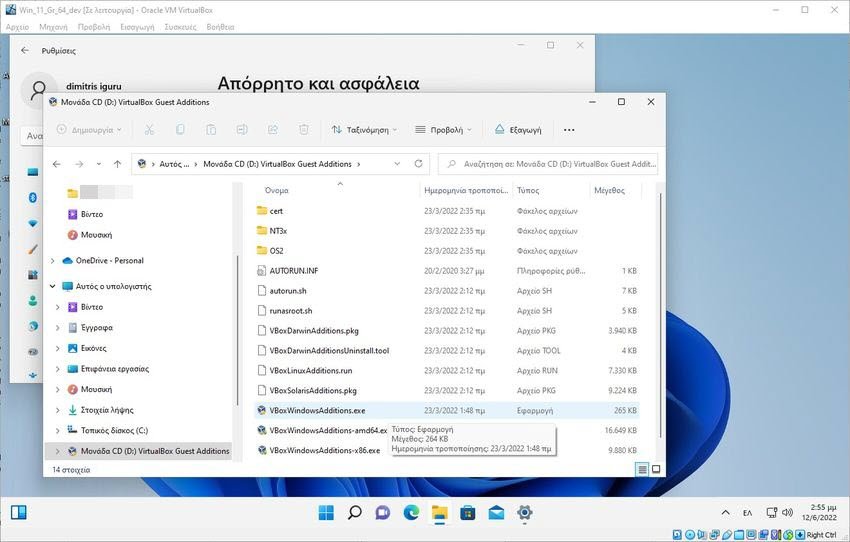
Step 3: In the initial folder of this virtual CD you will see three guest plugins for Windows. There are also add-ons for other operating systems, including Linux and Solaris.
The three Windows visitor plugins are for different architectures.
- VBoxWindowsAdditions is an automatic selector that selects the correct file depending on the architecture you have. Choose this if you do not know exactly what you have.
- VboxWindowsAdditions-amd64 are 64-bit systems.
- VboxWindowsAdditions-x86 is for 32-bit systems.
Right-click on one of the above files and select Open from the context menu to start the installation on the virtual machine. You can simply double-click the file to start the installation.
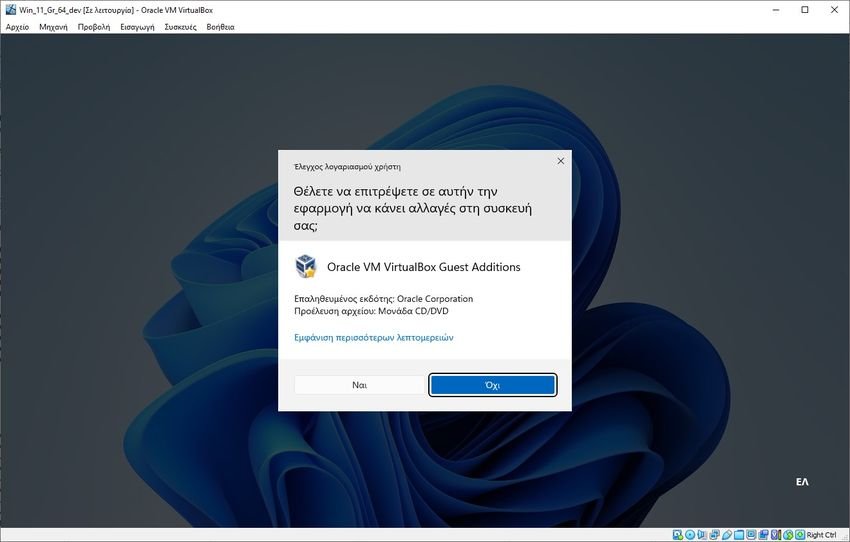
Step 4: Windows displays a user account check prompt, which you must select Yes.
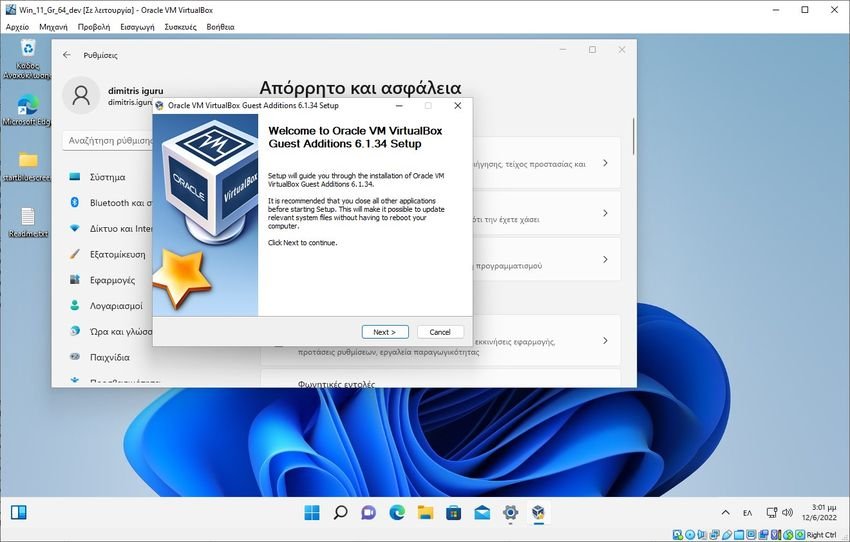
Step 5: The installer starts after selecting Yes. Click Next on the first page that appears.
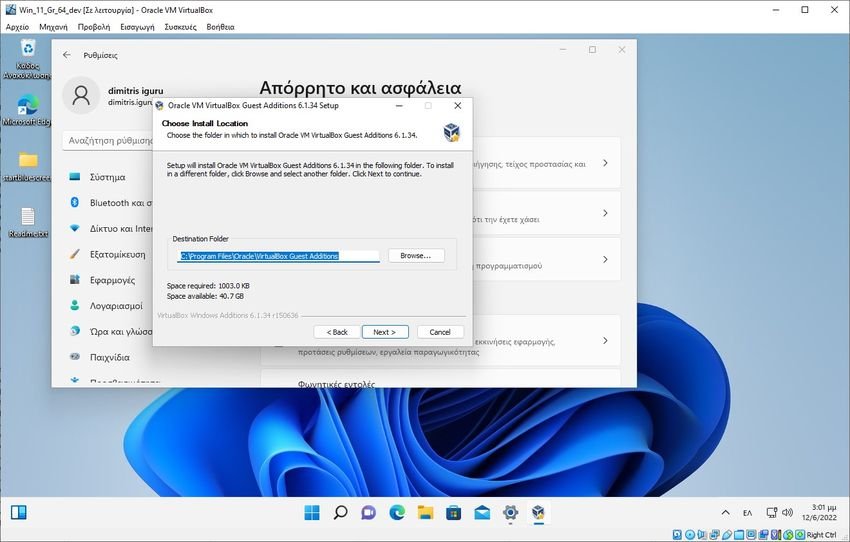
Step 6: On the following page appears the envelope destination for the files to be installed. You can change this, but most users may want to keep the default path. Select Next to continue.
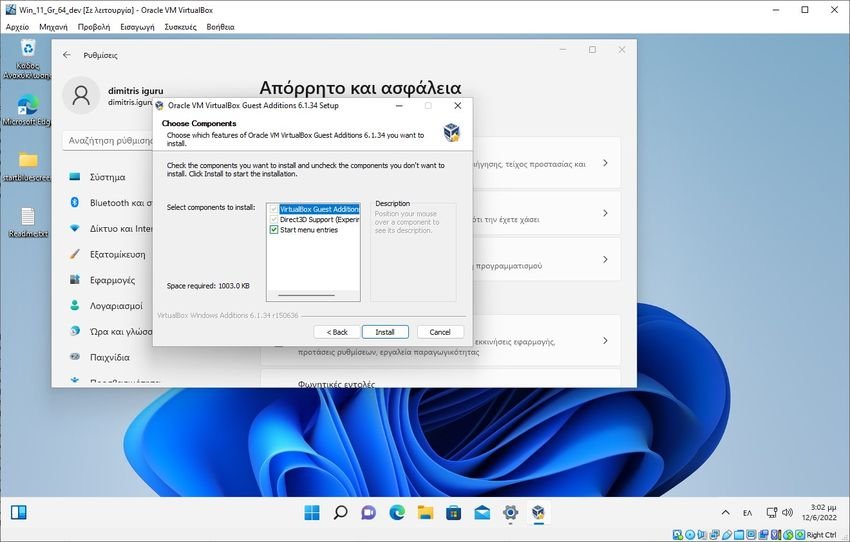
Step 7: The final screen displays the components to be installed. You can disable the creation of an entry in the start menu, but the other two components will be installed. Select the Install button to continue.
Step 8: The installer displays its progress and actions as soon as you press the install button.
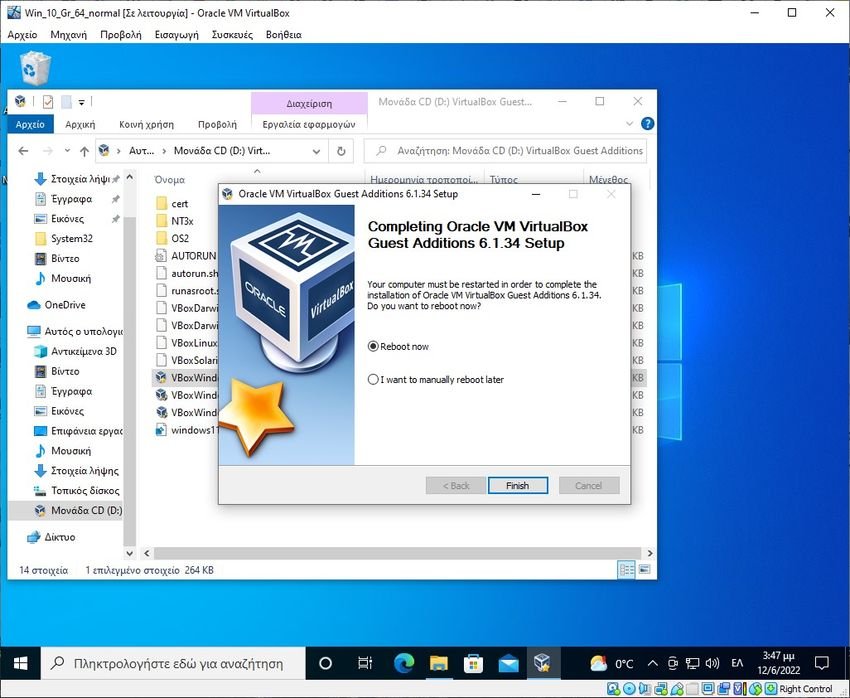
When finished it is necessary to restart the virtual machine to complete the installation. You can do this immediately by selecting "reboot now" or at a later time. Select finish to exit the installer.
With the new start of your virtual operating system all screen resolutions are unlocked. Choose View > Virtual Screen X to choose a different resolution. Note that it may take a few seconds until the analyzes become available.
You will find that in addition to the existing screen resolutions, you can also select "something in between" if you simply open or close your virtual machine window on a single axis.
So you can bring the Virtual screen to the personal dimension you want.
We remind you that the physical screen limits the available resolution. you can not exceed the maximum resolution supported by your normal physical screen.
