
As you may already know, every device on your computer needs a driver. It can be a built - in driver Windows 10, or it may be from the hardware manufacturer published in the Windows Update catalog, or installed by the OEM or by the user himself manually from the vendor's cd or from a website.
A new version of a driver usually improves the functionality of device issues and corrects bugs in its previous version. But sometimes, a newer version gives more problems to the device that can make it even useless.
In this case, you may want to restore the previous device driver, at least until the next version of the driver that will probably solve any problem. The ability to restore drivers was introduced to Windows from the XP version and is included in each version from then until now.
To restore the earliest version of a driver to Windows 10, do the following:
1. Open Device Manager. To do this, press the Win + X keys at the same time and select "Device manager" from the pop-up menu.
In Device Manager, go to the desired group of the device whose driver you have a problem with and open its submenu. For example, if you want to reset the driver on your graphics adapter, then it should expand the group with name "Screen adapters".
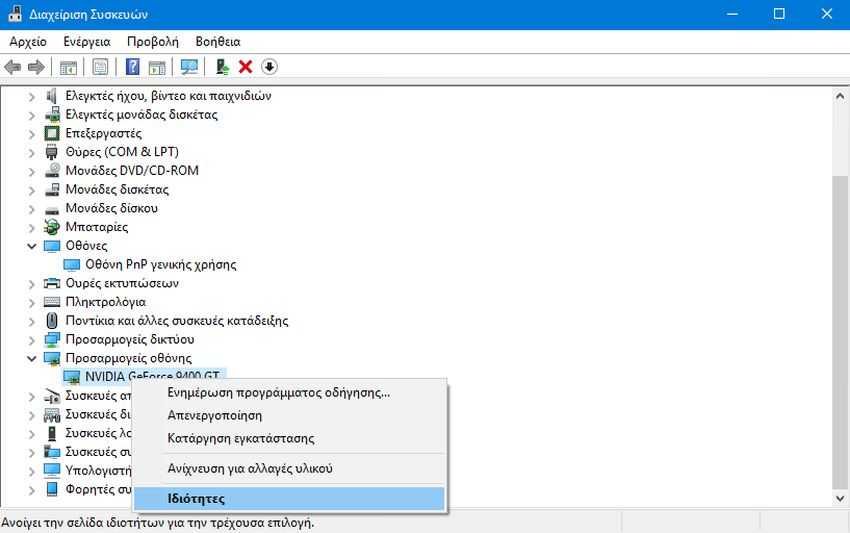
2. Right-click on your problematic device listed and select Properties from the context menu.
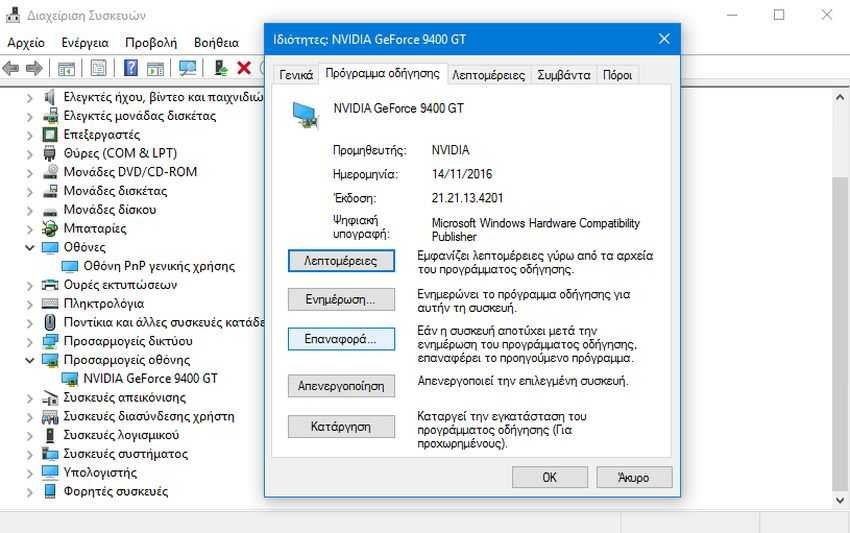
3. In the device properties dialog box, go to the "Driver" tab. There, you will find a button called "Roll Back Driver". Press it.
4. The next dialog box, "Reset Driver Package", comes with a number of options for collecting feedback on why you want to reset your older driver. Select the appropriate ratio and click "Yes" to confirm the operation.
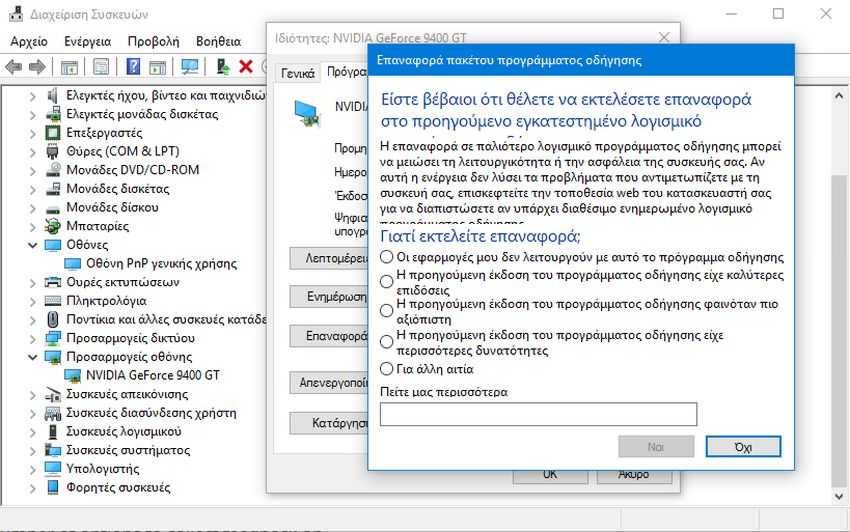
You may be prompted to restart your computer to go to the previous version of the driver.
Once you have finished resetting the driver, you will need to exclude drivers from Windows Update so that they do not reinstall automatically.
