The Windows Defender is the default antivirus application of Windows 10. Earlier versions of Windows like Windows 7 and Vista also had it but it was less effective since it was only for scanning adware και spyware. Στα Windows 8 και Windows 10, το Defender βασίζεται στην εφαρμογή της Microsoft Security Essentials και προσφέρει καλύτερη protection since it can now scan any kind of malware.
 However, despite Microsoft's claims that it offers full protection, studies have shown that third-party antivirus applications still offer better protection. If you prefer to use a different anti-virus, you should disable Windows Defender. Below we describe how to disable it.
Windows Defender can be disabled through its settings. To access it, you need to open the Windows Defender user interface. To open it quickly, press Win + R on keyboard and enter the following command:
% ProgramFiles% \ Windows Defender \ MSASCui.exe
Click OK and go to the Settings tab. In the left part of the window, you will see the item “Administrator.” Click on it.
Now in the right pane you will see the “Turn on this app” checkbox. Remove the tick to disable Windowws Defender.
Click the "Save Changes" button to confirm your changes.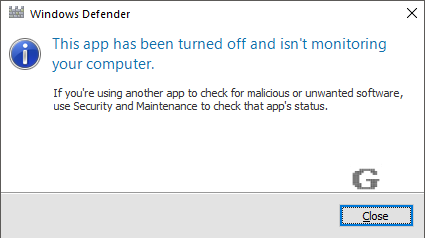
To re-enable the application, you can use the Action Center from the classic Control Panel.
Open the Control Panel and go to Control Panel \ System and Security \ Action Center. In the right pane, you will see the message saying Window Defender is disabled.
Click the "Enable Now" button to re-enable Windowws Defender.
