
Τα Windows 10 έχουν έναν κρυφό επεξεργαστή βίντεο που αποτελεί κομμάτι της εφαρμογής Photos και που λειτουργεί περίπου όπως το Windows Movie Maker or Apple iMovie.
You can use it to trim your videos or create your own movies and slideshows. You can even create videos automatically. Let's see what you can do with it, step by step.
How to cut, slow motion, take photos or draw in a video
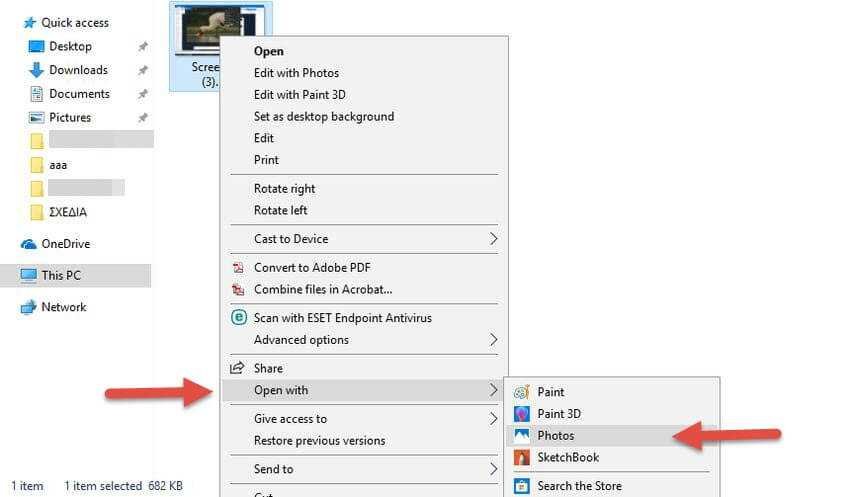
To edit a video file, open it with the Photos application. You can do this in File Explorer by right-clicking on the video file and then selecting Open with> Photos (Open with> Photos)
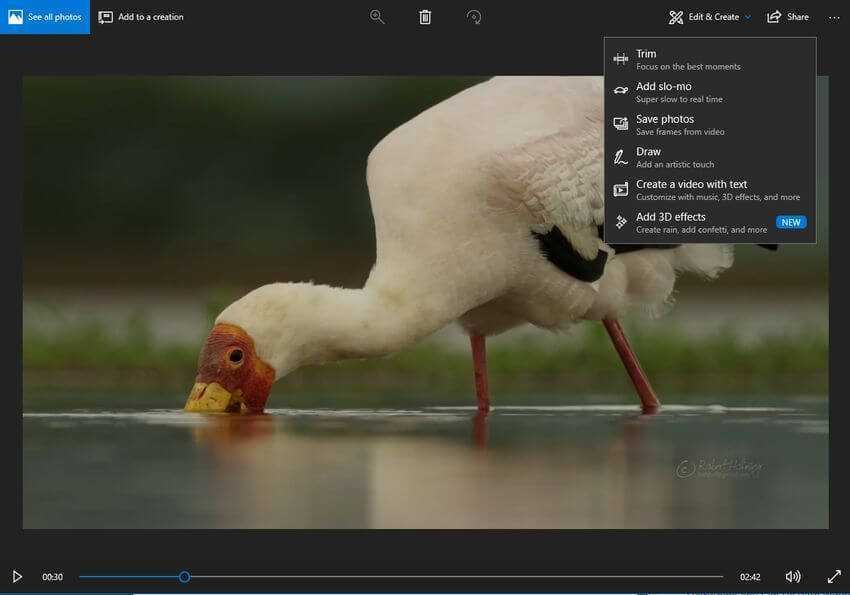
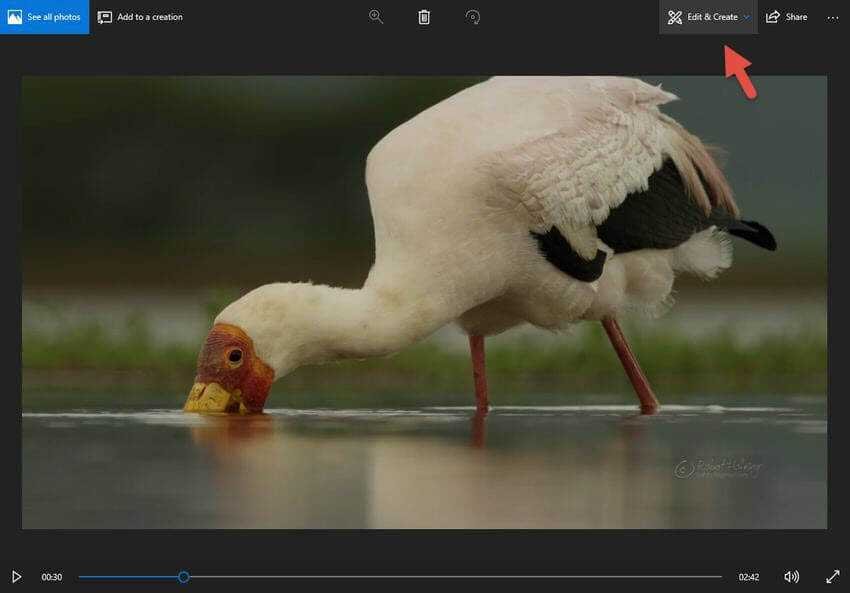
The video will open and start playing normally even though the app is called Photos. To edit the video, click "Edit & Create" on the toolbar.
You will see a variety of video editing tools that you can use. Click on one of the tools to use it. For example, to trim a part of a video, click "Trim" in the pop-up menu.
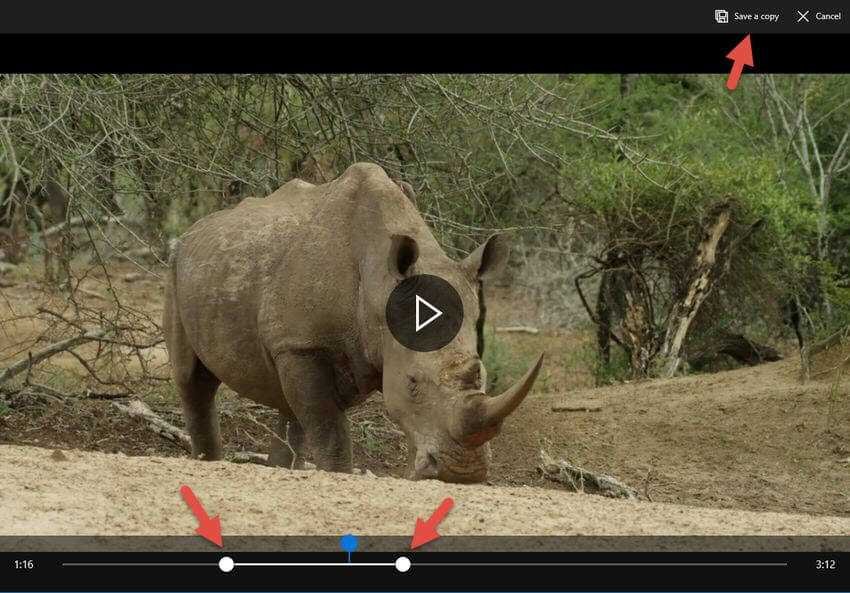
To use the Trim tool, simply drag the two white handles (dots) on the play bar to select the part of the video you want to hold. You can drag the blue pin icon to see what is playing at that moment in the video, or click the play button to play the selected video section.
Once done, click "Save a Copy" to save a copy of the cut video. To stop editing without saving changes, click "Cancel".
Photos puts the edited video in the same folder as the original with a similar file name. For example, we edited a video named FILE001.mov and received a video file named FILE001Trim.mp4. Yes, you got it right, it only saves on mp4.
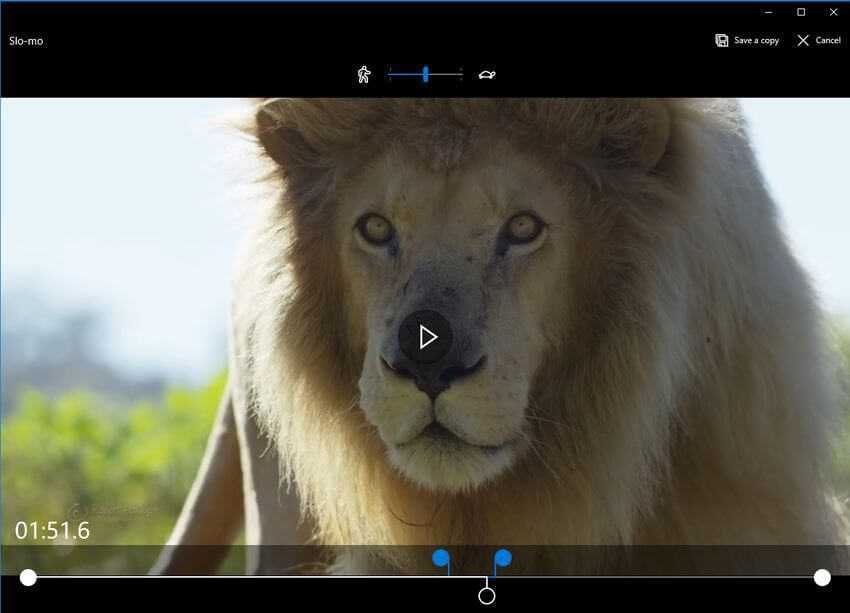
And the other tools work similarly. The Add Slo-mo tool allows you to select a slower speed and then apply it to a piece of video.
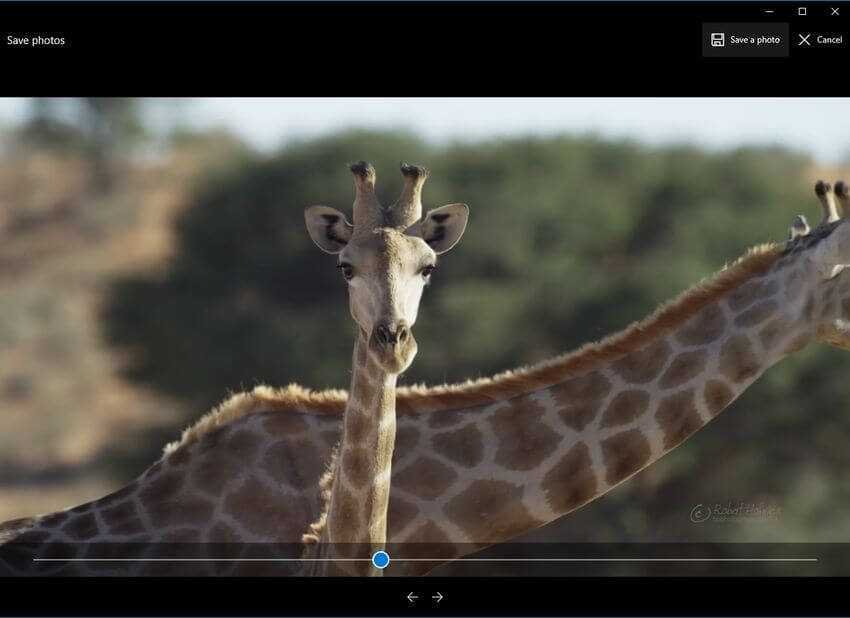
Το εργαλείο "Save Photos" (Αποθήκευση φωτογραφιών) σας επιτρέπει να επιλέξετε ένα στιγμιότυπο του βίντεο και να το αποθηκεύσετε ως φωτογραφία. Στο κάτω μέρος του window, θα δείτε τα κουμπιά σε σχήμα βελών "Previous frame" (Προηγούμενη εικόνα) και "Next frame" (Επόμενη εικόνα) που μπορείτε να χρησιμοποιήσετε για να επιλέξετε ένα συγκεκριμένο στιγμιότυπο ενός αρχείου βίντεο.
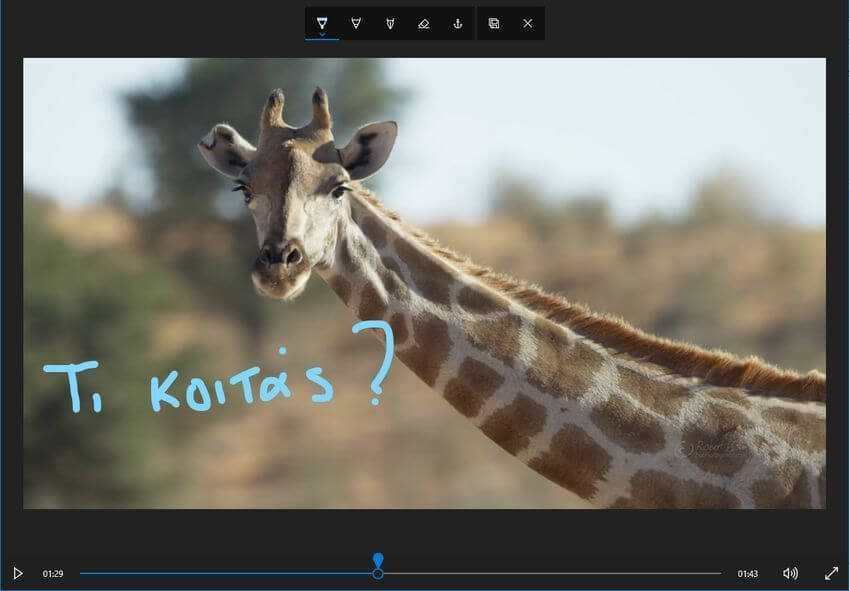
The Draw tool provides tools to draw on a video. You can use pen, pencil, calligraphy pen and eraser and choose your favorite colors. Anything you draw appears smoothly on the screen during the video - as if you were writing it at the time, and then disappears after a few seconds.
The "Create a video with text" and "Add 3D effects" options open the more advanced video editing interface, which we'll cover below.
How to combine videos, add text and apply XNUMXD effects
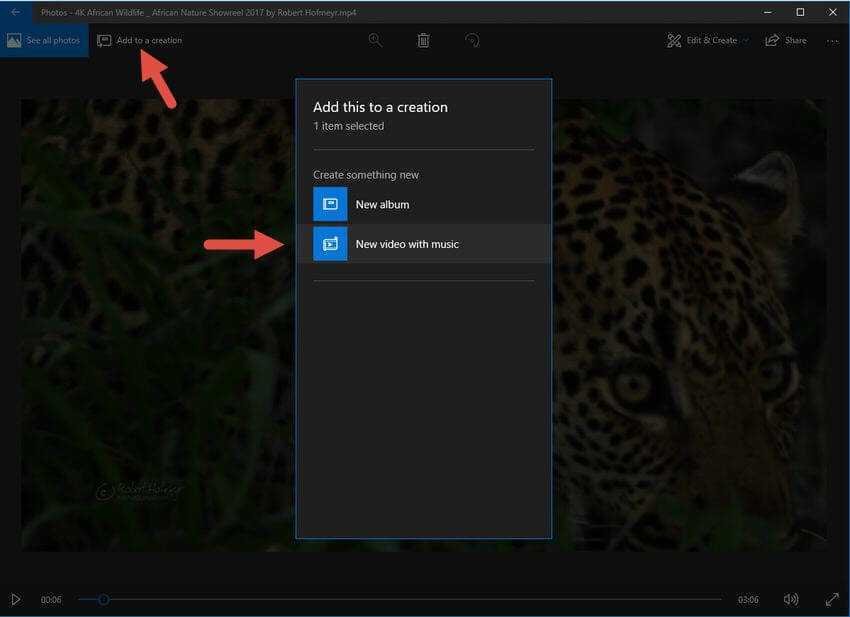
To start creating a video, you can click the "Create a video with text" or "Add 3D Effects" tool. You can also click the "Add to a creation" button in the upper left corner with the video open, then click "New video with music".
You can also start with a custom video by launching the Photos app from the Start and then clicking Create> Custom video with music on the app's home page.
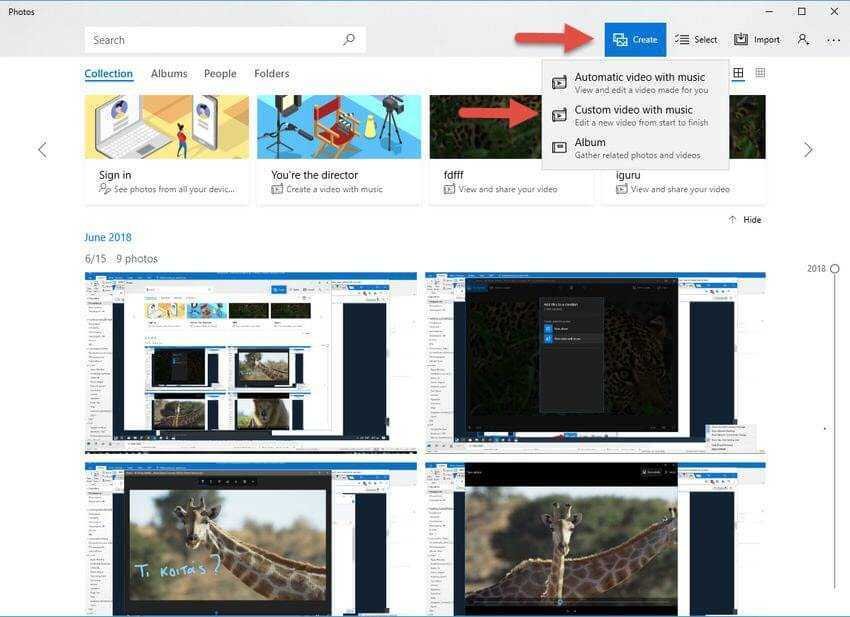
The "Automatic video with music" option also allows you to choose your own photos or videos. The Photos app combines them for you automatically, into a custom video.
You will be asked to add at least one video or photo to create a custom video. You can add photos to get a slide show or, if you want, combine photos with a video.
However, you can also add a video to edit it or more than one video to combine.
Whichever way you use to create a custom video, you will end up with a screen with a project library, a video preview, and a storyboard window.
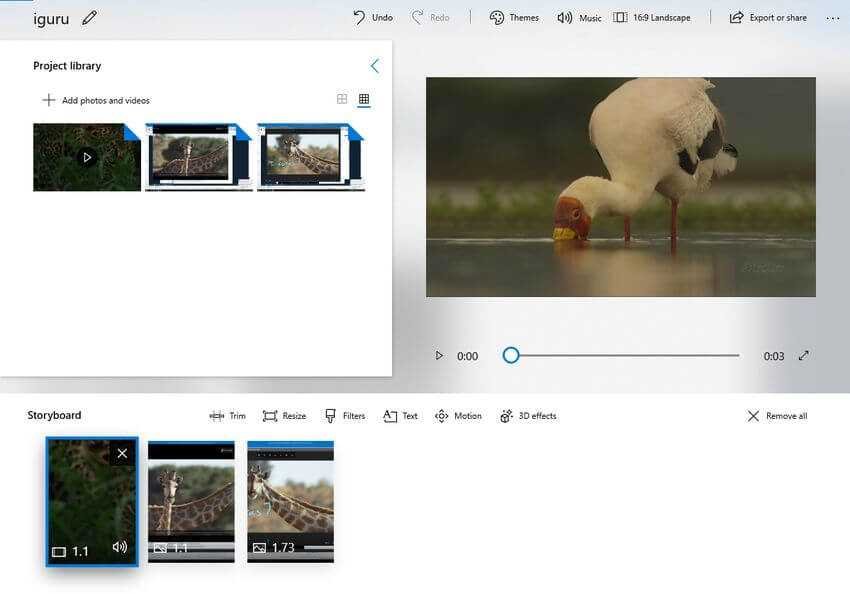
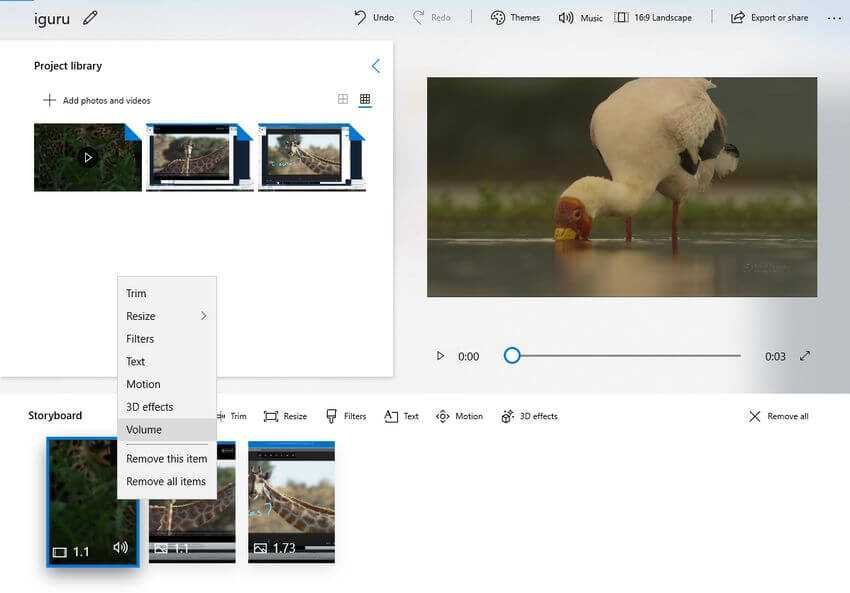
To add one or more videos (or photos) to your project, drag them from the project library to the storyboard. Click "Add photos and video" to the project library to add more videos to the library. You can then drag them onto the storyboard.
Add a video and you'll see some editing tools in the Storyboard window. In addition to the basic Trim tool, you can resize a video with the "Resize" command, add visual filters with Filters, enter text with Text, apply motion effects with Motion , add 3D effects with XNUMXD Effects and increase or decrease the sound with Volume.
Even if you just want to edit a single video, you can add that video here, use the various editing tools, and then export the video to a new file. Alternatively, if you want to combine videos, you can insert them into the storyboard and edit them together.
The editing tools are pretty self-explanatory. The Trim tool works just like the Trim tool we mentioned at the beginning of the article, when editing a single video. The resizer can remove the usual black bars from a video, a function that is important if you combine in one project, several videos with different aspect ratios.
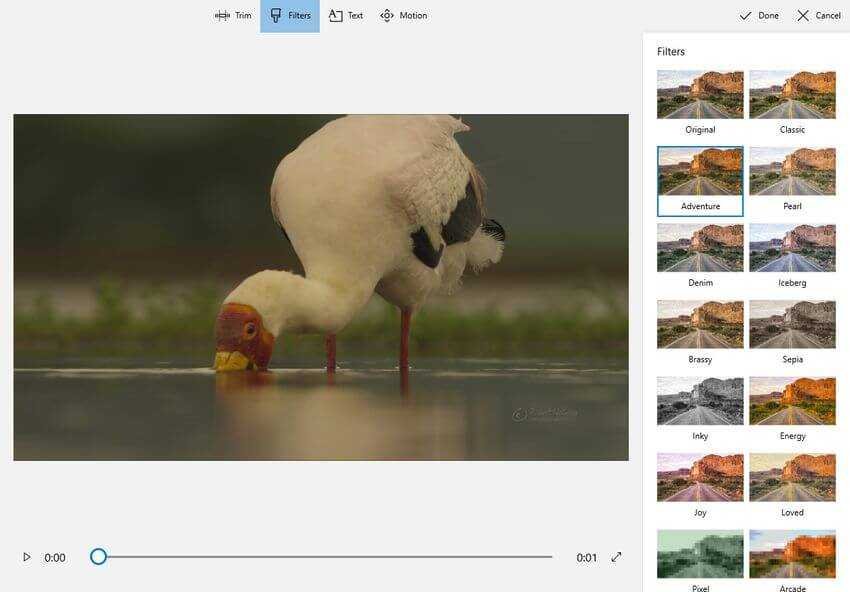
The Filters tool offers a variety of filters, from Sepia to Pixel.
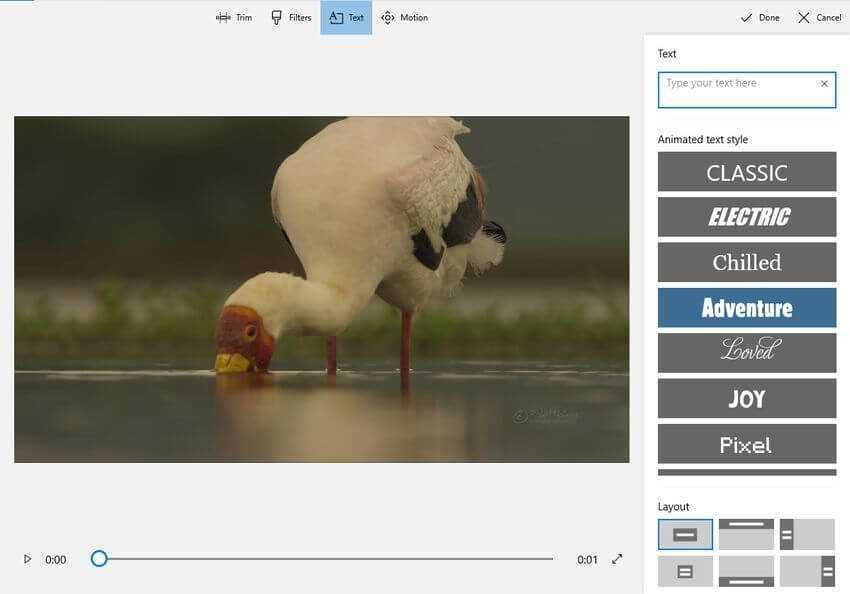
The Text tool provides different styles and layouts of animated text that you can place in different places in the video.
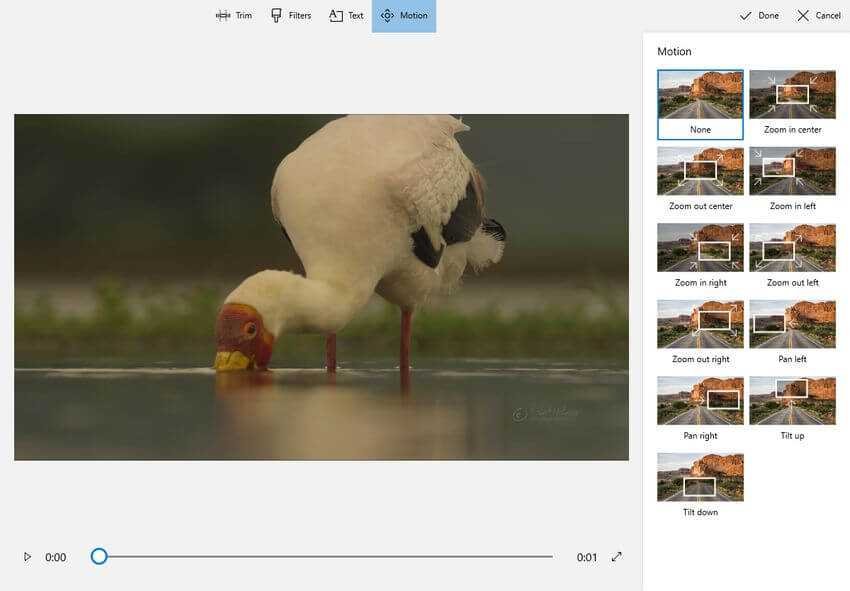
The Motion tool allows you to choose different camera movement styles for a video or photo.
The Add 3D effects tool offers a library of 3D effects that you can apply to your video. It has lots of goodies, from autumn leaves and snowflakes to explosions, fires and lightning.
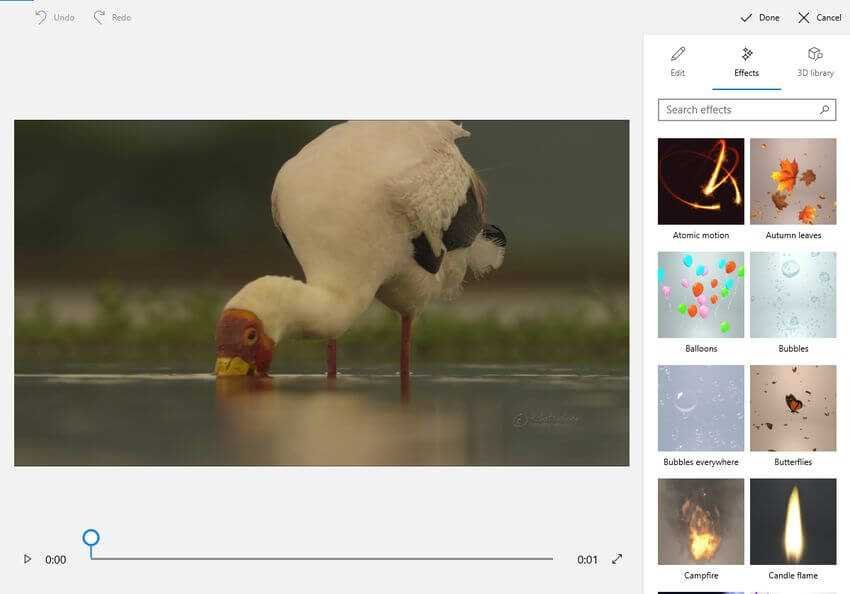
You can apply one or more 3D effects and each one has different options that you can use to customize it. Some 3D effects need to be placed on a part of the video screen, while others apply to the entire screen.
In the Storyboard window, you can click the speaker icon to select a volume level for each individual video. This is useful if you are combining multiple videos and one has a louder sound than the other.
The "Themes" option on the top bar of the window allows you to select different themes. Themes are a combination of filters, music and text formats that all work together. You can watch a preview video first to get an idea of what your video will look like.

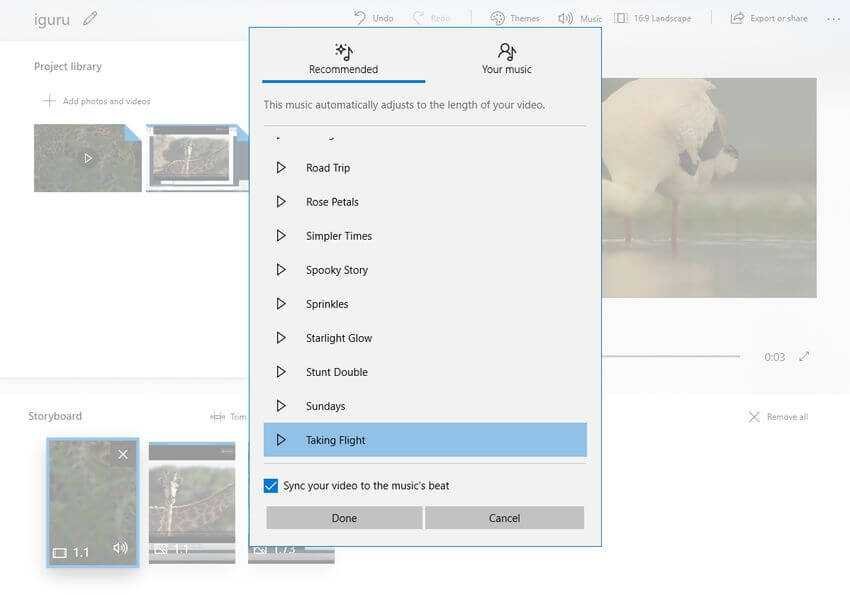
To apply music to a video, click the "Music" button on the top bar. The Photos app includes a few music options for you to choose from. You can also select "Your music" to import your own music file.
There is also a "16:9 Landscape" button on the toolbar. You can use it to switch between different aspect ratios for your video.

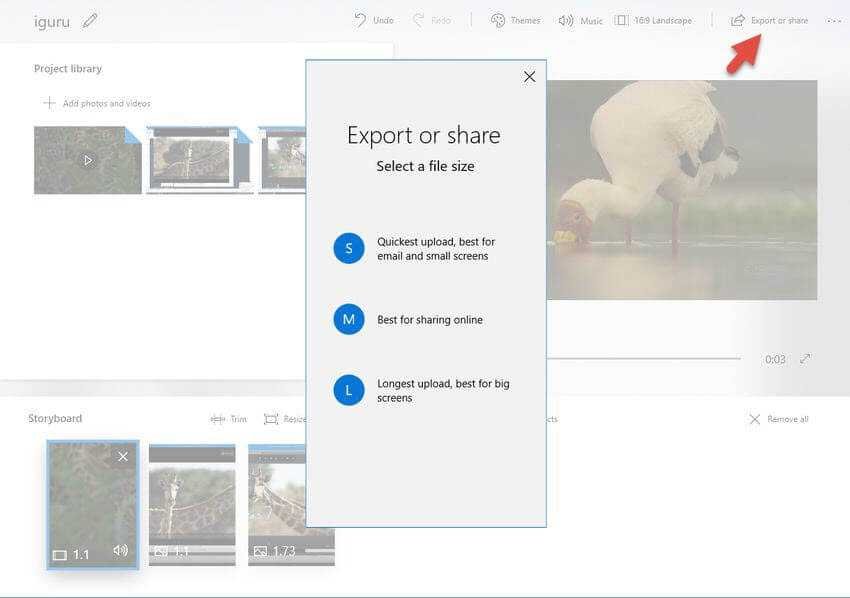
Όταν τελειώσετε, κάντε κλικ στην επιλογή "Export or Share" (Εξαγωγή ή κοινή χρήση) για να εξαγάγετε το επεξεργασμένο βίντεο σε ένα νέο αρχείο.
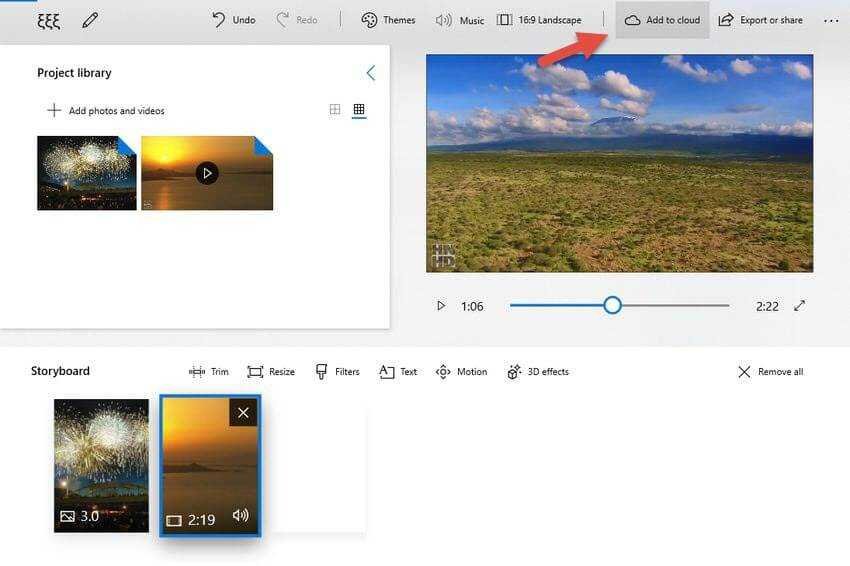
You can also click the "Add to cloud" button if you want to upload the video to the Microsoft cloud. You can then continue editing it with the Photos app from another computer where you're signed in with the same Microsoft account. Your videos will appear in the "Video Projects" location when you launch the Photos app.
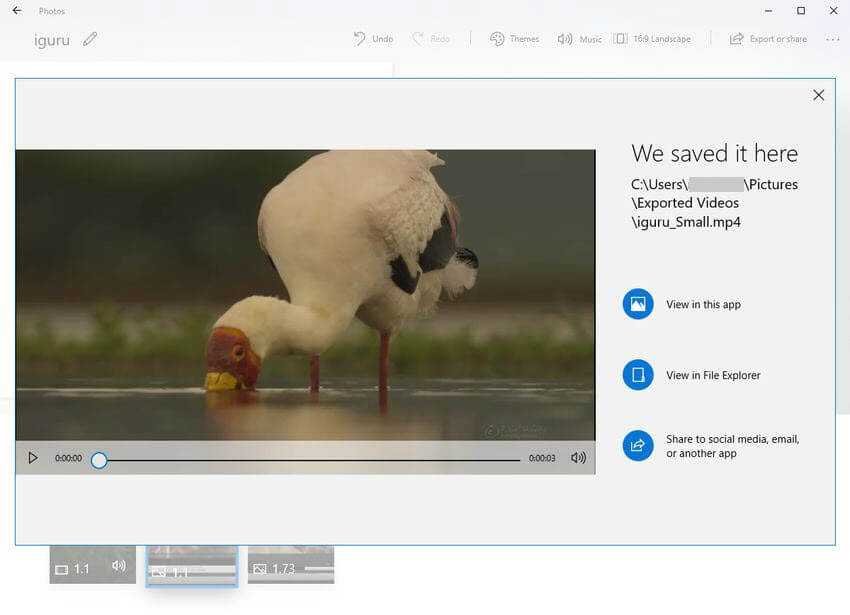
The Photos app extracts the video and tells you where it's stored on your computer. Note the exact address so you don't have to look for it later. It usually places it in the "Pictures\Exported Videos" folder.
Although Photos is not the most powerful video editor you can run in Windows, it is amazingly capable, is included in all Windows 10 computers, and can do many of the basics in a fairly simple graphical environment. Try it next time you want to edit a video on a Windows computer.

Well, I'm using this program to create video and it's the first time I make 15 minutes. However, only 5s are downloaded first minutes. We have no idea why it's happening?
Enjoyable !!!!