Following her announcement Microsoft for the circulation of Windows 11, there are many who want to try the new operating system but are thinking the consequences, if something goes wrong. Would you rather try Windows 11 without upgrading? If so, you can do so in the way below.
Below we will see how you can install Windows 11 on your existing system. Download VMware Workstation 16 Player and a Windows 11 ISO.
First, you will need to download and install VMware Workstation 16 Player. Click on the Download link from its official website VMware Workstation 16 Player.
After downloading the VMware Workstation installer, install the software.
You will soon need to download a Windows 11 ISO file. You can do this from the page Download Windows 11.
Set up a Windows 11 virtual machine on program VMware Workstation 16 Player

When the Windows 11 ISO download is complete, you are ready to set up your virtual machine. Start VMware Workstation 16 Player and click Create New Virtual Machine to display the wizard.
Select the installation disk image file (iso) button. Then click Browse to open a file selection window. Select the downloaded Windows 11 ISO and click the Open button.
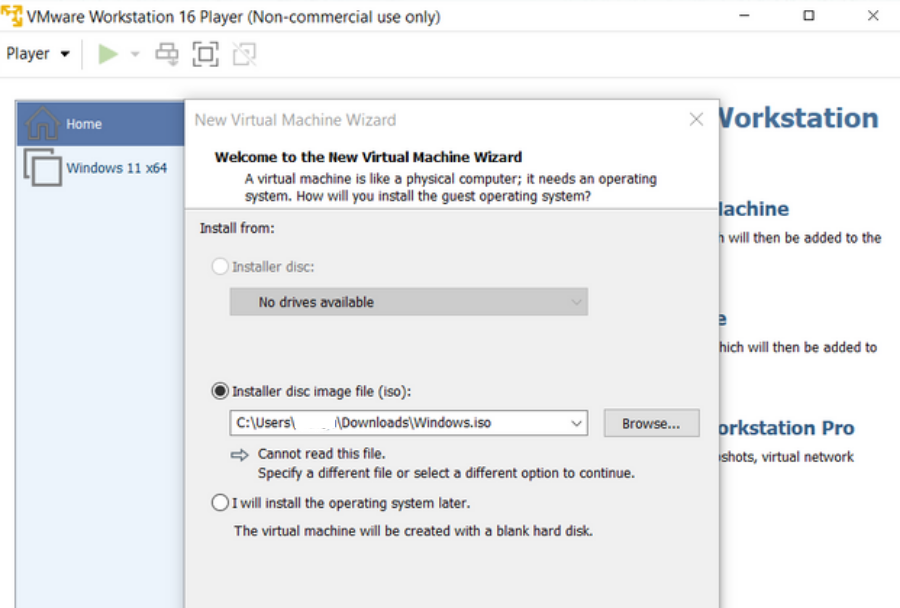
Click Next to display the operating system options that you will host on your computer (guest OS). Select the Microsoft Windows option. Then select Windows 10 x64 in the Version drop-down menu.
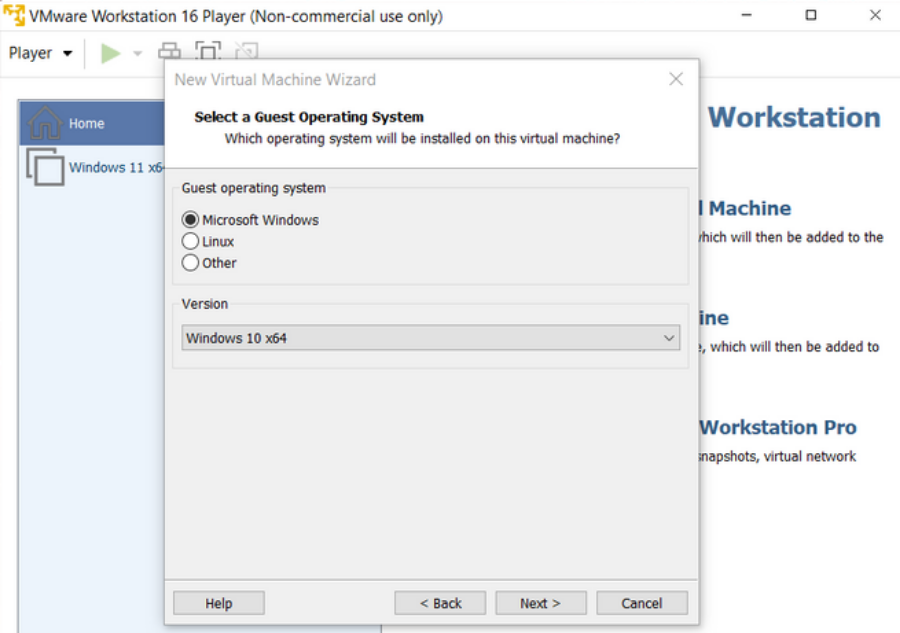
Select Next to proceed with the selections. Name the virtual machine Windows 11. You can leave the default installation location as is.
Click Next again to determine the disk size. Set Maximum disk size to at least 64 gigabytes. Select the Save Virtual Disk setting as a single file.
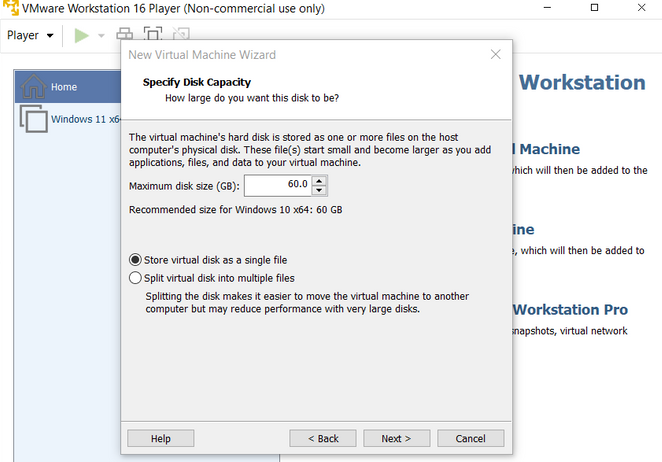
Click the Next button to reach the final installation step of your virtual machine.
Click the Hardware Adjustment button and set the RAM to at least four GB (gigabytes). If your computer has 16 or more GB of RAM, it is recommended that you provide up to eight GB. Then click Close.
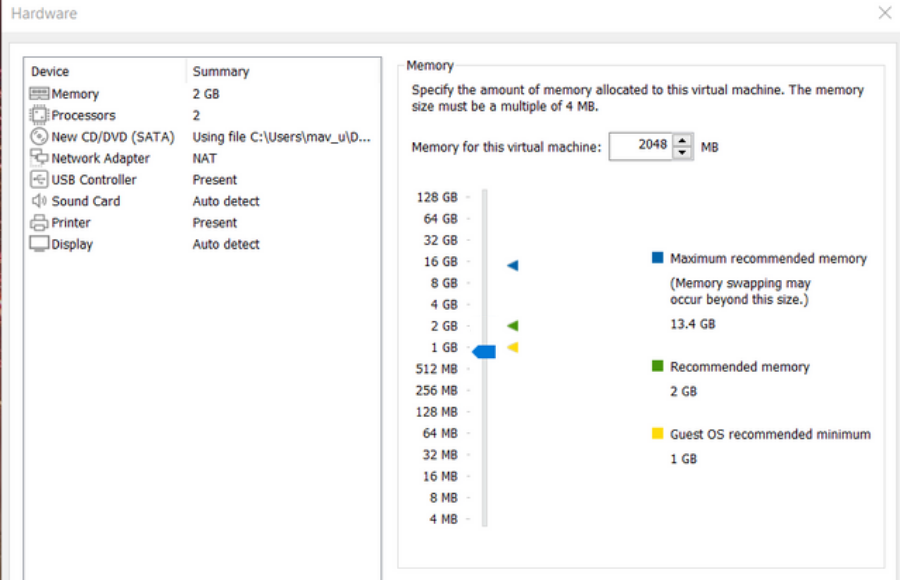
Click Finish to create the virtual machine. Your new virtual machine will appear under the VMware WorkStation Player home menu. Select Windows 11 in this menu and click Play virtual machine.
The process of installing Windows 11
When you start the virtual machine, you will see the message "Press any key to boot from CD or DVD", or "Press any key to boot from CD or DVD". Press any key according to the instructions to display the Windows installation.
After selecting the language preferences, you will reach the Windows activation step. You do not need to provide a product key for the installation. So you can click I do not have a product key to skip it. However, Windows 11 will run with some restrictions and you will see "Activate Windows" at the bottom right of the screen.
Alternatively, you can provide a generic Windows 11 product key. These are temporary keys that you can use to install and test Windows. However, generic keys expire after 30-90 days
Windows 11 Home: YTMG3-N6DKC-DKB77-7M9GH-8HVX7
Windows 11 Pro: VK7JG-NPHTM-C97JM-9MPGT-3V66T
Windows 11 Enterprise: XGVPP-NMH47-7TTHJ-W3FW7-8HV2C
Windows 11 Education: YNMGQ-8RYV3-4PGQ3-C8XTP-7CFBY
In the next step, you need to select a version of Windows 11. If you want the most features, select Pro or Enterprise.
Then select the Drive 0 Unallocated Space virtual disk. Click Next to install.
After that, the Windows 11 installation wizard will appear. Provide the required ones settings presented according to your preferences. If you click the Accept button, you will enter the Windows 11 desktop from VMware Workstation 16 Player after a few minutes. Now you can play by testing Windows 11.


