
After some time the CPU thermal paste responsible for heat transfer starts to harden and not perform well. Result: CPU overheating.
In an old computer there is always the possibility that the CPU will start to develop high temperatures. You'll know this when you see a drastic drop in performance in almost any program, even though your machine's specs are well above minimum requirements of the program.
This behavior indicates CPU overheating and the usual first response is to turn on the computer and to thoroughly clean it of dust. Of course you will check the smooth operation of the fans, both of the CPU and of the box.
Read: What are the temperature limits of a computer
But if the problem of high CPU temperature persists then it is likely that it is time to change the thermal paste. The manufacturers say it's a good idea to replace it every 2-3 years, as the paste degrades over time, but nobody really cares.
The truth is that thermal pastes usually last about two to five years, but that time usually varies depending on the quality of the paste and the usage. And this is the time for its performance to begin to decrease, and not to completely degrade.
Since at five years the programs are more demanding and you start to realize the reduction in performance gradually, no one imagines that changing the thermal paste will bring things back to the way they were. Most people think that their machine is "old".
To replace the thermal paste from your CPU, you must first remove the old one and then apply the new paste. Let's see the steps for a successful change.
Note that usually replacing the thermal paste on a CPU does not void its warranty, unless useste specific thermal pastes not recommended by the manufacturer, such as liquid metal. Any damage to other components during this process may void the warranty for those components.
What tools will you need?

The tool makes the master. So goes a saying in the market, so make sure you have good quality tools and don't settle for anything cheap and anonymous productthe. You will need:
-
A set of screwdrivers for disassembling and reassembling your computer. You definitely need a Phillips screwdriver and a flat screwdriver. If you have a laptop you should probably also have Torx (star) screwdrivers with you.
-
Microfiber or any lint-free fabric
-
Microfiber swabs
-
Isopropyl alcohol 70%-90% to remove old thermal paste. Pure alcohol also works as an alternative.
-
An excellent quality thermal paste
-
Antistatic wristband (for the more adventurous), to ground yourself. This avoids any damage to the computer components due to electrostatic discharge.
If the computer and its fan are in the dust, also get a can of compressed air.
Open computer
Put your computer in a work area that is clean (no lint, dust, or debris).
Turn on your computer and let it work for a few minutes with as heavy a program as possible. This will heat up the CPU and by extension its paste, making it easier to remove the fan above the CPU.
Now, turn off your computer and unplug the power cord. After that, disconnect all other connected peripherals. Press the power button and hold it for 2-3 seconds. This will turn on the computer and drain any remaining charge from the capacitors.
If you have an antistatic wristband, wear it and connect it to a radiator or faucet or to the ground of an outlet. If you don't have one, touch a metal object connected to the ground with your bare hands.
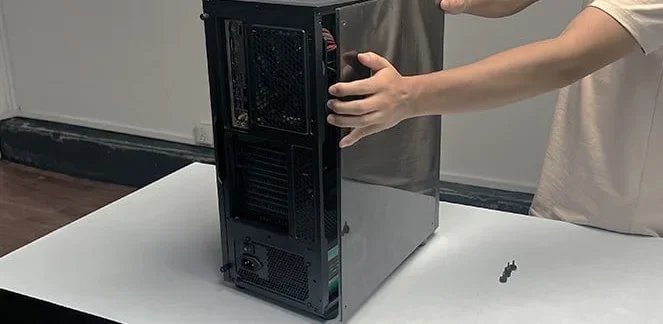
Remove the side panel from your computer case. On most desktop computers simply unscrew the two rear screws and pull out the chassis.
In laptop it's best to first watch a video for your machine that tells you which screws to remove, in which order and where to start opening the bottom case of your machine.
Removing your CPU fan
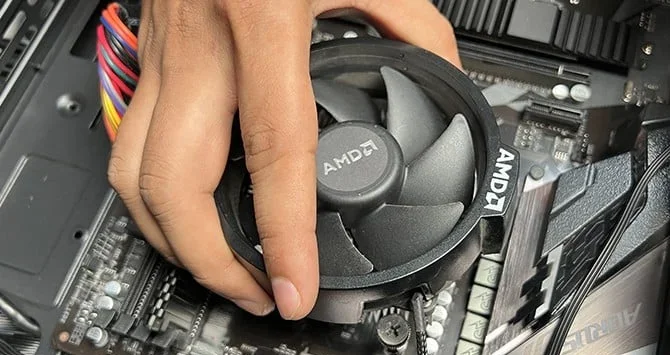
Now, unbolt the CPU fan from the motherboard. Depending on its type, you can either unscrew or unlock the four clips that hold it to the motherboard.
Of course if there are components preventing this removal, such as RAM or GPU, you should remove them first. For those who have never done it before, it would be good to search the internet and find a video of the process. Even an assembly video will enlighten you, as disassembly is exactly the reverse process.
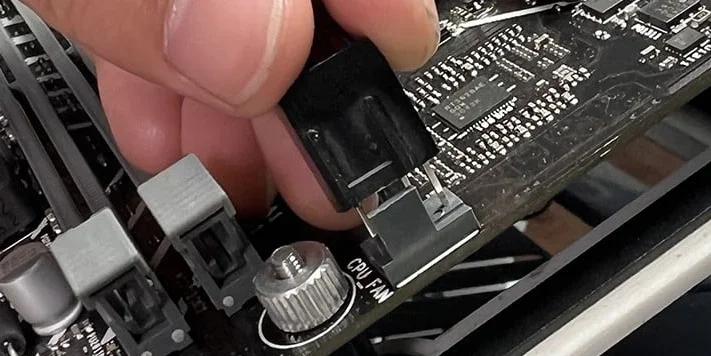
Then carefully disconnect the fan from the motherboard as well as RGB cables (if present). If you see velcro to manage these cables, simply unroll them to remove the cooler.
You are ready to remove the CPU fan. Generally, pull up, twisting it slightly if it seems stuck.
Cleaning the old thermal paste
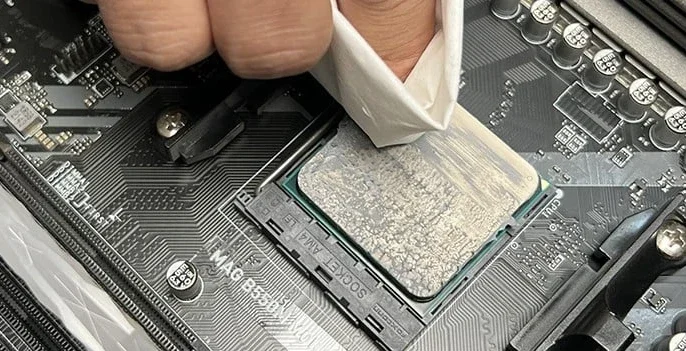
After removing the fan, clean the thermal paste from both the CPU and the fan heatsink.
You should not put new paste on top of the old one as this will create air pockets in the paste layer and affect thermal dissipation. You can use isopropyl alcohol with a microfiber cloth and cotton swabs to clean the paste.
If there is more thermal paste, wipe it first with a dry cloth to remove most of it. You can even use a paper towel. Then take some microfiber or lint-free cloth and put isopropyl alcohol on it. Then wipe the paste off the CPU and the fan heatsink.
Just be careful not to rub it too hard and leave any residue on the motherboard. Do not use solvents other than isopropyl alcohol or alcohol. Better not to experiment.
If the paste gets on the sides of the CPU, use a cotton swab dipped in isopropyl alcohol and clean it. Generally though, when you're done, there shouldn't be any paste residue on the CPU and heatsink.
If you had used liquid metal based thermal paste the surfaces may have oxidized and will be slightly more difficult to clean. In this case use 91% or stronger isopropyl alcohol.
For the heatsink, try using 1000 grit sandpaper along with the rubbing alcohol to rub off the oxidized layer. You mean sandpaper away from the CPU (!). This will remove all text on the chip, which may void your warranty.
After cleaning the paste, we recommend you also clean the CPU cooler if it has dust. You should also clean any dust from your computer so that it doesn't interfere with the cooling process in general.
Installing new thermal paste
Without thermal paste, your CPU is vulnerable to overheating. This can cause many performance issues and even shorten the life of your computer. So you need to apply new thermal paste before reinstalling the CPU cooler.
Applying the paste is quite simple. But there are a few things to keep in mind:
- Make sure all the isopropyl alcohol has dried off the heatsink and CPU.
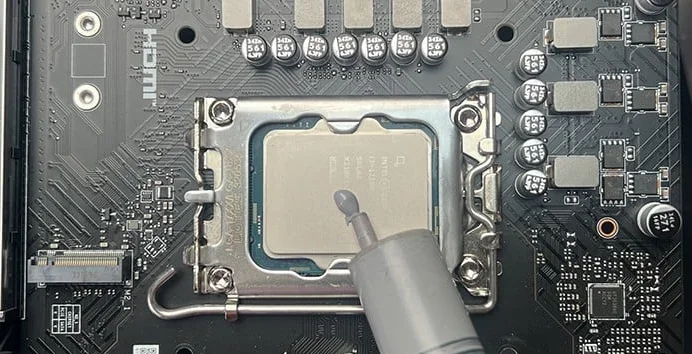
- You need to apply an appropriate amount of paste to the CPU.
If the thermal paste is not enough, it will not spread over the entire surface of the CPU. If it is too much, it may leak into the motherboard. There are different schools of thought here on how to put paste on the CPU.
Watch related video:
You can use any pattern you like. Just make sure the paste spreads evenly.
A better quality paste lasts longer and provides better thermal conductivity. So try to use a good paste instead of a cheap, low quality one.
Most thermal pastes typically have a lifespan of about five years. However, this may vary by brand and production date. So if you have an old thermal paste, check its expiration date in advance.
It is also best to check the thermal paste user manual before applying it in case it comes with special instructions.
Reinstall the CPU cooler
After applying the paste, it's time to reinstall the CPU heatsink with its fan and reassemble everything.
If you are using a CPU cooler with spring screws, be sure to place it over the CPU in the correct orientation, while ensuring that it does not press on the fan cables.
Then lock it in place using its locking mechanism. Do the exact reverse of what you did to unlock her.
Read: What are the common mistakes when assembling a computer
The paste is still very fresh. You can disconnect the heatsink and see if the paste is spread across the surface. If not, apply more. Place back on the heatsink.
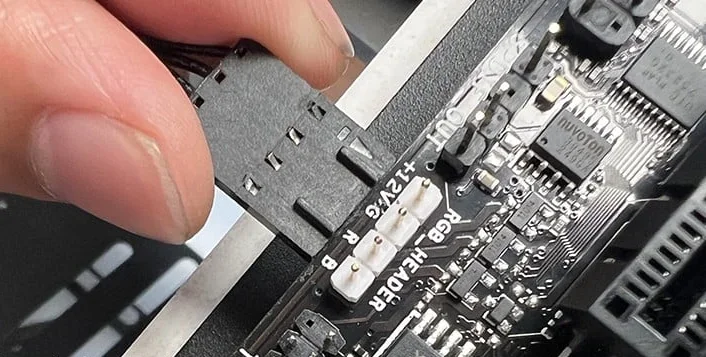
Reconnect the necessary cables to the plug CPU_FAN of the motherboard. If you have an RGB cooler, connect them to the RGB connector.
Put on the computer cover and then connect the power cord and all other peripherals to the computer.
After that, it's always a good idea to monitor the CPU temperature to see that everything is going well.
