
It's a somewhat rare problem, but in some cases, Windows may show the same hard drive or partition two times using different unit letters disk.
Αυτή η συμπεριφορά είναι συνήθως αποτέλεσμα όταν ένας χρήστης ή πρόγραμμα δημιουργήσει μια εικονική μονάδα δίσκου και την αντιστοιχίσει σε ένα πραγματικό δίσκο σας. Αυτές οι εικονικές μονάδες δεν είναι σαν τους εικονικούς δίσκους που δημιουργούνται με ένα εικονικό λογισμικό, αλλά φέρνουν περισσότερο σαν μια shortcut ή σαν ένα συμβολικό σύνδεσμο που παραπέμπει απλά σε μία τοποθεσία.
The virtual drive does not appear in the disk management tool (because it's not a real disk), but you can remove it using the line orders. See below how.
Open a Command Prompt window and type the following command:
subdocument_display / d
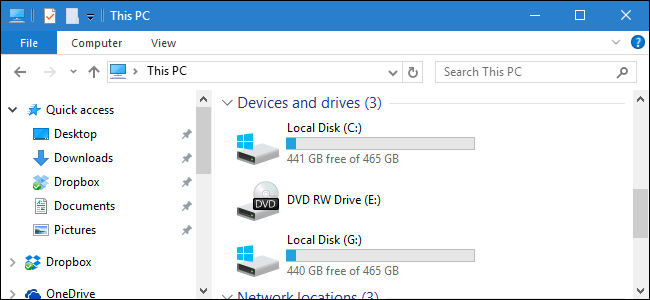
Where the "virtual_drive_drive_letter" is the letter assigned to the drive. If you are not sure what the physical drive letter is and what the virtual drive letter is, open Disk Manager (for Windows 10 right-click on startup and go to Disk Management) and see which letter appears there. What appears is the actual unit. What does not appear is the virtual drive.

In the case of our example, disk management confirms that C: is our real disk, which means that G: is the virtual disk. Thus, our order for removal will be:
subst G: / d
Once you press Enter, the virtual drive must disappear immediately. You do not have to restart Windows or whatever. It is a problem that does not occur frequently, but when it does, it certainly causes panic, do not accidentally erase the entire physical disk.
In addition, you can type the subst command without any parameter to see all the virtual disks that you have on your system.

