
In this article, you will learn how to automatically hide and show them scrolling lines in Windows 10.
If you use Windows 10, you may have noticed that scroll bars are automatically hidden when scrolling a page. Whether you are in an application or a browser, scrolling bars are hidden when you stop scrolling through this page. This is because Windows 10 automatically hides these scrolls by default.
So, in case you want the scroll bars to appear all the time, this article will show you how. You can configure the relevant setting in one way or another and as described below.
Method 1 - Through the Settings application
1. Turn right click on the Start button or press Win + X and select Settings.
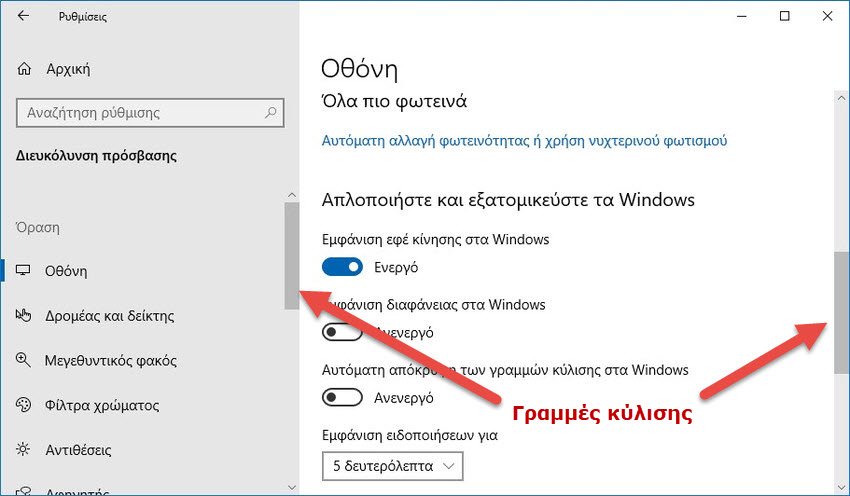
2. In the Settings application window, scroll to the option Facilitation accesss > Display.
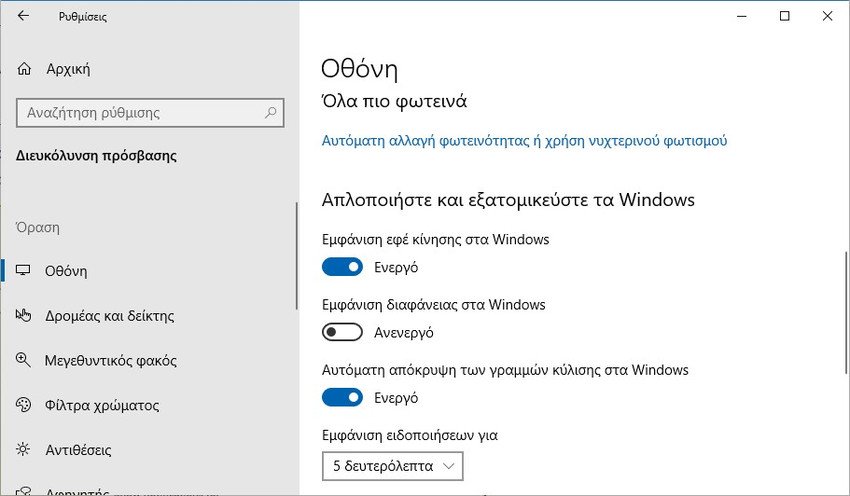
3. Now in the right part of the screen, in the section "Simplify and personalize Windows", you will find the option "Automatically hide scroll bars in Windows“. You can set it to On or Off to hide or show scrolling lines, respectively. The default setting is enabled, ie the scroll bars are automatically hidden.
4. Close the Settings application.
Method 2 - Through the registry
1. Because it will damage the registry, make a backup of it first. See here how.
2. Press Win + R at the same time and in the "Run" window that appears type regedit and click OK to open the Registry Editor.

2. In the left pane of Registry Editor, go to the following registry key:
HKEY_CURRENT_USER \ Control Panel \ Accessibility
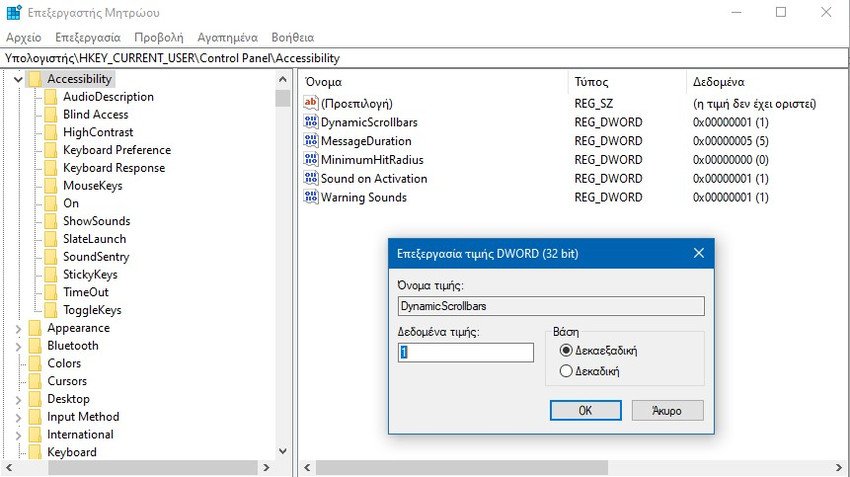
3. Now in the right part of the registry key Accessibility, you will find the DynamicScrollbars. You can set the DWORD value data to 1 to automatically hide the scroll bars (default setting). Alternatively, you can set it to 0 to display the scroll bars.
4. Close the Registry Editor. Log out, and then sign in again to see the changes.
